Mounting and Cabling FireStore and the FireWire Hard Disk Drive
DO NOT CONNECT A BATTERY UNTIL YOU HAVE COMPLETED ALL
CABLING!
Now mount FireStore into the main slot. It should simply slide in. You can also
insert the FireWire disk drive in the drive slot. First connect the 6-pin to 6-pin
FireWire cable that came with your FireStore and make it accessible in the rear
compartment. Once these items are inserted, connect all the cables in the rear
compartment.
A black cable with a mini-jack power connector comes from the back of the 4-pin
XLR power connector on the side of the chassis. Connect this to the power
connector marked “DC 12V, 2A” on the rear panel of FireStore. Make sure the
power switch on FireStore is set to “ON”. Connect the 4-pin to 4-pin FireWire
cable you inserted earlier into FireStore’s “DV In/Out” connector. Finally, connect
the 6-pin – 6-pin FireWire cable from the Hard Disk Drive to FireStore’s “To HDD”
connector.
At this stage, you may also like to restrain the cables in the rear compartment.
Do this by using the slots on the rear of the chassis and zip ties. It is also
recommended that you test the unit now. Insert a 12V NP series battery (such
as the Focus BATT-0004-01). Turn the power switch on the side of the unit on
(the green LED will light). Ensure that all items function properly.
Once complete, replace the chassis back into the FireStore nylon case.
Using the Optional FireStore Field AC Adapter and Other DC Power
Sources
It is possible to connect AC power to the FireStore Carry Case using the optional
FireStore Field AC Adapter (ASYF-0639-01). Simply connect the AC adapter to
the 4-pin XLR power connector on the side of the FireStore Carry Case.
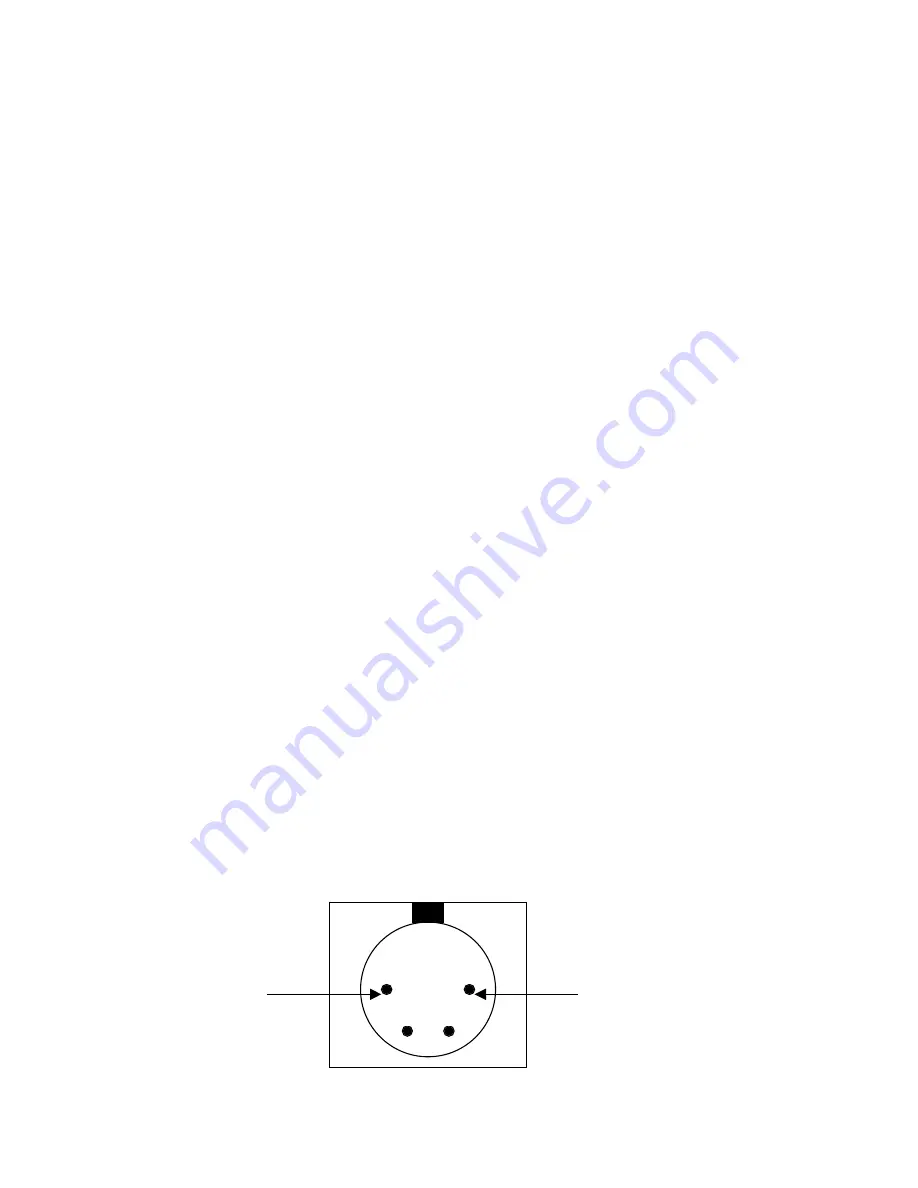
It is also possible to connect a different 12V DC power source into the 4-pin XLR
power connector. To do so, use the following configuration:
1
3 2
4
-
GROUND
+
12V DC


