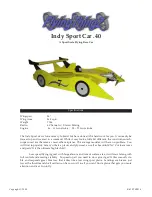
FlyingThingZ Indy Sport Car .40 Скачать руководство пользователя страница 1

Indy Sport Car .40

A Sport Scale Flying Race Car

The Indy Sport Car is fun and easy to build. We have done all the hard work for you. It can easily be

framed up and covered in a weekend. While it may look a little bit different, the construction tech-

niques used are the same as most other airplanes. The average modeler will have no problem. You

will find top quality Laser Cut balsa, plastic and plywood, as well as beautiful CNC Cut foam cores

and parts! It is the ultimate high tech kit!

Low speed flying is great, with huge elevons and tons of surface area, it will crawl along with

full control and amazing stability. To speed up all you need to do is give it gas! It flies smooth, sta-

ble, and responds great. Most say that it flies like a low wing sport plane. Landings are breeze, just

lower the throttle and she’ll settle in on her own. All in all you can't find a plane that gets you more

attention and is as fun to fly.

Copyright © 2004

Kit# FTZ3014

Specifications

Wingspan:

24"

Wing Area:

864 sq in

Weight:

7 lbs.

Radio:

4 Channel w/ Elevon Mixing

Engine:

.46 - .61 two-stroke / .53 - .71 four-stroke

Содержание Indy Sport Car .40

Страница 1: ...es and parts It is the ultimate high tech kit Low speed flying is great with huge elevons and tons of surface area it will crawl along with full control and amazing stability To speed up all you need...

Страница 2: ...ntents 4 Additional Requirements 5 Required Tools and Adhesives 5 Fuselage Assembly 6 Preparing the Foam 1 0 Wing Assembly 1 0 Elevon Assembly 1 3 Coroplast Parts Assembly 1 3 Spoiler Assembly 1 4 Fin...

Страница 3: ...IS NOT A TOY IF MISUSED IT CAN CAUSE SERIOUS BODILY HARM AND DAMAGE TO PROPERTY FLY ONLY IN OPEN AREAS PREFERABLY AT AMA www modelaviation com APPROVED SITES FOLLOW ALL INSTRUC TIONS INCLUDED WITH YOU...

Страница 4: ...ns carefully Kit Contents Part Description Qty A Fuselage Hatch 1 B Fuselage Reinforcements 2 C Firewall 2 D Fuselage Sides 2 E Rear Servo Tray 1 F Forward Servo Tray 1 G Fuselage Cross Brace 1 H Hatc...

Страница 5: ...rs Wax Paper Paper Towels Ruler Mixing Sticks Threadlock Denatured Alcohol Rotary Tool or Dremel Router Attachment for Rotary Tool or Dremel Rubber Bands Dead Center Engine Mount Locator Hex Wrench Se...

Страница 6: ...up with the notches in the front of the reinforcement Again use a square to assure it s at a perfect 90 deg angle to the fuselage The small hole on the firewall should be on the top left when laid out...

Страница 7: ...rear servo tray at this time it is only being used as a spacer A10 Size and cut a hatch tongue plate and glue it to the notch es on the back of the fuselage Sand the edges flush with the sides of the...

Страница 8: ...Glue the balsa sticks to the sides of the fuse the rear servo tray and the fuselage cross brace Cut the balsa stick at the notches on the servo tray you ll need these notches to mount your radio gear...

Страница 9: ...e follow the manufacturer s instructions on using their material for covering A24 Lay a piece of the precut vinyl shaped like the fuselage on your workbench Place the fuselage onto the vinyl and cut s...

Страница 10: ...es together to form one gear block with a notch in the middle as shown in the image above Use clamps to keep the assembly together as the glue sets Once the glue has set sand all edges flush for a smo...

Страница 11: ...edges of the assembled gear block In the same fashion scribe marks along the side of the wing core following the smaller edges of the assembled gear blocks C9 Using a rotary tool with a router attachm...

Страница 12: ...e a mark near the leading and trailing edge 11 3 4 from one side of the wing Carefully lay the first piece of covering along the two marks centered on the wing Squeeze out any air bubbles starting in...

Страница 13: ...help fold over the curves Overlap 1 8 to 1 4 of the covering around all the edges D4 Using a larger piece of covering wrap the elevon in the vinyl Cut away all excess D5 Find the location of the cont...

Страница 14: ...fore cover the spoiler support brackets spoiler and winglets G Final Assembly G1 Temporarily attach the fuselage to the wing Use a felt tip non permanent marker to outline the shape of the wing onto t...

Страница 15: ...ecut holes in the center cutout of the motor mount for your fuel lines The fuel tank goes right behind your battery pack directly in front of the forward servo tray Wrap the fuel tank with foam rubber...

Страница 16: ...edge of the wing Use one strip of tape on the top and one on the bottom of the elevon joint Make sure the tape follows the contours of the elevon for a silky smooth oper ation Apply a strip of the ap...

Страница 17: ...the left elevon should move down and the right elevon should move up When turning left the left elevon should move up and the right elevon should move down Note Check all control surface movement look...

Страница 18: ...o little work Adjust the throttle as necessary to flare at the bottom of your approach Practicing this up high will make landings a snap 2004 Official AMA National Model Aircraft Safety Code Effective...

Страница 19: ...ace ment Example 40 engine 200 feet electric motors will be based on equivalent combustion engine size Additional safety requirements will be per the RC Combat section of the current Competition Regul...

Страница 20: ...FlyingThingZ Inc 2075 Grandview St Oceanside CA 92054 www flyingthingz com support flyingthingz com...

Отзывы: