<
Back Next
>
Let’s Build the “Flat X-Wing” Quad
1.
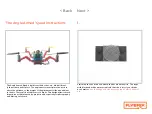
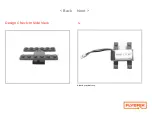
Attach (4) Boom-Arms to (2) 1x8 bricks.
*Notice the next few instruction pictures are in black and white. That’s
to remind you that the colors of your bricks don’t matter. Use the brick
shapes
as your reference for which bricks to use.
All Flybrix airframes have their strengths and weaknesses. The point is
to have fun getting to understand where these strengths and
weaknesses occur, why and how through building and flying.
This particular design called the “Flat X Wing” is quick to build, light and
nimble in the air, is moderately balanced, and breaks apart quite
spectacularly on most crashes. There next build in the instructions offer
more flight stability. The following build offers more durability. Give
them all a try!
Содержание Angle Armed Quad
Страница 1: ... Back Next Version 1 4 2 September 2017 Flybrix Building and Flying Instructions Quad Starter Kit ...
Страница 8: ... Back Next Design check In 4 Attach 1 1x4 brick to the top of the flight board Front Back Front Back ...
Страница 20: ... Back Next 2 Attach 4 1x1 knobs 3 Attach 2 1x6 bricks ...
Страница 21: ... Back Next Design Check In Side View 4 Attach your battery ...
Страница 22: ... Back Next 5 Attach 2 1x4 bricks and 4 1x1 knobs to the 1x4 bricks 6 Attach 2 1x6 bricks ...
Страница 30: ... Back Next 4 Attach the velcro tile to the 2x4 brick 5 Attach 2 1x4 bricks ...
Страница 31: ... Back Next 6 Attach 2 1x6 bricks to the top of the 1x4 bricks 7 Attach the battery to the velcro tile ...


