-4-
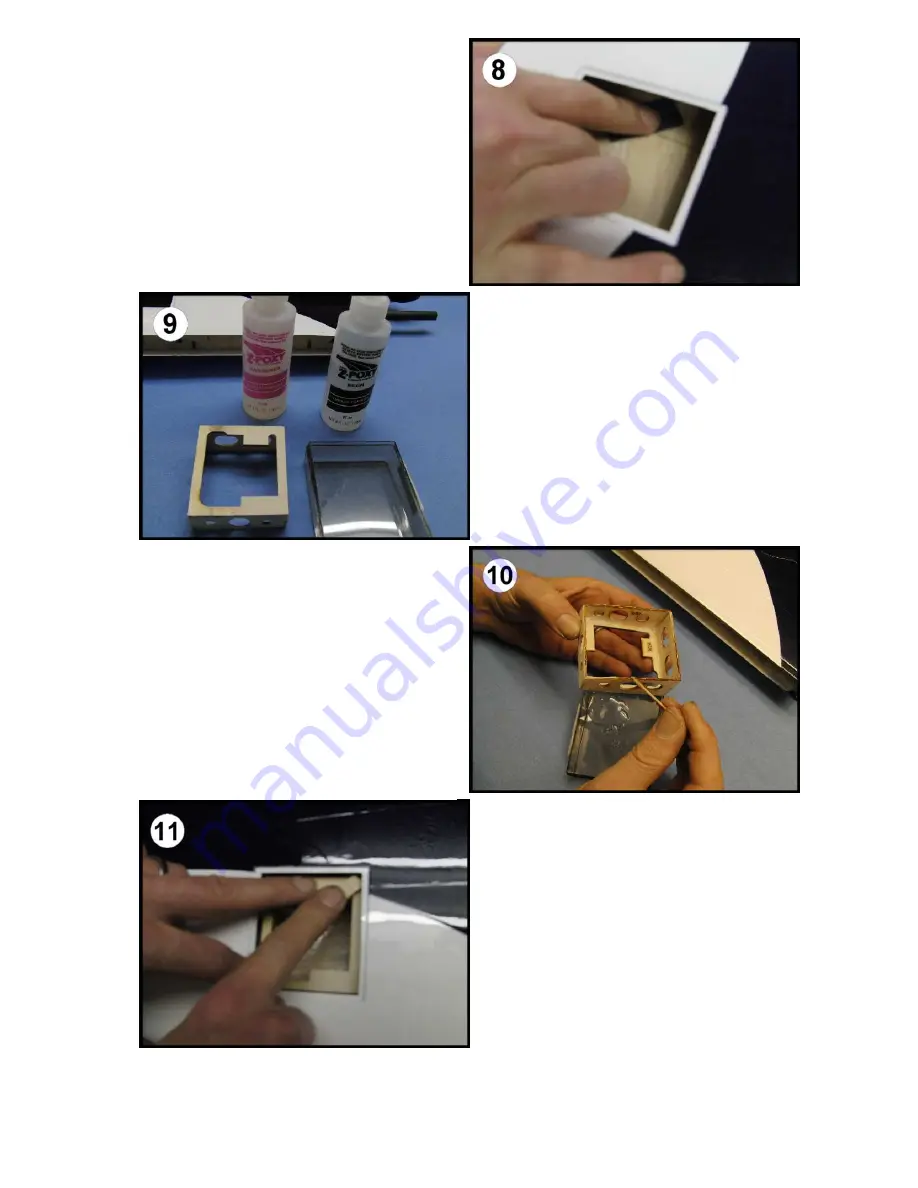
Entfernen sie die Servorahmen und
schleifen sie die Klebestelle entlang der
Markierung gründlich mit feinen Schleif-
papier an. Achten sie darauf das sie das
Gewebe nicht durchschleifen.
Remove the servo mount and sand the
inner surface of the wing between the lines
previously marked.. Make sure that you
don’t destroy the Fiberglass Layer.
Please use fine grade sandpaper
Als nächstes kleben wir die Servorahmen
in ihre endgültige Position. Für diesen
Schritt verwenden wir 5 Min. Epoxy.
Wir verwenden hierfür ZAP Z-Poxy. Sie
können auch jedes andere Fabrikat hierfür
verwenden.
Now glue the servo mounts in place using
5 Min. Epoxy. We use ZAP Z-Poxy but
you can use each another brand as you
prefer.
Streichen sie nun die Klebekanten auf der
Unterseite der Servorahmen gleichmäßig
mit dem fertig angemischtem Epoxy ein.
Stellen sie sicher das ein lückenloser
Auftrag erfolgt.
Apply the Epoxy to the bottom edge of the
servo mount box. We use a toothpick for this.
Make sure the Epoxy reaches the full length of
the bottom edge. NOTE: This means the
“bottom edge” as you are working and not the
edge that will be glued to the inside of the
lower wing skin.
Bringen sie die so vorbereiteten
Servorahmen in Position und drücken sie
diese gleichmäßig an. Fixieren sie die
Ecken mit kleinen Holzkeilen so das
während der Aushärtung leichter Druck
erzeugt wird.
Position the servo mount box and
temporarily wedge them with small wood
scraps in the upper corners. This will press
the mounts down until the Epoxy hardens.


