Fluke 0095969865722 Скачать руководство пользователя страница 15

Diagnostic Videoscopes

Menus

11

Image Menu

Table

9

 lists the options in the Image menu.

Setup Menu

Table

10

 lists the options in the Setup menu.
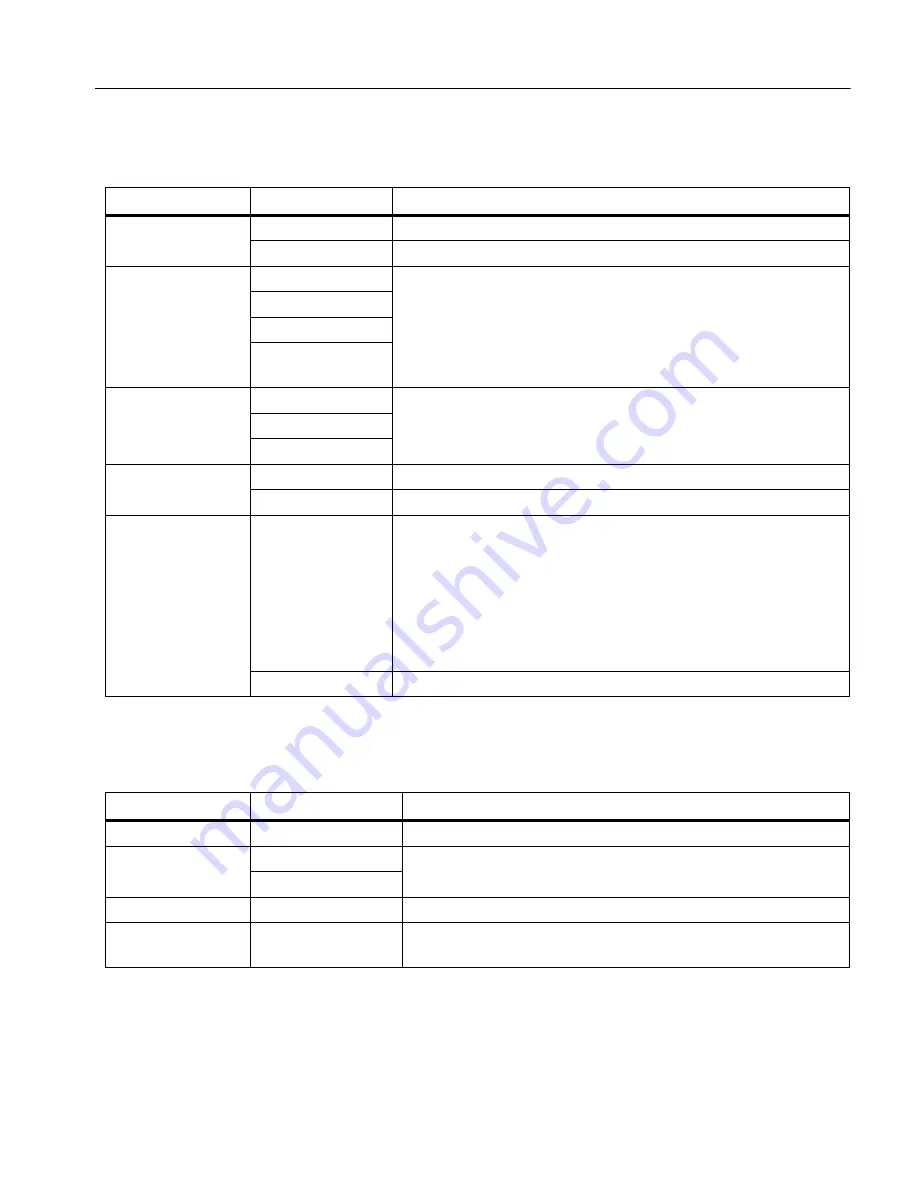
Table 9. Image Menu

Option Menu

Option

Description

Image Mode

Image

Select to set up the Product to capture an image.

Video

Select to set up the Product to record a video.

View Mode

True Color

Select to set the view mode.
Use True Color to differentiate similar colors from each other.
Use Texture to emphasize the texture of the target.
Use UV to identify leak detection with UV dye. Images are clearer 
when used with the UV accessory.
Use Inspection to Identify cracks, wear points, and fine print.

Texture

UV

Inspection

Color

Standard

Select to set the color palette.

Grayscale

Inverted

Rotate

180

Select to rotate the image 180

°

.

None

Select to view the image with no rotation.

Up is Up

On

Select to rotate the image automatically so the orientation of the 
image on the display is upright regardless of the position of the 
probe.
With 

On

 activated, use the Product to:

View text such as serial numbers.

Identify the location of items in relation to each other. For 
example, if switch A is located to the right of switch B, switch A 
shows on the display to the right of switch B.

Off

Select to view the image with no orientation correction.

Table 10. Setup Menu

Option Menu

Option

Description

Auto Off

<options>

Sets the time before the Product automatically turns off.

Time Stamp

ON

Turns on/off the time stamp on image and video files.

OFF

Backlight

<options>

Sets the brightness level of the display. 

Date/Time

<options>

Sets the date format and the date. See 

Date

.

Sets the time format and the time. See 

Time

.

Содержание 0095969865722

Страница 1: ...Diagnostic Videoscopes Users Manual March 2018 English 2018 Fluke Corporation All rights reserved Specifications are subject to change without notice All product names are trademarks of their respect...

Страница 2: ...ce center to obtain return authorization information then send the product to that service center with a description of the difficulty postage and insurance prepaid FOB Destination Fluke assumes no ri...

Страница 3: ...deo 10 Menus 10 Primary Menu 10 Image Menu 11 Setup Menu 11 Date 12 Time 12 Fluke Connect 13 Memory Menu 13 Review Image or Video 13 Delete Image 14 View Images or Videos 14 View on a PC 14 View on an...

Страница 4: ...DS701 DS703 FC Users Manual ii...

Страница 5: ...o contact Fluke call one of the following telephone numbers Technical Support USA 1 800 44 FLUKE 1 800 443 5853 Calibration Repair USA 1 888 99 FLUKE 1 888 993 5853 Canada 1 800 36 FLUKE 1 800 363 585...

Страница 6: ...al aid Charge the batteries when the low battery indicator shows to prevent incorrect measurements Disconnect the battery charger and move the Product or battery to a cool non flammable location if th...

Страница 7: ...de of Regulations Title 20 Sections 1601 through 1608 for small battery charging systems This Product contains a lithium ion battery Do not mix with the solid waste stream Spent batteries should be di...

Страница 8: ...the manual may apply to your Product The figures show the DS703 FC Use Table 2 to identify the features of your Product Features Table 2 lists the features of the Product Table 2 Features Feature DS7...

Страница 9: ...3 shows the Product and the standard accessories Table 3 Standard Accessories Item Description Item Description Control panel F Neck strap Hand strap G USB cable LCD screen display H HDMI cable D Prob...

Страница 10: ...e connections of the Product Table 4 Connections Item Description Item Description Anchors for hand strap E HDMI input Micro B USB input F Anchor for T Pak magnetic hanger Probe input G Anchor for nec...

Страница 11: ...Videoscopes Product Familiarization 7 Table 5 shows the parts of the probe Table 5 Probe Item Description Item Description Probe head D Side LED Probe cable E Forward camera Side camera F Forward LED...

Страница 12: ...and videos Image mode Tap to capture an image See Capture an Image Video mode Tap to start recording a video Tap again to stop recording a video See Record a Video Forward side camera control Tap to t...

Страница 13: ...briefly and the image saves to memory Table 7 Control Panel Button Home Screen Function Push to turn on or off the Product NA Push to open the Primary menu Push to turn on or off the zoom control Use...

Страница 14: ...he Primary menu 2 Push to open the Image menu or push to open the Setup menu 3 Push K L to select an option 4 If needed push to open a submenu 5 Push or to select an option 6 Push to set the option an...

Страница 15: ...Inverted Rotate 180 Select to rotate the image 180 None Select to view the image with no rotation Up is Up On Select to rotate the image automatically so the orientation of the image on the display i...

Страница 16: ...Push to open the set time option menu 5 Push to select the minutes or hours 6 Push K L to change the minutes or hours 7 If you selected the 12 hour format select AM or PM 8 Push to set the time and r...

Страница 17: ...On the mobile device a Download the Fluke Connect app b Go to Settings Wi Fi c Select the Wi Fi network that begins with FLUKE d In the password field enter fluketools 3 On the Fluke Connect app a Sel...

Страница 18: ...pp where available View on a PC To view saved files on a PC through a USB connection 1 Connect the USB A connector end of the USB cable into your PC and the Micro B USB connector end of the USB cable...

Страница 19: ...rmware 1 Connect the USB A connector end of the USB cable into your PC and the Micro B USB connector end of the USB cable into the Product The PC will register the Product as a USB device 2 On the PC...

Страница 20: ...PROBE 1 2M DUAL VIEW 1 8 5 mm wide 1 2 m long high definition imaging probe with forward and side view camera lenses 4962749 FLK 8 5MM PROBE 3M DUAL VIEW 1 8 5 mm wide 3 m long high definition imagin...

Страница 21: ...roduct for an extended period of time See Figure 1 Figure 1 Adjustable Neck Strap Maintenance To maintain the Product clean the case and lenses and charge the batteries W Caution To prevent damage to...

Страница 22: ...roduct is near room temperature before you connect the Product to the charger See the charging temperature specification Do not charge in hot or cold areas When you charge in extreme temperatures batt...

Страница 23: ...or 4409209 Specifications Temperature Operating 0 C to 50 C 32 F to 122 F Storage 10 C to 60 C 14 F to 140 F Battery Charging 0 C to 45 C 32 F to 113 F Relative Humidity 10 to 95 non condensing Altitu...

Страница 24: ...pply network that supplies buildings used for domestic purposes There may be potential difficulties in ensuring electromagnetic compatibility in other environments due to conducted and radiated distur...

Отзывы: