background image

Page 30


FW-F011-A-M_v0404_01_EN.docx 


 11   12 

an approved 

associated 

apparatus 

 4   5   6 

an approved 

associated 

apparatus 

 9   10 

an approved 

associated 

apparatus 

 7   8 

an approved 

associated 

apparatus 

optional 

hazardous 

location 

apparatus 

Certification F0-SERIES 

 Type -XI  


Certificate number: CSA.08.2059461 

Intrinsically Safe for Class I/II/III, Division 1 
Groups A,B,C,D,E,F,G. Temperature class T4 

Class I, Zone 0, AEx ia IIC T4 


Project ID: 3033306 
Intrinsically Safe for Class I/II/III, Division 1 

Groups A,B,C,D,E,F,G. Temperature class T4 
Class I, Zone 0, AEx ia IIC T4 


HAZARDOUS AREA


SAFE AREA


Control drawing number:  FWCD-0001 

Revision: 1.1 

Date: May 5

th

, 2014 


optional 

hazardous 

location 

apparatus 

 1 


3


 2 

an approved 

associated 

apparatus 

Control Drawing F0xx-A-XI 

The installation must comply with national requirements (e.g. in Canada, the Canadian Electrical Code, Part 1 
Appendix F and in USA, the National Electrical Code, NFPA 70, Article 504 and ANSI/ISA-RP 12.6). 

Warning: Substitution of components may impair intrinsic safety. 

For the circuits connected to terminals 1 and 2, 4 and 5, 7 and 8, 9 and 10, the output parameters of the 
connected barriers (up to 4) or hazardous location apparatus must meet the following requirements: 

Voc  

≤   The lowest Vmax of the CSA / FM Approved apparatus in the circuit 

Isc  

≤   The lowest Imax of the CSA / FM Approved apparatus in the circuit 

Pmax  

≤   The lowest Pmax of the CSA / FM Approved apparatus in the circuit 

Ca  

≥   The sum of the cable capacitance and the internal capacitance Ci of each CSA / FM Approved 

apparatus installed in the circuit 

La  

≥   The sum of the cable inductance and the internal inductance Li of each CSA / FM Approved 

apparatus installed in the circuit 

For the circuits connected to terminals 1 and 2, 4 and 6, 7 and 8, 11 and 12, the input parameters of the 
connected hazardous location apparatus must meet the following requirements: 

Vmax  

≥   The Voc of the of the circuit 

Imax  

≥   The Isc of the circuit 

Pmax  

≥   The Pmax of the circuit 

Ci  

≤   The difference between the Ca of the circuit and the sum of the cable capacitance and the internal 

capacitance Ci of all other CSA / FM Approved apparatus installed in the circuit 

Li  

≤   The difference between the La of the circuit and the sum of the cable inductance and the internal 

inductance Li of all other CSA / FM Approved apparatus installed in the circuit 

Hazardous Location Apparatus 

– switches, thermocouples or non-inductive resistance devices, or CSA / FM – 

Certified Apparatus 

– should be connected in accordance with the manufacturer’s installation instructions. 

The cable parameters are determined by the parameters of the system into which the F0-Series General Purpose 
Indicators is connected. 

Only certified Intrinsically Safe Fluidwell battery type FW-LiBat-0xx may be used and replaced in hazardous area. 

The entity parameters for F0-Series General Purpose Indicators, model F0xx-A-XI, are as follows: 

Terminals 1 and 2 

– Input parameters: 

Vmax   =   30 V 

Ci   =   0 nF 

Imax  

=   150 mA 

Li   =   0 mH 

Pmax   =   0.92 W 


Terminal 3 

– Internally not connected 

Terminal 4 and 5 

– Input parameters – Type -PD/-PX  

Vmax   =   30 V 

Ci   =   0 nF 

Imax  

=   200 mA 

Li   =   0 mH 

Pmax   =   1.2 W 


Terminal 4 and 6 

– Output parameters – Type -PD  

Voc, Isc, Pmax, Ca and La are equal to those of the 
circuitry connected between terminals 4 and 5. 

Terminal 7 and 8 

– Input parameters – Type -OT 

Vmax   =   30 V 

Ci   =   0 nF 

Imax  

=   200 mA 

Li   =   0 mH 

Pmax   =   1.2 W 

Terminal 9 and 10 

– Input parameters – Type -ZB 

Vmax   =   30 V 

Ci   =   0 nF 

Imax  

=   200 mA 

Li   =   0 mH 

Pmax   =   0.75 W 

Terminal 11 and 12 

– Input parameters – Type -AH 

Vmax   =   30 V 

Ci   =   6.1 nF 

Imax  

=   100 mA 

Li   =   0 mH 

Pmax   =   0.75W 

common ground 

TERMINAL CONNECTORS F0-SERIES 

5.2.3 

ELECTRICAL DATA - CONTROL DRAWING 


Содержание F011-A

Страница 1: ...F011 A TOTALIZER Signal input flowmeter 0 4 20mA Options Intrinsically Safe F Series Field mounted indicators for safe and hazardous areas More info www fluidwell com fseries ...

Страница 2: ...not be disposed of into the general waste system or into a landfill At the end of its life equipment shall be disposed of according to the local regulations regarding waste of the electrical and the electronic equipment Please contact your local dealer national distributor or the manufacturer s Technical helpdesk for information on the product disposal SAFETY RULES AND PRECAUTIONARY MEASURES The m...

Страница 3: ...damage of the F011 A or connected instruments A caution indicates actions or procedures which if not performed correctly may lead to personal injury or incorrect functioning of the F011 A or connected instruments A note indicates actions or procedures which if not performed correctly may indirectly affect operation or may lead to an instrument response which is not planned WARRANTY AND TECHNICAL S...

Страница 4: ...6 4 3 1 Identification 16 4 3 2 Opening Removing the cover 18 4 3 3 Closing Replacing the cover 18 4 4 Mechanical installation 19 4 4 1 Dimensions Aluminum and stainless steel enclosures 19 4 4 2 Dimensions Non metallic enclosures 20 4 4 3 Mounting 21 4 5 Electrical installation 22 4 5 1 Electrical safety 22 4 5 2 Protective Earth PE connections 22 4 5 3 Field wiring connections 23 4 5 4 Power sup...

Страница 5: ...IIC IIIC 35 5 4 2 F011 A PD XI ZB Ex ia IIC IIIC 35 5 4 3 F011 A PL XI ZB Ex ia IIC IIIC 36 6 MAINTENANCE 37 6 1 General directions 37 6 2 Instructions for repair 37 6 3 Battery replacement 38 6 3 1 Safety instructions 38 6 3 2 Replace the battery 39 6 3 3 Disposal of batteries 39 TECHNICAL SPECIFICATION 40 PROBLEM SOLVING 43 DECLARATION OF CONFORMITY 44 INDEX OF THIS MANUAL 45 LIST OF FIGURES 46 ...

Страница 6: ...s are available Fig 1 Typical application for the F011 A Configuration of the F011 A The F011 A has been designed to be implemented in many types of applications For that reason a SETUP level is available to configure your F011 A according to your specific requirements It includes several important features such as span measurement units signal selection etc All setting are stored in EEPROM memory...

Страница 7: ...e displayed information like accumulated total and flow rate CLEAR key This key is used to CLEAR the value of total 2 3 OPERATOR INFORMATION AND FUNCTIONS In general the F011 A will always function at Operator level The information displayed is dependent upon the SETUP settings The signal from the connected sensor is processed by the F011 A in the background whichever screen refresh rate setting i...

Страница 8: ... total Low battery alarm When the battery voltage drops it must be replaced At first battery low will flash but as soon as it is displayed continuously the battery MUST be replaced shortly after The remaining lifetime after the first moment of indication is generally several days up to some weeks See paragraph 6 3 for further information on battery replacement Fig 4 Example of low battery alarm Ra...

Страница 9: ...till active Make sure that the unit is not being used for any application when altering the settings 3 2 1 ENTERING SETUP LEVEL Configuration of the F011 A is done at SETUP level which can be reached at all times while the F011 A remains fully operational At SETUP level the display will deactivate the RUN indicator and activate the SETUP indicator Use the control panel to access SETUP level PROG k...

Страница 10: ...ach function that needs to change navigate to that function and follow the steps indicated below During the programming sequence the display will deactivate the SETUP indicator and activate the PROGRAM indicator When programming new values alterations will only be set after the PROG key has been pressed to confirm the new value STEP 3 Step 1 Starting the programming sequence PROG key When a functi...

Страница 11: ...nce Use the control panel to return to OPERATE level PROG key In order to return to the operator level press the PROG key for three seconds When no keys are pressed for 2 minutes SETUP level will be left automatically 3 3 CONFIGURATION SETTINGS All settings of the F011 A can be set via the control panel The following paragraphs give a detailed description of each setting 3 3 1 OVERVIEW FUNCTIONS S...

Страница 12: ...t the flowmeter generates 20mA at a rate of 652 31 USGAL per hour the selected unit is barrels There are 42 gallons in one barrel so the rate is 652 31 42 is 15 53119 barrels hour This is 0 0043142 barrels second which is the span Enter for SETUP 1 3 004314 and for SETUP 1 4 6 Example 2 Calculating the span Let us assume that the flowmeter generates 20mA at a flow rate of 2 481 3 Liters minute and...

Страница 13: ...ignal the display is switched off but all settings and totals are stored In this mode power consumption is extremely low To wake up the F011 A again press the SELECT key twice 3 3 5 EXPLANATION OF SETUP MENU 4 FLOWMETER SETUP FUNCTIONS AND VARIABLES 4 FLOWMETER 4 1 FORMULA The F011 A can process the 0 4 20mA signal in two ways Interpolation the signal is processed linear R S x I Square root for di...

Страница 14: ...ed DEFAULT with this setting the factory value is re installed CAL SET to select the last calibrated value 4 5 TUNE MAX 20mA With this setting it is possible to calibrate the input value for 20mA as the signal from the flowmeter might not be exact 20 0mA at maximum flow rate This function will measure the real output value at maximum flow rate Be very sure that the offered signal is correct before...

Страница 15: ...s e g F011 A XF Follow the electrical installation instructions as shown in chapter 4 and the mechanical installation instructions of the enclosure that are supplied separately Type XI Suitable for intrinsically safe applications e g F011 A XI Follow the general mechanical and electrical installation instructions of chapter 4 and the specific installation instructions of chapter 5 4 2 INSTALLATION...

Страница 16: ...fy your F0 Series device all field mount enclosures have a weatherproof identification label placed on the outside of the unit Fig 6 Identification Example of F0 Series identification label safe area Installation label A second label is located on the inside and shows additional installation data For panel mount enclosures the outside label is not available so the inside label also serves as ident...

Страница 17: ...afe area Type PF or PM Serial number and year of production The serial number can be reviewed on the identification label or in SETUP menu Others The production date is either shown separately on the label or indicated by the first 4 digits of the serial number representing year and week number YYWW ...

Страница 18: ...their mating parts and the front cover is now completely separate 4 3 3 CLOSING REPLACING THE COVER To replace the cover on the F Series enclosure follow this procedure 1 Re insert all terminals to their original position 2 Carefully position the front cover onto the back cover making sure that the gasket falls nicely into the gutter of the back cover 3 Replace all 4 screws into the front cover an...

Страница 19: ...ert B after H HBx Fig 9 Dimensions Aluminum and stainless steel enclosures 75 mm 2 95 130 mm 5 12 112 mm 4 40 60 mm 2 36 120 mm 4 72 M20 x 1 5 PG9 PG9 30mm 30mm 22 5mm M20 x 1 5 M16 x 1 5 M16 x 1 5 30mm 30mm 22 50mm M20 x 1 5 22 5mm M20 x 1 5 M20 x 1 5 25mm 25mm 22 5mm 1 2 NPT 0 9 3x 1 2 NPT 0 12 0 12 0 9 HA HM HN HO HP HT HU 6 x M12 12mm 12mm 24mm 24mm 36mm 36mm 14mm 17mm 115 mm 4 53 98 mm 3 86 H...

Страница 20: ... mm 5 12 112 mm 4 40 60 mm 2 36 120 mm 4 72 HD HK HK back box flat bottom HE HF HG HH D 12mm 12mm 12mm 24mm 24mm 36mm 36mm 14mm 17mm 22 5mm 30mm 30mm D 16mm D 20mm 0 9 D 22mm 0 866 22 5mm 25mm 25mm D 20mm D 20mm D 16mm HC 75 mm 2 95 118 mm 4 65 104 mm 4 09 HJ 0 9 0 12 0 12 3x D 22mm 0 866 115 mm 4 53 98 mm 3 86 29 1 mm 1 15 31 mm 1 22 ...

Страница 21: ...ing the mounting plate please follow the instructions that came with the accessories Alternatively the unit can be panel mounted by using only the front cover Wall mount by using the openings on the out side of the back cover Wall mount by using the mounting plate accessory Meter mount by using one of the openings in the bottom of the back cover Pipe mount by using the mounting plate with the brac...

Страница 22: ...back panel The metal front panel is connected to the Protective Earth by the mounting screws and serrated washers The wire screens shield are meant to prevent electromagnetic interference and shall be connected to the common ground terminals that belong to the specific sensor connection The wire screens shall be terminated at one side to prevent wire loops Inside of the Fluidwell unit the differen...

Страница 23: ...ational Rules and Regulations When a power supply is connected to the field wiring connections please also consider the demands for power supply wiring shown in paragraph 4 5 4 The installation must comply with inter national requirements and local ordinances o Within the Europe Union and the UK all installations must comply with national regulations o Within Canada all field wiring must conform t...

Страница 24: ...M Terminal 7 sensor supply 8 2V 12V or 24V Type PF and PM offer a power supply for the sensor The flowmeter can be externally powered with 8 2V 12V or 24V DC max 400mA 24V The voltage is selected with the three switches inside the F011 A Be sure that all the leads to the terminals are disconnected from the F011 A when the internal plastic protection cover has been removed HIGH VOLTAGE 400V NEVER c...

Страница 25: ...B PD PL PX 4 6 1 TERMINALS 1 2 FLOWMETER INPUT The F011 A requires a 0 4 20mA flowmeter signal which will be processed 4 times a second with a 16 bits accuracy The input is not isolated The screen of the signal wire can be connected to the common ground terminal See paragraph 4 5 3 Type PL input loop power Model F011 A PL is powered from the 4 20mA sensor signal Fig 15 Terminal connections Analog ...

Страница 26: ... AREA APPLICATIONS TYPE PF PM Take careful notice of all safety and precautionary measures indicated in paragraph 4 5 Electrical Installation and review paragraph 4 5 3 and 4 5 4 before applying any field or power supply wiring For Intrinsically Safe applications read chapter 5 Following terminal connectors are available on the F011 A when supplied with Type PF PM Fig 17 Overview of terminal conne...

Страница 27: ...ed can cause ground loop currents that could damage the equipment See paragraph 4 5 2 Protective Earth PE connections for more information 4 7 2 TERMINALS 5 7 FLOWMETER INPUT The F011 A requires a 0 4 20mA flowmeter signal which will be processed 4 times a second with a 16 bit accuracy The input is not isolated The screen of the signal wire can be connected to the common ground terminal See paragr...

Страница 28: ...ur F0 Series device all field mount enclosures have a weatherproof identification label placed on the outside of the unit Fig 19 Identification Example of F0 Series identification label intrinsic safety Installation label A second label is located on the inside and shows additional installation data For panel mount enclosures the outside label is not available so the inside label also serves as id...

Страница 29: ...ush discharges For reasons of ESD and safety always ground the metal enclosure properly as indicated in section 4 5 Electrical installation of this manual Do not blend metal front covers with non metallic rear covers vice versa and or cable glands A metal cover on a non metallic rear cover could lead to ESD A metal cable gland in a non metallic enclosure could invalidate isolation For enclosures a...

Страница 30: ...cuits connected to terminals 1 and 2 4 and 6 7 and 8 11 and 12 the input parameters of the connected hazardous location apparatus must meet the following requirements Vmax The Voc of the of the circuit Imax The Isc of the circuit Pmax The Pmax of the circuit Ci The difference between the Ca of the circuit and the sum of the cable capacitance and the internal capacitance Ci of all other CSA FM Appr...

Страница 31: ...circuit For the circuits connected to terminals 1 and 2 4 and 6 7 and 8 11 and 12 the input parameters of the connected hazardous location apparatus must meet the following requirements Vmax The Voc of the of the circuit Imax The Isc of the circuit Pmax The Pmax of the circuit Ci The difference between the Ca of the circuit and the sum of the cable capacitance and the internal capacitance Ci of al...

Страница 32: ...rcuits precautions must be taken to separate the Intrinsically safe circuits in accordance with EN 60079 11 For electrical data consult Annex 1 for this F0 Series model on the following page Substitution of components may impair intrinsic safety Exchange of Intrinsically safe battery FWLiBAT 0xx with certificate number KEMA 03ATEX1071 U or IECEx KEM 08 0005U is allowed in Hazardous Area Read parag...

Страница 33: ...ic safety Ex ia IIC IIIC only for connection to a certified intrinsically safe circuit with following maximum values Ui 30 V Ii 200 mA Pi 1 2 W Li 0 mH Ci 0 nF External supply output circuit Type PD terminals 6 and 1 2 7 or 8 in type of protection intrinsic safety Ex ia IIC IIIC with the following maximum values The maximum output parameters are equal to the parameters of the external supply input...

Страница 34: ...external power supply The following types of power supply are available for hazardous area Type PX as standard all intrinsically safe products are supplied with terminal 4 and 5 to power the product externally Type PC offers additional to type PX an internal Intrinsically Safe lithium battery This ATEX certified battery FW LiBAT xxx may be changed in hazardous area Type PD offers a sensor supply o...

Страница 35: ...Uo Io Po Note above values are safety values Consult the technical specification for operational values Power supply For example MTL5025 max 30 V max 150 mA max 0 92 W Uo Io Po Power supply type PX 8 30V DC I S flowmeter input type A 0 4 20mA Backlight option type ZB Sensor supply voltage for analog flowmeter type A U not available in this example Please note type PX may be used in combination wit...

Страница 36: ... Common ground Signal Circuit depends on type of signal 9 10 Common ground Supply backlight HAZARDOUS AREA SAFE AREA Power supply For example MTL5025 max 30 V max 200 mA max 0 75 W Uo Io Po Note above values are safety values Consult the technical specification for operational values Power supply For example MTL5025 max 30 V max 93 mA max 0 92 W Uo Io Po I S flowmeter input type A PL 4 20mA input ...

Страница 37: ...splay update uses significantly more power Pulse output Low temperatures the available power will be less due to battery chemistry Check periodically The condition of the casing cable glands and front panel The input output wiring for reliability and aging symptoms The process accuracy As a result of wear and tear re calibration of the flowmeter might be necessary Do not forget to re enter any sub...

Страница 38: ...ions Intrinsically safe applications Type PC Only batteries of type FW LiBAT 021 that hold the Ex marking as shown below are suitable replacements and certified for use in hazardous areas Before replacing the battery in hazardous area verify that the new battery is undamaged in good condition and suitable for use in the unit Type FW LiBAT 021 re ordering nr SPC02 Never use safe areas batteries in ...

Страница 39: ...r the battery connector to prevent a short circuit Fig 27 Battery replacement procedure Install the new battery as follows 1 Make sure the new battery is undamaged in good condition and suitable for use in the unit Check that the markings on the battery correspond with the type of installation as shown above 2 Install the battery 3 into the retainer 4 making sure the wire 1 comes out at the correc...

Страница 40: ...H 31mm 1 22 IP65 TYPE 4X Plastic GRP panel mount enclosure Weight 450gr Aluminum Stainless Steel panel mount enclosure Weight 600gr Field wall mount enclosures Dimensions with extended back Classification 130 x 120 x 75mm 5 10 x 4 72 x 2 95 WxHxD 130 x 120 x 90mm 5 10 x 4 72 x 3 54 WxHxD IP67 TYPE 4X Aluminum SS enclosures Type HA Type HB HSB Type HL Type HM HBM HSM Type HN Type HO HBO HSO Type HP...

Страница 41: ...g totals every minute Data retention at least 10 years Password Configuration settings can be password protected Hazardous area option Intrinsically safe Type XI ATEX approval KEMA 05ATEX1168 X II 1 G Ex ia IIC T4 Ga II 1 D Ex ia IIIC T200 100 C Da CSA approval CSA 08 2059461 IS Class I II III Division 1 Groups A to G T4 Class I Zone 0 AEx ia IIC T4 Ga IECEx approval IECEx KEM 08 0006X Ex ia IIC T...

Страница 42: ...with variable decimal position Update time Four times a second Voltage drop 2 6 Volt Load impedance 3kOhm Relationship Linear and square root calculation Operational Operator functions Displayed functions Total and accumulated total Accumulated Total Digits 7 digits Accumulated total 11 digits Unit L m3 GAL USGAL KG lb bbl no unit Decimals 0 3 Note Total can be reset to zero by pressing CLEAR twic...

Страница 43: ...nknown If the pass code is not 1234 there is only one possibility left call your supplier ALARM When the alarm flag starts to blink an internal alarm condition has occurred Press the select button several times to display the 4 digit error code The codes are 0001 irrecoverable display data error data on the display might be corrupted 0002 irrecoverable data storage error the programming cycle migh...

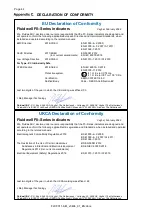
Страница 44: ...anager Technology Bo 6 5 60 AA e hel he etherlands oltawe 5 66 A e hel he etherlands luidwell B is 001 certified b A ertification B eander 1051 6 5 Arnhem he etherlands eghel ebruary 2 22 e luidwell declare under our sole responsibility that the Series indicators are designed and will operate conform the following applicable Legislation and Standards when installed and operated according to the re...

Страница 45: ...3 flow rate Span 12 flowmeter 13 functional description 6 high current 43 input signal 25 intrinsic safety 28 Intrinsic safety 29 37 39 keys 7 low current 43 main function 9 maintenance 37 operational 7 9 15 37 operator level 7 pass code 43 power supply 26 range error 8 43 rate total 7 sensor supply voltage 24 SETUP level 9 signal input 25 terminal connectors 25 26 total decimals 12 decimals Span ...

Страница 46: ...ge selection type PF and PM 24 Fig 14 Overview of terminal connectors F011 A type PB PD PL PX 25 Fig 15 Terminal connections Analog signal input 25 Fig 16 Terminal connections Backlight ZB 26 Fig 17 Overview of terminal connectors F011 A type PF PM 26 Fig 18 Terminal connections Analog signal input 27 Fig 19 Identification Example of F0 Series identification label intrinsic safety 28 Fig 20 Identi...

Страница 47: ...Page 47 FW F011 A M_v0404_01_EN docx ...

Страница 48: ...rpolation 4 2 filter 01 off 4 3 cut off 00 0 4 4 calibration low 0 4mA factory 4 5calibration high 20mA factory 5 OTHERS 5 1 model F011 A F011 A F011 A 5 2 software version 03 ____ ____ 03 ____ ____ 03 ____ ____ 5 3 serial number _ _ _ _ _ _ _ _ _ _ _ _ _ _ _ _ _ _ _ _ _ 5 4 pass code 0000 5 5 tagnumber 0000000 Fluidwell bv PO box 6 Voltaweg 23 Website www fluidwell com 5460 AA Veghel 5466 AZ Vegh...

Отзывы: