Maintenance / Repair Parts
3
For parts or assistance, call Flotec Customer Service at
1-800-365-6832
4.
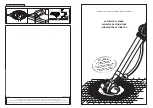
Use the hose, not the power cord, to position the
pump on the pool cover and to retrieve the
pump when finished. Make sure that the pump
stands on its feet while running and that it is in at
least 2-1/2” of water (the pump loses prime at 2-
1/4”).
5.
With pump submersed in the water, plug the
pump into a GFCI outlet.
6.
Monitor water level on the pool cover to be
ready to unplug the pump before it runs dry.
7.
The motor is thermally protected. This means
that the pump will shut off before damage from
overloading can be done to the motor. Low volt-
age, long extension cords, clogged impeller, very
low head or lift, etc., could cause cycling.
8.
This pump will pump water down to 2-1/4"; this
means that it will not remove all water. If unit has
been operating and suddenly no water comes
out of discharge hose, shut off unit immediately.
Water level is probably very low and unit has
broken prime. Use mop or squeegee to remove
remaining water.
9.
Pump depends on water for lubrication. Do not
operate pump unless it is in at least 2-1/4” of
water as pump may be damaged if allowed to
run dry.
Risk of electric shock. Before
attempting to check why unit has stopped oper-
ating, disconnect power from unit. Do not han-
dle pump with wet hands or when standing on
wet or damp surfaces, or in water. Failure to fol-
low this precaution can result in personal injury
or death and/or property damage.
MAINTENANCE
Risk of electric shock. Make cer-
tain that the pump is unplugged before attempting to
service or remove any component.
To clean the screen and filter:
1.
Unplug the pump and remove it from the pool
cover.
2.
Remove the hose.
3.
Dry the pump and cord.
4.
Squeeze the sides of the screen together (Key
No. 4) and pull it away from the pump. Screen
will unsnap and come off.
5.
Remove foam filter (Key No. 3) and wash in
soapy water.
6.
Rinse and reassemble.
To clean the impeller:
1.
Remove screen (Key No. 4) as described above.
2.
Grasp nose of pump (Key No. 2) and twist coun-
terclockwise. Front plate will come off, bringing
impeller with it.
3.
Clean impeller and replace front plate of pump.
Twist clockwise to lock it in place.
4.
Replace screen and filter. Pump is ready for
operation.
TROUBLESHOOTING
Pump won’t start or run.
1.
Blown fuse: If blown, replace with fuse of prop-
er size.
2.
Low line voltage: If voltage under recommended
minimum, check size of wiring from main switch
on property. If OK, contact power company.
3.
Obstructed impeller: Unplug pump and clear the
impeller (Key No. 2) .
4.
Pump Unplugged: Plug in pump.
5.
Defective motor: Replace pump.
Pump operates but delivers little or no
water.
1.
Garden hose is air-locked: Remove the garden
hose from the pump and hold the hose up while
walking all of the water out of the hose.
Emptying the hose of water should restore the
flow.
2.
Low line voltage: If voltage under recommended
minimum, check size of wiring from main switch
on property. If OK, contact power company.
3.
Something caught in impeller: Follow instruc-
tions under “To Clean Impeller” under
“Maintenance”.
4.
Plugged filter or screen: Remove parts and clean;
replace if necessary.
5.
Worn or defective parts or plugged impeller:
Clean parts; if required, replace parts or pump.
Key
Part
Part
No.
Description
Qty.
No.
1
Impeller Assembly
1
57R101
2
Foam Filter
1
500S66
REPAIR PARTS
1
2


