


7. Place a tick in the box for the type of network that
the camera is on (this is usually Public).
8. Click
OK
.
9. From the Control Panel click
Network and
Internet
.
10. Click
Network and Sharing Center
.
11. Click
Change advanced sharing settings
.
12. Click on the relevant network type (e.g. Public).
13. Ensure
Turn on network discovery
is selected.
14. Click
Save changes
if you switched on network
discovery, or
15. Click
Cancel
if network discovery was already
turned on.
Finding
the
camera's
IP
address
using
Windows
7
UPnP
To
use
this
method,
your
PC,
and
router
(if
used)
must
support
UPnP
(UPnP
is
enabled
in
the
camera
by
default).
The
camera
and
the
PC
must
be
on
the
same
network.
Ensure
the
camera
is
connected
to
your
PC
as
described
in
Chapter
4
Cables
and
connections.
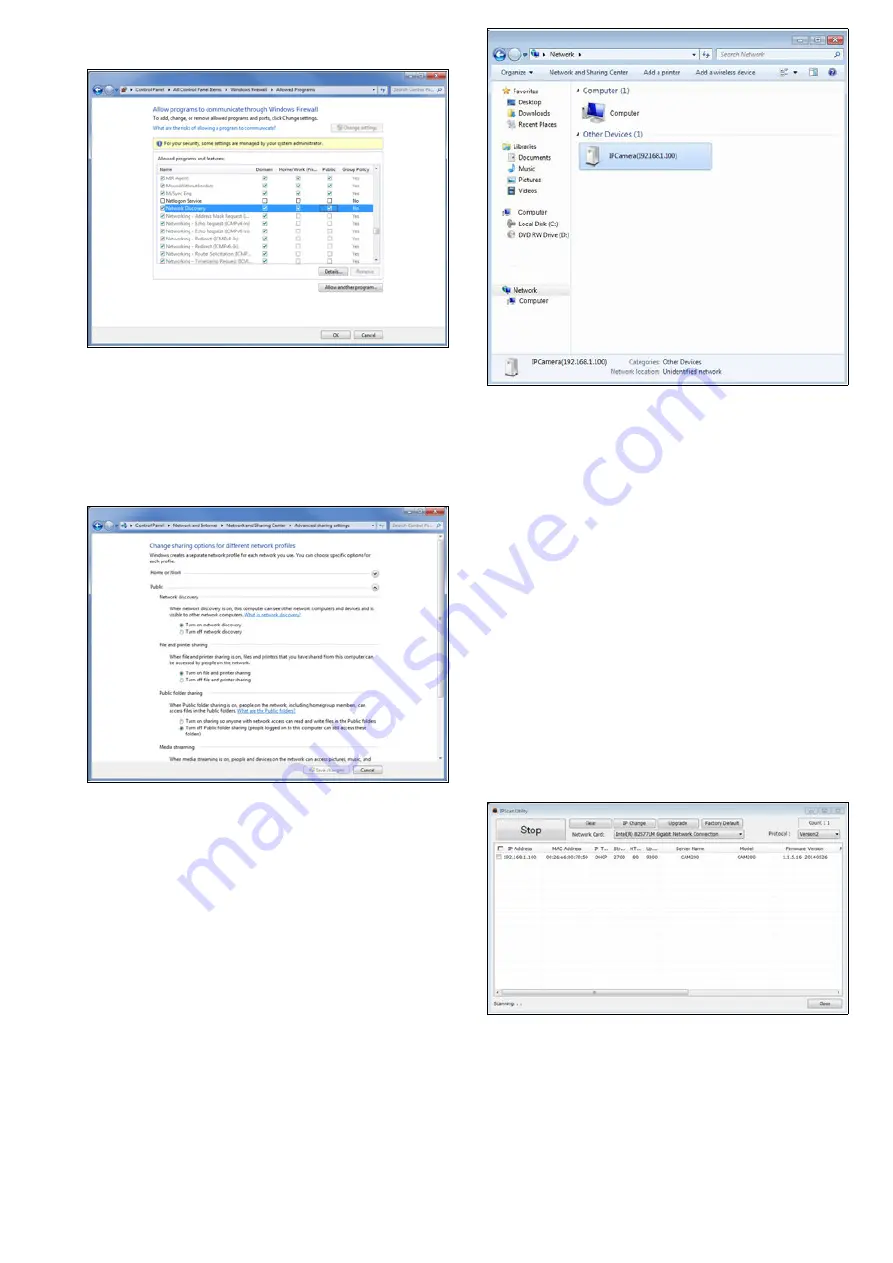
1. Click
Start > Computer > Network
.
The camera appears under Network
Infrastructure.
2. Double-click a camera icon to open the web
interface in your default browser.
3. Enter the username and password for the camera
and click
Login
.
Finding
the
camera's
IP
address
using
IP
Scanner
software
To
use
this
method,
your
PC,
and
router
(if
used)
must
support
UPnP
(UPnP
is
enabled
in
the
camera
by
default).
The
camera
and
the
PC
must
be
on
the
same
network.
Ensure
the
camera
is
connected
to
your
PC
as
described
in
Chapter
4
Cables
and
connections.
1. Insert the CD that was supplied with the camera
into the CD/DVD drive of your PC.
2. Navigate to the
SOFTWARE
folder.
3. Double click the IP Scanner executable file (e.g.
IPScan Utility.exe).
4. Click the
SCAN
button.
Details for any connected IP devices will be
displayed.
5. Double-click the relevant camera entry to open
the web interface using your default web browser.
6. Enter the username and password for the camera
and click
Login
.
Supported browsers
The camera includes a built-in web interface that can
be accessed using a web browser.
The following browsers are supported:
• Google Chrome
Operation
Содержание Raymarine CAM200IP
Страница 1: ...INSTALLATION INSTRUCTIONS CAM200IP CAM210IP...
Страница 22: ...Chapter 5 Mounting Chapter contents 5 1 Mounting the unit Mounting...
Страница 29: ...Chapter 7 Maintenance Chapter contents 7 1 Routine checks 7 2 Unit cleaning instructions Maintenance...
Страница 35: ...Chapter 9 Technical support Chapter contents 9 1 Raymarine product support and servicing Technical support...
Страница 37: ...Chapter 10 Technical specification Chapter contents 10 1 Technical specification Technical specification...


