5.1
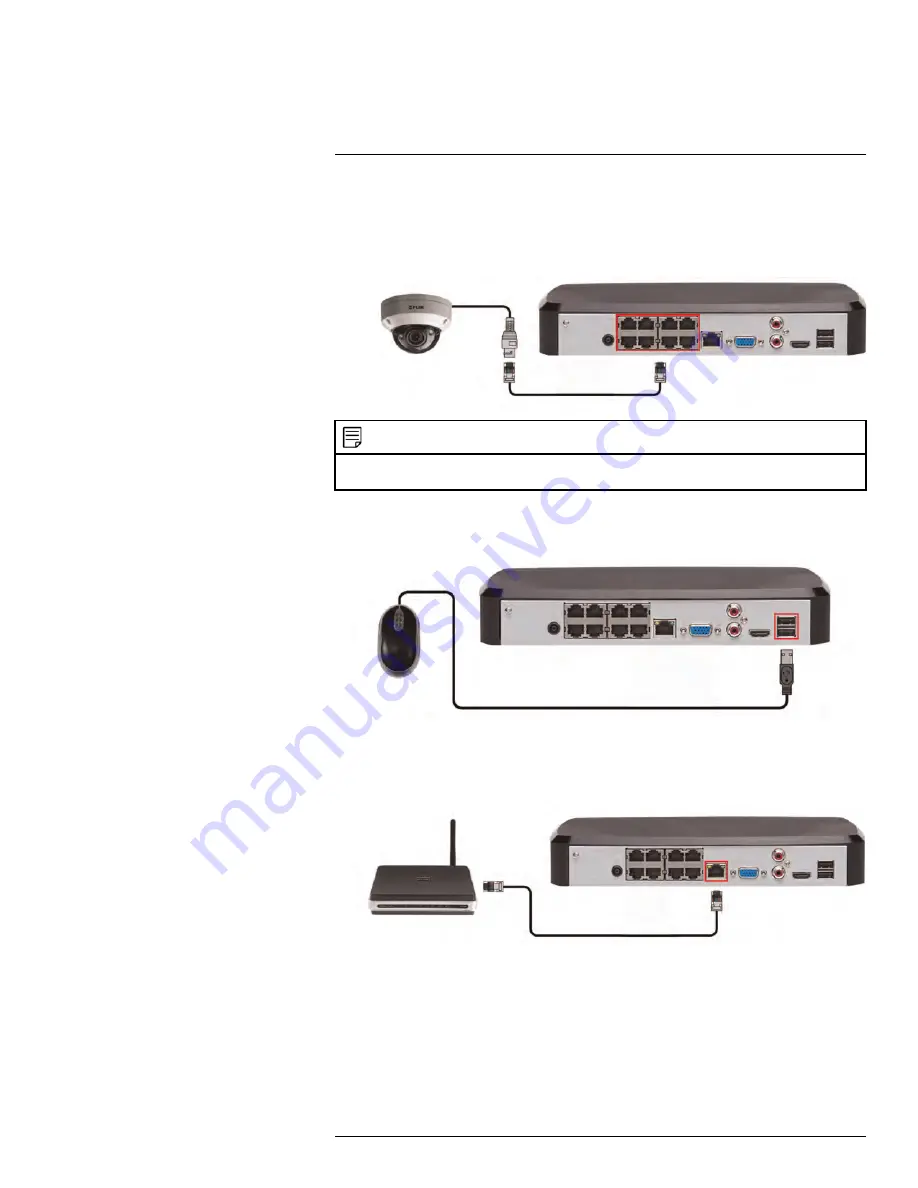
Step 1: Connect the Network Cameras
• Connect network cameras to the
PoE Ports
on the rear panel of the NVR using Cat5e
or higher grade Ethernet cable. The cameras will appear on the NVR without any addi-
tional configuration when the system starts up.
NOTE
You can also connect your network cameras to your local network for flexible installations. For details, see
5.13
Connecting Cameras to the Local Area Network (LAN)
, page 12.
5.2
Step 2: Connect the Mouse
• Connect the included USB mouse to one of the
USB
ports.
5.3
Step 3: Connect the Ethernet Cable
• Connect the included Ethernet cable to the
LAN
port on the rear panel of the system.
Connect the other end of the Ethernet cable to a router or switch on your network.
5.4
Step 4: Connect the Monitor
• Connect the included HDMI cable to the
HDMI
port, then to a TV or monitor
(recommended).
OR
• Connect a VGA cable (not included) to the
VGA
port, then to a monitor.
#LX400094; r.43927/43955; en-US
8
Содержание DNR214
Страница 1: ...Instruction Manual DNR210 Series...
Страница 2: ......
Страница 3: ...Instruction Manual DNR210 Series LX400094 r 43927 43955 en US iii...
Страница 10: ......
Страница 37: ...Setting The Time 8 7 Click Apply to save changes LX400094 r 43927 43955 en US 27...
Страница 46: ...Search Backup 11 5 Click Format 6 Select a format mode 7 Click OK to confirm LX400094 r 43927 43955 en US 36...
Страница 58: ...Managing Passwords and User Accounts 12 4 Click Add Group LX400094 r 43927 43955 en US 48...
Страница 138: ...Using FLIR Cloud Client for PC or Mac 15 To create a user account 1 Click Add LX400094 r 43927 43955 en US 128...
Страница 145: ...Using FLIR Cloud Client for PC or Mac 15 LX400094 r 43927 43955 en US 135...
Страница 219: ......


