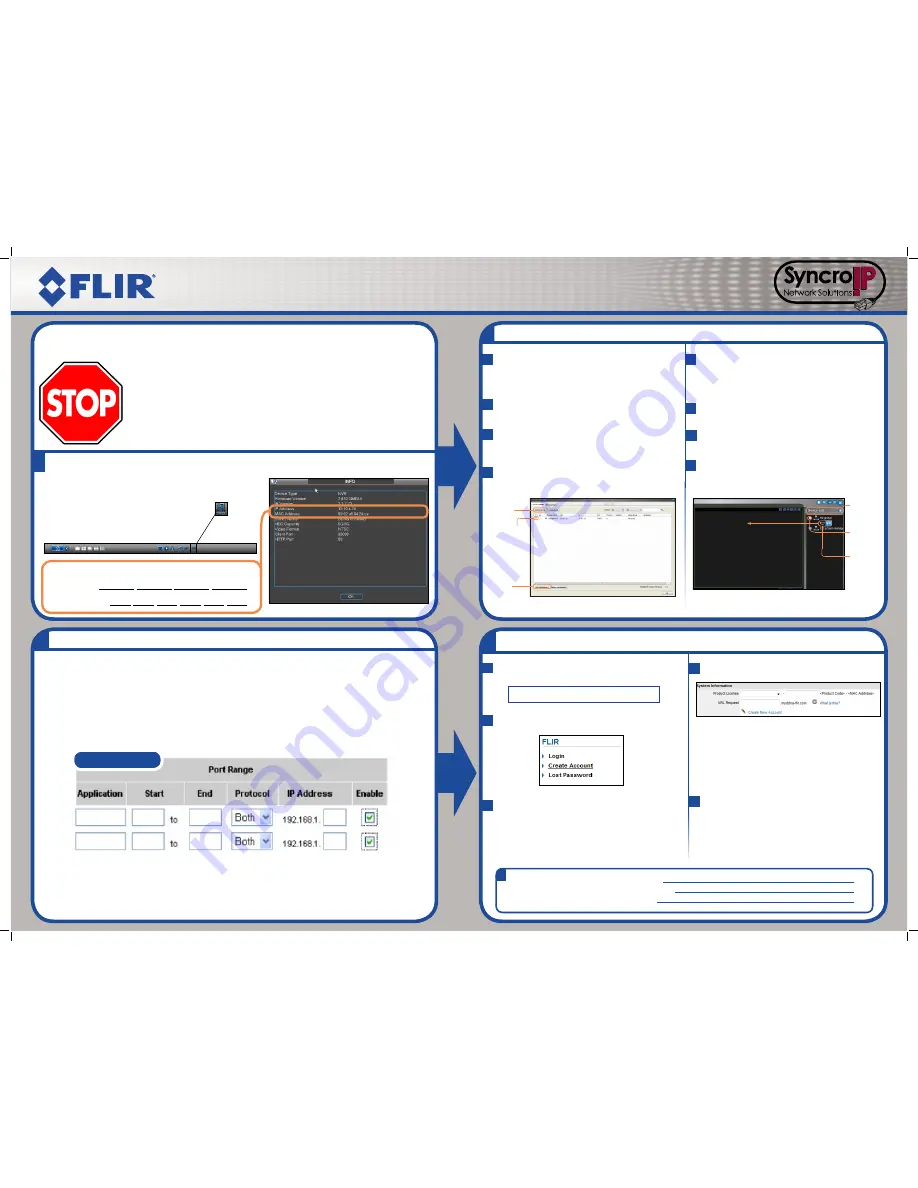
Find Your IP and MAC Address
Local Connection (for PC)
Record your information below:
IP ADDRESS
:
.
.
.
MAC ADDRESS
:
-
-
-
-
-
This guide will show you how to set up your system for connection over the Internet using a PC,
Smartphone, or Tablet.
1
2
3
b
c
d
Manually forward ports 80 and 35000 to the NVR’s IP address.
All routers are different. To port forward your router, please refer to your router’s user
manual.
An example of a port forwarding screen is shown for illustration purposes:
EXAMPLE
80
80
HTTP
12
35000
12
Client
35000
Before You Start:
Make sure you have:
• A router and high-speed Internet access (not included).
• Connected the NVR to a router or switch on your network using an Ethernet cable. See the Quick
Connection Guide for details.
• A PC connected to the same network as your NVR.
• Mac users, please visit
www.flirsecurity.com/pro
for instructions.
a
Network Video Surveillance Recorder
DNR100 Series
Quick Networking Guide
Click
Config Manager>Device Manage
.
Click
Search Device
. If a Windows Firewall
alert appears, click
Allow
.
Check the NVR and click
Add Management
.
Click
Search
Device
Check the NVR
Click
Add
Management
Enter the User Name (default:
admin
) and
Password (default:
000000
) for the NVR and
click
OK
.
e
Click
OK
.
f
Click
Device List
. Click
+
next to
No Group
.
g
Double-click the NVR. Click-and-drag the NVR
to the display area to view.
Click
Device
List
Click
+
next
to
No Group
Double-click
the NVR
NOTE:
An automatic port forwarding wizard is available from
www.flirsecurity.com/pro
.
Click-and-drag the
NVR to the display
area to view
Install
CMS software for PC
from the CD
or from
www.flirsecurity.com/pro
on a
computer in the same LAN as the NVR.
h
Port Forwarding
Left-click and login if prompted (Default User Name:
admin
; Default Password:
000000
). Click
on
the navigation bar.
Register for FLIR DDNS
4
c
Complete the Account Information fields
with your personal information. Complete
the Warranty Information with your purchase
details (optional).
a
Open your web browser and go to:
http://ddns.myddns-flir.com
d
Record your
information here:
e
b
Click
Create Account
.
DDNS User Name: ____________
DDNS Domain Name: ___________
DDNS Password: ___________
Complete the System Information fields:
Product License:
Select your product
model from the
Product License
drop down menu
(i.e. DNR100).
Once the information has been entered,
click
Create New Account
. Your Account
information will be sent to you at the email
Address you used in Step c.
<Product Code>-
<MAC Address>:
Locate the MAC address
of your NVR.
URL Request:
Choose a URL for your
DDNS connection
(i.e. your name, your
company or business
name, or anything of
your choice).
f
DNR100


