

D. Mount and connect the camera
Be sure to have the required accessories and tools available.
Refer to the User Guide as necessary.
1. Verify that the operating temperature range
is between -20°C ~ 50°C (-4° ~ 122°F),
0-90% relative humidity (non-condensing).
2. Mount the camera at the site.
3. Use the RJ-45 socket to attach the camera to the VMS via a PoE 10/100 Mbps network switch
(or use a PoE injector if connecting to a regular switch.)
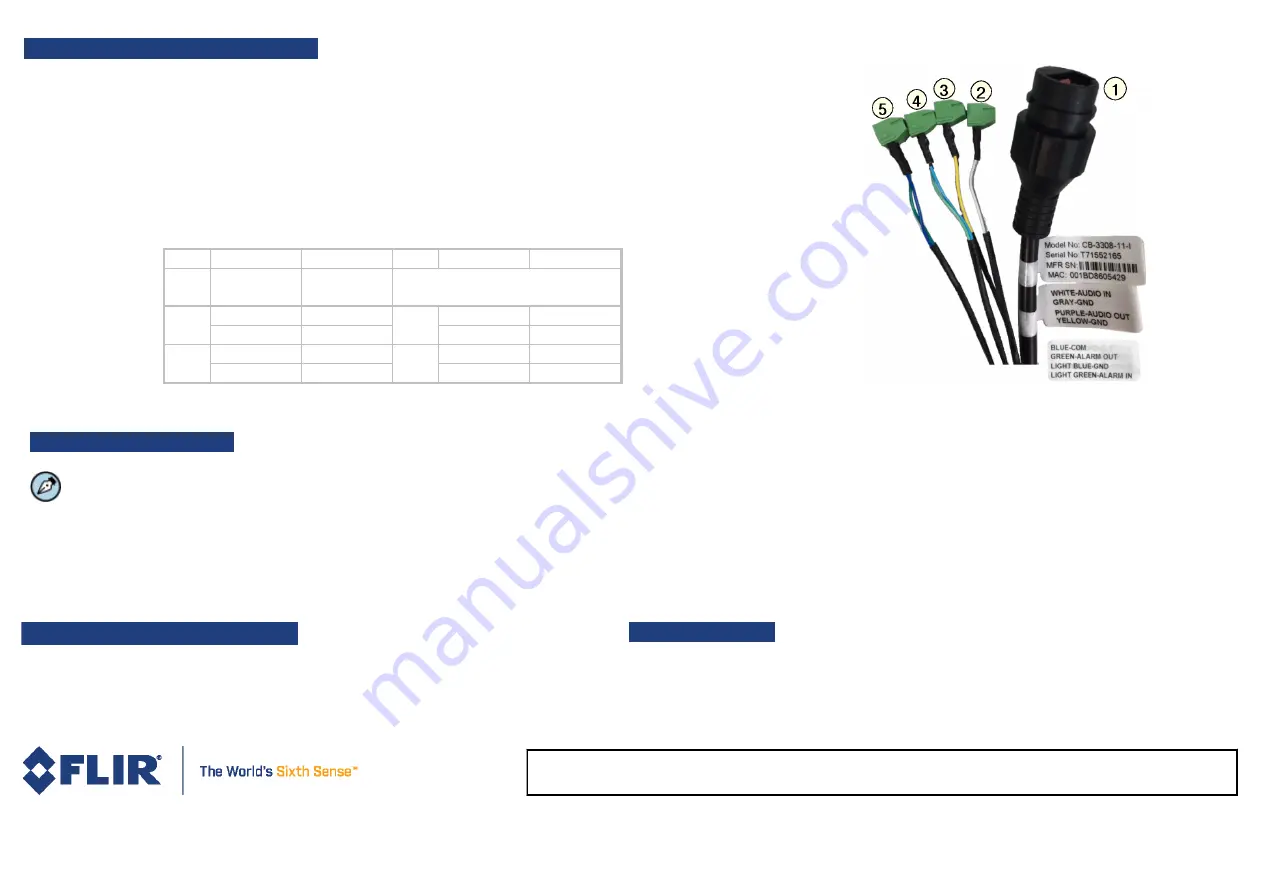
4. Connect Inputs and Outputs if required (see table below)
No.
Function
Identify
No.
Function
Identify
1
RJ-45
Network
(/PoE+)
2
Audio IN
White
4
Com
Blue
Gnd
Gray
Alarm OUT
Green
3
Audio OUT
Purple
5
Gnd
Light Blue
Gnd
Yellow
Alarm IN
Light Green
E. Discover the Camera
The camera’s web interface can be
accessed by Internet Explorer 10 and higher
(32-bit) with the ActiveX plug-in and by
browsers that do not require ActiveX, such as
Microsoft Edge, Chrome or Firefox, on PCs
running 64-bit Windows 7, 8, 8.1, or 10.
Set the Camera's IP address and Video Format
1. Download and install the DNA Utility, following the DNA
Application User Guide/Help screens.
2. Attach the unit to the same LAN segment as the computer
that is managing the unit. DNA automatically discovers the unit
on the network and displays the device’s current IP address in
the Discover List.
3. Select the unit from the Discover List.
4. If using a Static IP address (as on a Latitude System), follow
the DNA instructions to set the desired IP address.
5. On a system using DHCP, select the DHCP option in DNA.
6. To select PAL or NTSC, select the device in the Discover list,
right-click to open the context menu and clicking
Change
Video Format
.
5. Click
Update
.
F. Basic Video Analytics License
If Basic Video Analytics is to be used on this camera, then a camera license must be generated
and loaded to the camera. See
Basic Video Analytics Camera License
in the
User and
Installation Guide.
G. Attach to VMS
1. Use your VMS Discovery procedures to discover and attach the camera to your VMS.
2. Use VMS camera setup or camera Web Page access to verify camera orientation, video
settings, and focus.
If required, use camera web page to format SD card and set up SoE parameters
CB-3304/CB-3308 QIGv 4a
FLIR Systems, Inc.
Tel: +1-800-254-0632
6769 Hollister Ave.
Goleta, CA 93117
www.flir.com/security