16
ID 1/4” 18.0-EC-HD
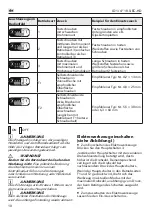
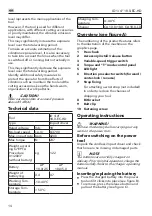
To select the drive control mode:
■
First, check the active mode. Either depress
and release the trigger switch or press the
drive control button or “T” button directly
without touching the trigger switch. The
LED indicator below the mode number
will illuminate to indicate the active mode
setting.
■
Press the drive-control button briefly (less
than 0.5 second) to cycle through the 3
modes. Each press changes one torque
level. See more details in the chart below.
To select the “T” mode:
■
Two methods are available to check the
current T mode:
Either depress and release the trigger switch
or press the drive-control button or the “T”
button directly without touching the trigger
switch.
The LED indicator below the mode number
will illuminate to indicate the current mode
setting.
Press the “T” button briefly (less than 0.5
seconds) to cycle between T1 and T2 modes.
Each press changes one mode. See more
details in chart below:
it indicator
displayed on panel
Woking
mode
Purpose
Example of application
1
Tightening when a good
finishing is needed
Tightening screws into sensitive
boards, such as plaster boards
2
Tightening with less
force and speed than
mode 3 (easier to
control than mode 3)
Driving screws into hard materials
as well as tightening bolts
3
Tightening with the
maximum force and
speed
Driving long screws into hard
materials, as well as tightening
bigger bolts than mode 2
TI
Driving self-tapping
screws into sheet metal
with good finish
Recommended type: #4.2x13 mm
Recommended type: #4.8x25 mm
T2
Driving self-tapping
screw into thick metal
with good finish
(handing tougher work
compare to T1 mode)
Recommended type:
#5,5x38 mm or 6.3x60 mm
ON OFF
Содержание 520756
Страница 1: ...ID 1 4 18 0 EC HD ID 1 4 18 0 EC HD IMPACT DRIVER ...
Страница 3: ...7 1 2 3 5 4 6 8 9 10 B 1 2 C A ...
Страница 4: ...D E F H G I ...
Страница 5: ...L K J ...
Страница 179: ......

