


GLEB Kitchen exhaust fan
12
A
ll
ri
g
h
ts
r
e
s
e
rv
e
d
.
V
e
rs
io
n
1
/2
0
1
3
©
F
lä
k
t
W
o
o
d
s
O
y
7.3 Replacing the motor
The fan has to be disconnected from the duct system
and mains before the motor can be replaced.
1. Check that the motor is disconnected from mains.
2. Open the cleaning hathc(es).
3. Measure the overlap between the impeller and
the inlet cone.
4. Open the impeller locking screw from the motor
shaft end and make sure that the impeller is
moving on shaft, if necessary use the extraction
tool.
5. Remove the motor bolts.
6. Remove the impeller from the shaft by pulling the
motor carefully backwards, take care that the
impeller remains in its place, securely supported
by the inlet cone and the hub.
7. Insert the new motor.
8. Insert the motor bolts.
9. Insert and tighten the impeller locking screw.
10. Check that the overlap is same as measured before and the impeller and the inlet cone are
precisely aligned.
11. Tighten the motor bolts.
12. Close the cleaning hathc(es).
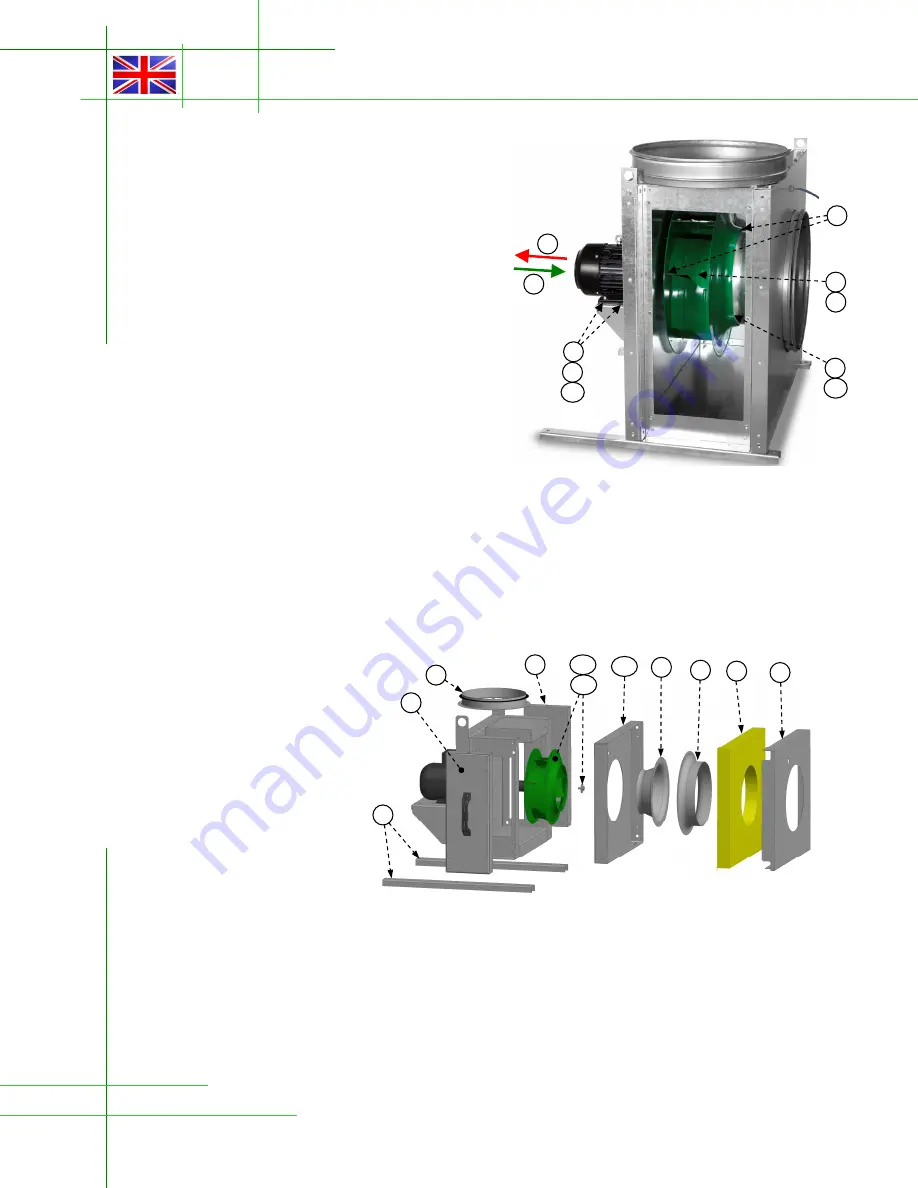
7.4 Replacing the impeller
The fan has to be disconnected from the duct system before the impeller can be replaced.
1. Check that the motor is disconnected from mains.
2. Open the cleaning hathc(es).
3. Measure the overlap between
the impeller and the inlet
cone.
4. Detach the outlet connection.
5. Detach the standing skids.
6. Detach the outer panel of
front plate.
7. Take out the insulation wool.
8. Detach the inlet connection.
9. Detach the inlet cone.
10. Detach the front plate, note
that there is a fire-resistant
sealing compound between
the front plate and the rest of
the casing
11. Open the impeller locking screw from the motor shaft end and pull out the impeller, if necessary
use the extraction tool.
12. Insert the new impeller and tighten the impeller locking screw.
13. Insert the rest of the parts in reversed order that they were dismantled.
Remember to renew the sealing of the casing with a fire-resistant sealing compound!
Remember to check that the overlap is same as measured before and the impeller and the inlet cone
are precisely aligned!
4
3
6
7
5
1 1
1 0
9
8
6
2
6
7
8
9
1 2
4
2
5
1 0
1 1


