


FLAIM Systems User Guide
Version 2
FLAIM Systems Pty Ltd
Copyright
©
2018
1
www.flaimsystems.com
Both SCBA sets should be launched using their respective FLAIM Set 1 and FLAIM Set 2
buttons on the iPad.
14.
Adding New/Replacement Hardware
This section should only be required if you need to replace a damaged piece of hardware.
FLAIM Trainer™kits ship fully paired to work out of the box.
Connecting new hardware is accomplished by using the mouse to hover over the green
‘Nozzle Connection Window’ at the bottom of the screen. Selecting Pair Nozzle, Pair Heat
Suit. Enables you to reselect a device. Please contact FLAIM for advice or updated
documentation before attempting this task as it should not be needed in normal operation.
14.1.
Re-pairing the tracking puck
If the nozzle tracking puck is accidently placed into pairing mode depicted by a blue flashing
LED or if the puck light remains blue during operation and the nozzle isn’t depicted in the
training scenario, it may need to be ’re-paired’ to establish connection with the FLAIM
Trainer™.
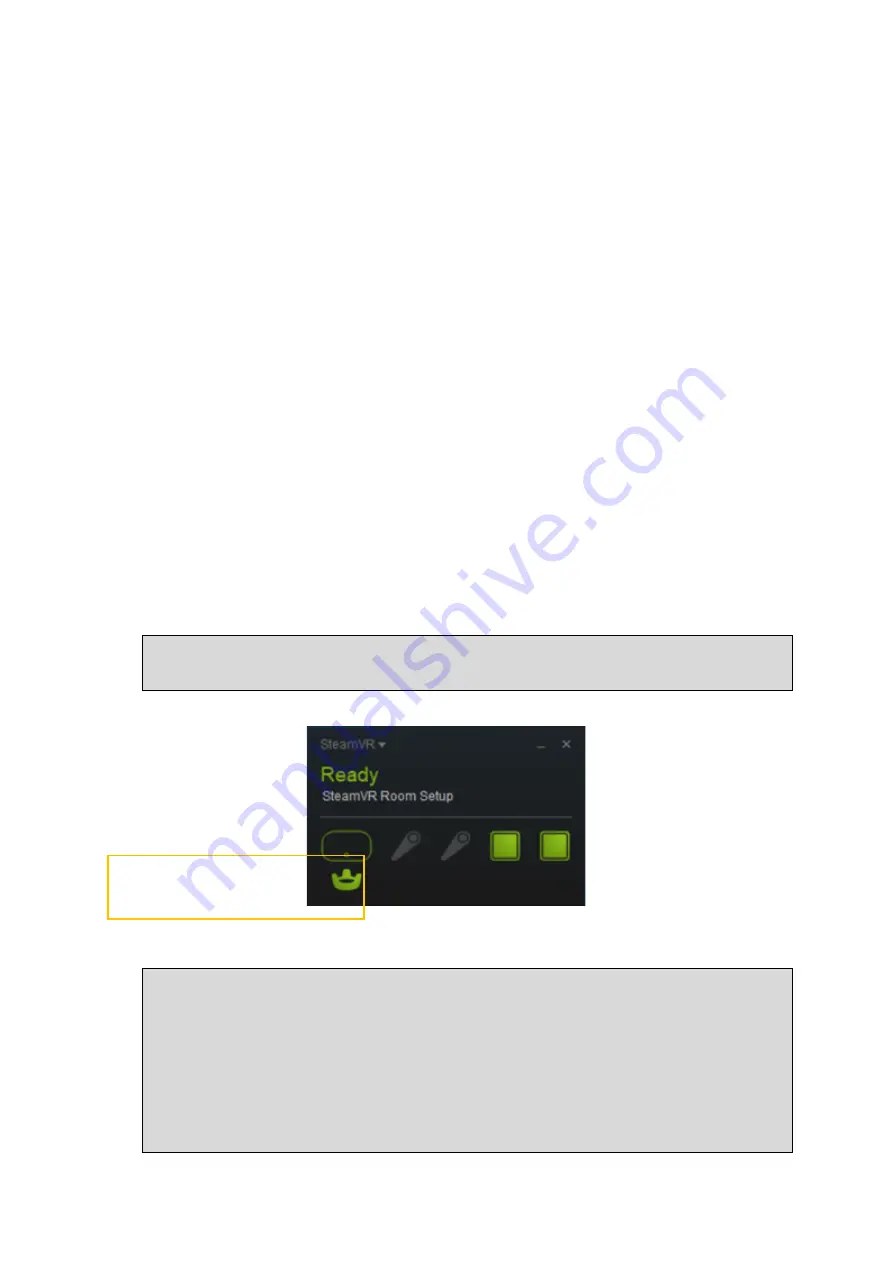
Step 1.
Using the mouse, right click on the SteamVR window (Figure 45)
and select Devices-Pair Controller.
Figure 45 SteamVR Software
Step 2.
Ensure that the tracking puck is charged and turned on (blue
light). Press and hold the power button again for 2 seconds and
the blue power light will start flashing indicating that it is in pairing
mode. Within a few seconds ‘Vive Controller Paired!’ (Figure 46)
should be displayed and the power light on the tracking puck
should be green. You can now click ‘Done’ and start your
scenarios.


