background image

ASSEMBLY  INSTRUCTION

AFTER SALES SUPPORT     

P8

PHONE:

  EMAIL:[email protected]   WEBSITE:fjkhomeproducts.com

855-965-5310

Storage:

Your new Gazebo was craft from steel and finished with a powder coat finish
to protect from rust. Please periodically inspect your new Gazebo for any 
scratches or chips and touch up with a paint for metal from your local hardware
store to insure many years of use.This product will rust if not protected.If you
are dismantling and storing your Gazebo after use,store in dry place wiping 
down and drying off all metal parts.

WARRANTY

This item is warranted to be free from defects in materials or  

   Workmanship for a period of 90 days.

FJK Home Products will not be responsible for weather related damages 
due to high winds and extreme weather conditions. 

CUSTOMER SERVICE

Email:[email protected]
Website:fjkhomeproducts.com

MADE IN CHINA

Содержание DWGO-26HDT

Страница 1: ...10 X10 STEEL GAZEBO MODEL DWGO 26HDT ASSEMBLY INSTRUCTION AFTER SALES SUPPORT P1 PHONE 855 965 5310 EMAIL customerservice fjkhomeproducts com WEBSITE fjkhomeproducts com...

Страница 2: ...F Part G 4 Pieces Part H 4 Pieces Part W Part J 1 Pieces Part K 1 Pieces Part L 1 Pieces Part M 12 Pieces Part N Part V 40 Pieces 20 Pieces Part P 32 Pieces Part Q 4 Pieces Part R 52 Pieces Part S 52...

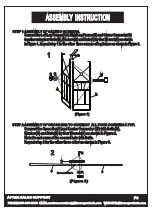
Страница 3: ...nect the Cross Bar C and Center Connector W with Bolts N Washer R and Nuts S by Hex Wrench U as shown in Figure 2 Note Do not connect the second hole with Bolts Repeat step 2 for the other three sides...

Страница 4: ...with Bolts N Washer R and Nuts S then connect Corner Connector G and Cross Bar C with Bolts N Washer R and Nuts S by Hex Wrench U as shown in Figure 3 E E E E H 4 Figure 4 STEP 4 Insert Corner Canory...

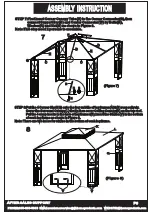
Страница 5: ...bling to avoid any bending or mishaps Figure 5 STEP 6 Connect Top Roof Tube F and Corner Canory Tube E by Bolts N Washer R and Nuts S as shown in Figure 6 E D F D E F D F F D E E Figure 6 F N S R H ST...

Страница 6: ...ut the 4 clasp hooks in the hole of leg frames B Insert the Stakes V in the bottom of each leg frame as shown in Figure 8 Note There are two holes for stakes in the bottom of each leg frame STEP 7 Fir...

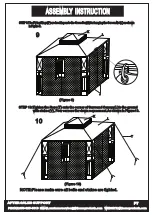
Страница 7: ...hooking on to the Cross Bar C for hanging the Screen Net J as shown in Figure 9 STEP 10 Tighten the Rope T onto the corner of Surround Canopy L to the ground with stakes V Four corners tier down requ...

Страница 8: ...from your local hardware store to insure many years of use This product will rust if not protected If you are dismantling and storing your Gazebo after use store in dry place wiping down and drying of...

Отзывы: