45242
EN User Manual
Soldering iron kit 30 W
- 3 -
Fixpoint
®
by Wentronic GmbH | Pillmannstraße 12
38112 Braunschweig | Germany
REV2016-10-20
V1.0
1
Safety Instructions
1.1
General
•
Read the user manual completely and carefully before use.
It is part of the product and contains important information for correct use.
•
Keep this user manual.
It must be available for uncertainties and passing the product.
Notes for network separation
The product has no power switch and may be used only in easily acces
sible outlets to quickly remove it in an emergency and after use.
Voltage-free only with pulled plug.
•
In case of emergency, during thunderstorms and after use,
pull the product on its plug housing!
Hot surfaces
The soldering tip and the front part of the soldering iron become hot
plugged-in.
•
Avoid proximity to flammable surfaces.
•
Disconnect the mains plug and allow it to cool down for a few
minutes.
•
For burns, hold the injured site under cold water for cooling,
consult a doctor and remove adhesives after hardening.
• Do not open the housing.
•
Do NEVER let the product unattended in use.
•
Compare the specifications of product, power supply and
peripherals. These must be identical.
Not meant for children.
•
Do not repair defective products by yourself, but contact the
dealer or producer.
•
Do not modify or alter product nor accessories.
•
Avoid stresses such as heat and cold, moisture and direct
sunlight, vibration and mechanical pressure.
•
Only use in dry ambience.
•
Risk of injury by stumbling and falling
•
Use only on stabil, non-slipping and horizontal surfaces.
1.2
Warning levels
Warnings against hazards that may result in
injuries
in case
of
non-observance.
Warnings against hazards that may result in
material
damage
in case of non-observance.
2
Description and Function
2.1
Soldering iron kit 30 W
This product is a set consisting of soldering iron, soldering iron holder, soldering tin,
soldering tip and soldering grease. It is used to produce conductive metal com-
pounds and serves as a simple alternative to the soldering station.
2.2
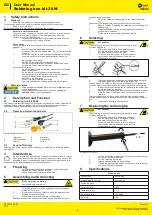
Operating elements and parts
2.2
Bedienelemente und Teile
1
2
3
2
4
5
6
Fig. 4:
Operating elements and parts
1 Lötkolben
2 Lötspitze
3 Lötkolbenhalter
4 Netzstecker
5 Lötzinn
6 Lötfett
2.3
Scope of Delivery
Soldering iron, soldering iron holder, soldering tin, soldering tip, soldering grease,
user manual
3
Intended Use
We do not permit using the device in other ways like described in chapter
Description and Function. Use the product only in dry interior rooms. Not
attending to these regulations and safety instructions might cause fatal
accidents, injuries, and damages to persons and property.
4
Preparing
•
Compare the specifications of product, power supply and
peripherals. These must be identical.
•
Check surfaces and plates for being stabil.
5
Assembling and Connecting
Risk of injury by stumbling
•
Lay the cables in a safe way.
1.
Turn the Y punch form of the soldering iron holder approxi-
mately 90° to the top.
2.
Place the soldering iron holder on a fire-resistant and non-
slipping, horizontal surface.
3.
Place the accessory as required on the surface.
Additional accessories such as other soldering tip sizes and a solder
sponge may be necessary.
4.
Select the soldering tip according to the size of the solder
joint.
If necessary, the appropriate size must be bought commercially.
5.
Refer to chapter “Replacing the soldering tip“ to changing the
soldering
tip.
6.
Prepare the solder joint by eliminating excess insulation,
grease, dirt or oxidation.
7.
Fix the parts to be soldered as best as possible.
6
Soldering
Hot surfaces
The soldering tip and the front part of the soldering iron get
hot when plugged-in.
•
Avoid close proximity to flammable surfaces.
•
Pull the mains plug before working on the unit
and allow to cool for a few minutes.
•
For burns, hold them under cold running water
to cool, seek medical advice and only remove
the adhesive to curing.
Fig. 5:
Soldering
1.
Touch the parts to be soldered with the heated soldering tip.
2.
Immediately apply some solder to the solder joint.
The flux cleans the solder so that the solder tin adheres in a better way.
It creates a good heat transfer, and the solder joint will quickly warm up.
3.
Always leave the soldering iron in contact with the solder joint
during the soldering process.
4.
Remove the soldering iron after the solder has been correctly.
5.
Allow the solder to cool down and don‘t burden them within
this
time.
The soldering grease is slightly acidic and should be used only when
oxidized solder brazing in addition, because the solder already contains
flux.
6.
Clean the soldering tip after each use.
7
Replacing the soldering tip
Hot surfaces
The soldering tip and the front part of the soldering iron get
hot when plugged-in.
•
Avoid close proximity to flammable surfaces.
•
Pull the mains plug before working on the unit
and allow to cool for a few minutes.
•
For burns, hold them under cold running water
to cool, seek medical advice and only remove
the adhesive to curing.
1.
2./3.
Fig. 6:
Replacing the soldering tip
1.
Loosen the Phillips head screws on the front of the soldering
iron with a Phillips screwdriver.
2.
Pull the soldering tip forward.
3.
Insert a different soldering tip as shown.
4. Tighten
the Phillips head screws on the front of the soldering
iron with a Phillips screwdriver.
8
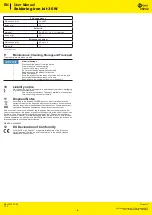
Specifications
Soldering iron
Connections
Safety plug
rated voltage (V~ @ Hz)
220-240, 50
Protection class
1
Protection level
IP20
Cable length (m)
~1.2
Dimensions (mm)
204 x Ø30
Weight (g)
168


