background image

9

16

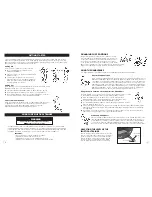
STEP 8 – Installing the Handlebars

a)

Connect the Vertical Tube Pulse Wire to 
the Left Handlebar Pulse Sensor Wire.

b)

Install the Left Handlebar into the Left
Swing Arm. Make sure to align the Bolt
Holes of the Left Handlebar with the Bolt
Holes of the Left Swing Arm.

c)

From the rear of the Elliptical, insert the 
two Carriage Bolts through the two holes.

d)

Install a Curved Washer, a Spring Washer,
and then an Acorn Nut onto each Bolt.
Make sure each Acorn Nut is tightened.

e)

Connect the Vertical Tube Pulse Wire with
the Right Handlebar Pulse Sensor Wire.

f)

Install the Right Handlebar into the Right
Swing Arm. Make sure to align the Bolt 
Holes of the Right Handlebar with the 
Bolt Holes of the Right Swing Arm.

g)

From the rear of the Elliptical, insert the two
Carriage Bolts through the two holes.

h)

Install a Curved Washer, a Spring Washer,
and then an Acorn Nut onto each Bolt.
Make sure each Acorn Nut is tightened.

Figure 8 – 

Install Handlebars

STEP 7 – Attaching the Monitor

a)

Remove the Bolts from the rear 
of the Monitor (see 7a).

b)

Put the Wires from the rear of the
Monitor into the large hole of the
Monitor Plate. Then insert the Bolts
through the Monitor Plate into the
Monitor.

c)

Connect the Monitor Wire to the
Vertical Tube Wire.

d)

Connect the Monitor Pulse Wires to 
the Vertical Tube Pulse Wires.

e)

Insert the Monitor Plate into the
Vertical Tube. Align the Bolt holes 
after inserting Monitor Mount (see 7b).

f)

Insert and tighten two Phillips Bolts
into the holes.

Figure 7a & b – 

Install Monitor

stationary

bar

monitor

monitor

monitor

mount

monitor plate

monitor pulse wires

monitor wire

M5 x 16mm phillips bolt

M5 x 10mm phillips bolt

vertical tube wire

vertical tube pulse wires

right swing

arm

right 

handlebar

M8 x 50mm

carriage bolt

pulse sensor wire

vertical tube 

pulse wire

vertical tube

pulse wire

pulse sensor

wire

left

handlebar

left swing arm

M8 curved 

washer

M8 acorn

nut

M8 spring

washer

7a

7b

PROGRAM 1

VALLEY

PROGRAM 3

FAT BURN

PROGRAM 4

RAMP

PROGRAM 5

FITNESS TEST

PROGRAM 6

ROTATING

PROGRAM 2

MANUAL

PROGRAM 9

PROGRAM 12

TARGET HEART RATE

85% HEART RATE

PROGRAM 8

PROGRAM 10

60% HEART RATE

PROGRAM 11

75% HEART RATE

INTERVALS

PROGRAM 7

BODY FAT PROGRAM

Program Profiles

FRONT

REAR

Содержание Eclipse 1175e

Страница 1: ...cturer s instructions See Limited Warranty Card for details Save your sales receipt You may wish to staple it into this manual Dedication to Quality 8 8 06 OWNER S MANUAL FOR MAXIMUM EFFECTIVENESS AND SAFETY PLEASE READ THIS OWNER S MANUAL BEFORE USING YOUR ECLIPSE 1175e Elliptical Trainer 1175e Elliptical Trainer ...

Страница 2: ...n Stretches 21 22 Care Storage of Your Elliptical Trainer 23 Workout Progress Charts 24 2006 Fitness Quest Inc All rights reserved Made in China Fitness Quest Eclipse and OLS are registered trademarks of Fitness Quest Inc 8 8 06 TABLE OF CONTENTS 24 WORKOUT PROGRESS CHARTS Use the charts below to keep track of your progress over time Before writing on them make as many copies as you think you ll n...

Страница 3: ... objects on or near this equipment when in use by others 15 Always use this equipment on a level surface 16 Never operate the equipment if the equipment is not functioning properly 17 Start exercise slowly and gradually increase the amount of resistance 18 If the user experiences dizziness nausea chest pain or any other abnormal symptoms stop exercise at once and consult a physician immediately 19...

Страница 4: ...onds Repeat for the opposite leg 6 Buttocks Hips and Abdominal Stretch Lay flat on your back with your hips relaxed against the floor Bend one leg at the knee Keeping both shoulders flat on the floor gently grasp the bent knee with your hands and pull it over your body and towards the ground You should feel a stretch in your hips abdominals and lower back Hold for 20 to 30 seconds and release Repe...

Страница 5: ...RATULATIONS ON PURCHASING YOUR ECLIPSE 1175e ELLIPTICAL TRAINER INTRODUCTION 21 Stretches can help improve flexibility and relieve the tightness in muscles that results from repetitive sport movements that require a limited range of motion like elliptical striding 10 to 12 minutes of daily stretching is recommended This can be done when warming up or cooling down When performing these stretches yo...

Страница 6: ...m allen wrench multi T tool with phillips screwdriver 2 PCS M10 flat washers for swing arm 2 PCS M10 nylon nuts for swing arm HEART RATE TARGET ZONE FOR CARDIOVASCULAR FITNESS TABLE 1 Maximum Attainable Heart Rate 85 Target Zone 70 Target Zone Heart Rate Beats Min 20 25 30 35 40 45 50 55 60 65 70 75 80 200 190 180 170 160 150 140 130 120 110 100 195 165 136 190 161 133 185 157 129 180 153 129 175 ...

Страница 7: ...se within five seconds after interrupting exercise because it starts to go down once you stop moving Count pulse for 10 seconds and multiply by six to get the per minute rate Remember your elliptical trainer also comes with pulse sensors located on the dual action handlebars When used properly the unit pulse sensors can help you to determine your estimated heart rate To do so a Push the START butt...

Страница 8: ...f total body stretches COOL DOWN a minimum of 5 10 minutes of slow walking or lower intensity elliptical exercise combined with stretching AEROBIC EXERCISE HOW MUCH HOW OFTEN Experts recommend that you do some form of aerobic exercise at least three times a week for a minimum of 20 continuous minutes Of course if that is too much start with a shorter time span and gradually build up to the minimum...

Страница 9: ...ately Consult your physician before continuing Pregnant Balance Impairment Taking medications that affect heart rate KNOWING THE BASICS Physical fitness is most easily understood by examining its components or parts There is widespread agreement that these five components comprise the basics of physical training CARDIORESPIRATORY ENDURANCE the ability to deliver oxygen and nutrients to tissues and...

Страница 10: ...m the rear of the Monitor see 7a b Put the Wires from the rear of the Monitor into the large hole of the Monitor Plate Then insert the Bolts through the Monitor Plate into the Monitor c Connect the Monitor Wire to the Vertical Tube Wire d Connect the Monitor Pulse Wires to the Vertical Tube Pulse Wires e Insert the Monitor Plate into the Vertical Tube Align the Bolt holes after inserting Monitor M...

Страница 11: ...AC adapter input Figure 9 AC Adapter Assembly is now complete IMPORTANT Please read pages 12 13 before beginning your workout for important instructions on how to use your elliptical trainer RECOVERY FUNCTION During a workout this button can be pressed to activate a resting period for 1 minute The program will automatically go into Recovery if you exceed the pulse rate that was entered before the ...

Страница 12: ...P Increases the value of a selected workout parameter During the workout it will increase the resistance load 4 ENTER To input desired value or workout mode 5 TEST Press to enter into Recovery function when the Monitor has the heart rate value Recovery is Fitness Level 1 6 after one minute F1 is the best and F6 is the worst 6 MODE Press to switch display from RPM to SPEED and ODO to DIST during wo...

Страница 13: ...t will decrease the amount of work in your upper body and increase the amount of work in your lower body CHANGING FOOT POSITIONS The generously sized foot platforms are 7 wide by 16 long which provides workout stability and allows you to vary your foot position for different workout intensities Begin with your feet in the most forward position and then move your feet to the position that feels mos...

Отзывы: