


W5541pr
-0721
10
Troubleshooting • Solución de problemas • Guide de dépannage
Î
service.fi sher-price.com
ASSEMBLY MONTAJE ASSEMBLAGE
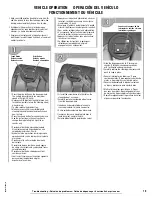
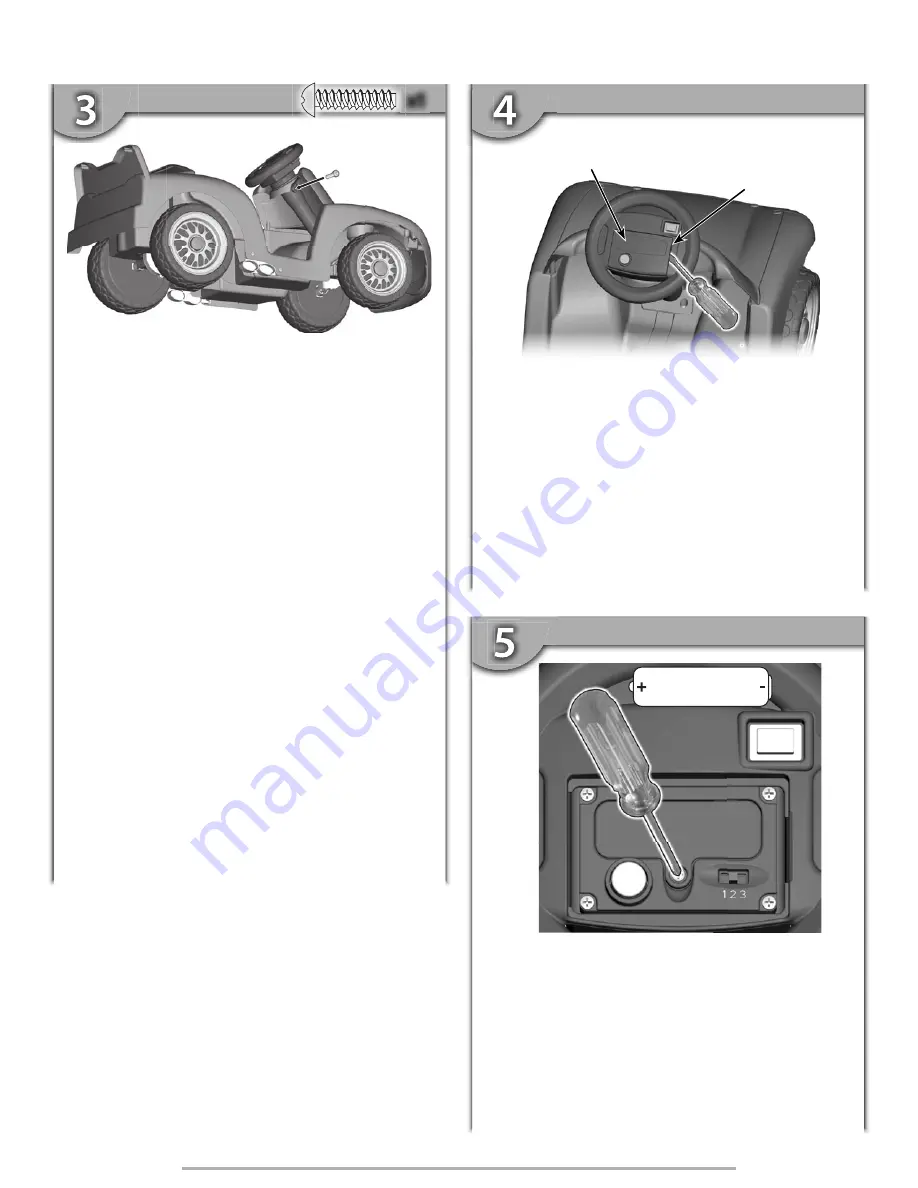
• Turn the steering wheel slightly to access the hole in the
side of the steering column.
• Insert a #8 x ¾" (1,9 cm) screw into the hole on the side
of the steering column. Tighten the screw with a Phillips
screwdriver. Do not over-tighten.
Hint:
For your convenience, there is a hole in each side of
the steering column and an extra #8 x ¾"
1,9 cm screw. You
will only need to use one screw on one side of the steering
column to fasten the steering wheel.
• Girar ligeramente el volante para lograr acceso al orificio del
lado de la columna de mando.
• Insertar un tornillo
№
8 x (1,9 cm) en el orificio del lado
de la columna de mando. Apretar el tornillo con un
desatornillador de cruz. No apretar en exceso.
Atención:
para su conveniencia, hay un orificio en cada lado
de la columna de mando, así como un tornillo
№
8 x 1,9 cm
adicional. Solo es necesario usar un tornillo en un lado de la
columna de mando para ajustar el volante.
• Tourner légèrement le volant pour accéder au trou situé sur
le côté de la colonne de direction.
• Insérer une vis nº 8 de 1,9 cm dans le trou de la colonne de
direction. Serrer la vis avec un tournevis cruciforme. Ne pas
trop serrer.
Remarque :
Il y a un trou de chaque côté de la colonne
de direction, et une vis supplémentaire nº 8 de 1,9 cm est
fournie. Il est nécessaire d’insérer seulement une vis sur un
côté de la colonne de direction pour assembler le volant.
SIDE VIEW
VISTA DEL LADO
VUE DE CÔTÉ
DASH VIEW
VISTA DEL TABLERO
VUE DU TABLEAU DE BORD
Steering Wheel Cover
Tapa del volante
Garniture du volant
Slot
Ranura
Fente
• Fit a slotted screwdriver into the slot on the steering wheel,
as shown.
• Carefully remove the steering wheel cover from the
steering wheel.
• Introducir un destornillador de cabeza plana en la ranura del
volante, tal como se muestra.
• Quitar cuidadosamente la tapa del volante.
• Insérer un tournevis à pointe plate dans la fente du volant,
comme illustré.
• Enlever délicatement la garniture du volant.
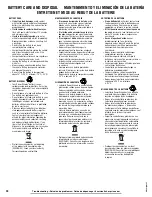
• Loosen the screw in the battery compartment door with
a Phillips screwdriver. Remove the door.
• Insert an "AA" (LR6)
alkaline
battery.
Hint:
We recommend using an
alkaline
battery for longer
battery life.
• Replace the battery compartment door and tighten the screw.
• Fit the steering wheel cover on the steering wheel and push
to snap in place.
• If the sound box begins to operate erratically, you may need
to reset the electronics. Remove the battery and replace it.
• When sounds become faint or stop, it’s time for an adult to
change the battery.
1,5V x 1
“AA” (LR6)
x1


