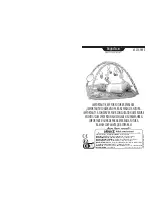
manualshive.com logo in svg
background image

3

WARNING

ADVERTENCIA

FALL HAZARD

Babies can 

FALL

 from product resulting in head injuries.

• NEVER leave child unattended. Always keep child in view while in product.
• NEVER use near stairs.
• To avoid tip over, place product on a flat, level surface.

STRANGULATION HAZARD

Strings can cause 

STRANGULATION

.

• DO NOT place items with a string around child’s neck, such as hood strings or 

pacifier cords.

• DO NOT suspend strings over product or attach strings to toys.
• 

Bounce & Explore Mode: 

Use only for a child who is able to hold head upright 

unassisted and who is not able to walk or climb out of product.

PELIGRO DE CAÍDAS

Los bebés se pueden 

CAER

 del producto, lo que podría provocar lesiones en 

la cabeza.
• NO dejar al niño fuera de su alcance. Siempre mantener al niño a la vista mientras 

esté en el producto.

• NUNCA lo utilices cerca de escaleras.
• Para evitar que el producto se voltee, ponlo sobre una superficie plana y nivelada.

PELIGRO DE ESTRANGULAMIENTO

Los cordones pueden causar 

ESTRANGULACIÓN

.

• NO poner artículos con cordones, tales como capuchas o chupones, alrededor del 

cuello del niño.

• NO colgar cordones sobre el producto ni amarrar cordones a los juguetes.
• 

Modo salta y explora: 

Úsala solo con niños que puedan mantener la cabeza 

derecha sin ayuda y que no puedan caminar ni salirse del producto.

Содержание GPN16

Страница 1: ...ASSEMBLY AND USE GUIDE GU A DE MONTAJE Y USO GPN16...

Страница 2: ...ayuda y no debe poder caminar ni salirse del producto Modo estaciona y juega Para ni os de 6 a 36 meses Adult assembly is required Phillips screwdriver not included required for assembly Product feat...

Страница 3: ...o is not able to walk or climb out of product PELIGRO DE CA DAS Los beb s se pueden CAER del producto lo que podr a provocar lesiones en la cabeza NO dejar al ni o fuera de su alcance Siempre mantener...

Страница 4: ...package and identify them before assembly Some parts may be packed in the pad IMPORTANTE Sacar todas las piezas del empaque e identificarlas previo al montaje Algunas piezas pueden venir embaladas en...

Страница 5: ...5 ASSEMBLY MONTAJE 1 2 PRESS PRESIONAR PRESS PRESIONAR PRESS PRESS PRESIONAR PRESIONAR PRESS PRESIONAR PRESS PRESIONAR...

Страница 6: ...tabs on the side of the pad to the matching pegs Coloca la almohadilla del asiento con las leng etas rojas apuntando hacia ti y la silla saltarina con las etiquetas de instrucciones tambi n apuntando...

Страница 7: ...maining four tabs on the seat pad to the pegs on the seat ring Voltea la silla saltarina de modo que el frente apunte hacia ti Conecta las cuatro leng etas restantes de la almohadilla en las clavijas...

Страница 8: ...8 ASSEMBLY MONTAJE 6 7 x 4...

Страница 9: ...9 ASSEMBLY MONTAJE 8...

Страница 10: ...10 DECORATION DECORACI N 1 2 5 8 3 4 7 10 6 9...

Страница 11: ...arbon zinc or rechargeable Insert batteries as indicated inside the battery compartment and Remove batteries during long periods of non use Always remove exhausted batteries from the product Dispose o...

Страница 12: ...a de almacenamiento en la parte inferior del veh culo Position the car under the jumperoo seat Insert the 2 tabs on the front of jumperoo seat into the openings in the front of the car Coloca el veh c...

Страница 13: ...BOUNCE EXPLORE MODE MODO SALTA Y EXPLORA 3 Lift the back of the car until it snaps onto the jumperoo seat Levanta la parte posterior del veh culo hasta que haga clic en el asiento de la silla saltari...

Страница 14: ...not touching the floor at all adjust the height to any of three positions one for the smallest child and three for the tallest child Con el veh culo acoplado a la silla saltarina coloca al beb en el...

Страница 15: ...las capas de malla y ajusta la barra del cintur n en la ranura que quieras Atenci n Quiz sea necesario meter el cintur n del interior de la conexi n para poder meter la barra del cintur n en la ranur...

Страница 16: ...6 SEAT HEIGHT ADJUSTMENT AJUSTE DE ALTURE DE LA SILLA 6 Pull the strap on the inside of the hub to remove any slack Jala el cintur n al interior de la conexi n para que no quede ning n segmento suelto...

Страница 17: ...ward to release the car from the jumperoo seat Tira ambos seguros hacia afuera para liberar el veh culo del asiento de la silla saltarina 1 2 Lower the back of the car until it rests on the floor Baja...

Страница 18: ...at then set the car on the floor Tira del veh culo hacia delante hasta que se suelte del asiento de la silla saltarina y coloca el veh culo en el suelo Place the shape sorter tray on top of the car Co...

Страница 19: ...lors and opposites along with fun sounds music and lights Level 2 Explore 6M This level is designed for the Park Play mode Press the horn to hear colorful flavors of ice cream Explore fun phrases abou...

Страница 20: ...y sonidos divertidos Nivel 2 Explora de 6 meses en adelante Este nivel est dise ado para el modo Estaciona y juega Presiona la bocina para escuchar los extravagantes sabores de los helados Explora fr...

Страница 21: ...TS AND SOUNDS SI NTATE Y EXPLORA A TUS ALREDEDORES CON M SICA LUCES Y SONIDOS Remove the sweet treats to sort them in the door shape sorter or puzzle tray Quita las golosinas y ord nalas en el clasifi...

Страница 22: ...eh culo y los juguetes con un pa o humedecido en una soluci n limpiadora No uses blanqueador No uses limpiadores fuertes o abrasivos Enjuaga con agua para eliminar el residuo de jab n No sumerjas el j...

Страница 23: ...puede causar interferencia da ina a radiocomunicaciones Sin embargo no hay ninguna garant a de que no haya interferencia en una instalaci n particular Si este equipo llega a causar interferencia da in...

Страница 24: ...ura Santiago Tel 1230 020 6213 VENEZUELA Servicio al consumidor Venezuela Tel 0 800 100 9123 ARGENTINA Mattel Argentina S A Av Libertador 1000 Piso 11 Oficinas 109 y 111 Vicente L pez Prov Buenos Aire...

Отзывы: