background image

Р8 Ð

SUMMARY OF KEYPAD FUNCTIONS

1.

DISPLAY WINDOW:

 Displays protection zone ID

and system status messages.

2.

1

OFF KEY


:

 Disarms burglary portion of the sys-

tem, silences alarms and audible trouble
indicators, and clears visual display after
problem's correction.

3.

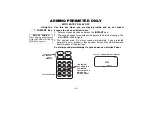
2

AWAY KEY


:

 Arms the entire burglary system,

perimeter and interior.

4.

3

STAY KEY


:

 Arms perimeter portion of burglary

system only. Interior protection is not armed,
which allows movement within premises without
causing alarm.

5.

4

MAXIMUM KEY


:

 Arms in manner similar to

AWAY mode, but without the entry delay feature,
thus providing maximum protection. An alarm will
occur immediately upon opening any protection
point, including the main door.

6.

5

TEST KEY


:

 Tests the system and alarm

sounder if disarmed. Refer to 

TESTING THE

SYSTEM

 section for test procedures.

7.

6

BYPASS KEY


:

 Removes individual protection

zones from being monitored by the system.

8.

7

INSTANT KEY


:

 Arms in manner similar to

STAY mode, but without the entry delay feature.
Entering via the main door will cause an instant
alarm.

9.

8

CODE KEY


:

 Used to assign additional user

codes for other users of the system.

10.

9

CHIME KEY


:

 Turns CHIME mode on and off.

When on, the opening of windows or doors while
the system is disarmed will sound 3 beeps at the
keypad(s).

11.

R E A D Y


K E Y :

 Displays all open protection

zones.

12.

#

KEY:

 "Quick Arm" key permits ARMING of the

system without use of a security code (if so
programmed).

13.

KEYS 0Ð9:

 Used to enter your security code(s).

14.

READY INDICATOR:

 (GREEN) Lit when the system

is ready to be armed (no faults present). While the
system is disarmed, this indicator will go on and off as
protection zones are closed and opened.

Note:

 On some keypads (Style A) there is, instead, a

POWER INDICATOR 

(GREEN) which is lit when AC

power is present. If the indicator is off, the system may still
be operating, but on its backup battery power. See 

Power

Failure

 in 

TROUBLE CONDITIONS

 section.

N o t e : Keys   1    through    9    each perform their

associated companion functions (OFF, AWAY, STAY, etc.)
when preceded by an entry of the security code (as
described later).

Содержание FA120C

Страница 1: ...USER S MANUAL FA120C Security System N5100 3V3 9 96 Previous Menu ...

Страница 2: ...e 10 Quick Arming 10 Assigning Changing Deleting User Codes Using the 8 CODE Key 11 ENTRY EXIT DELAYS 12 CHECKING FOR OPEN ZONES Using the READY Key 13 BYPASSING PROTECTION ZONES 14 Using The 6 BYPASS Key 14 Quick Bypass 15 ARMING PERIMETER ONLY WITH ENTRY DELAY ON Using The 3 STAY Key 16 ARMING PERIMETER ONLY WITH ENTRY DELAY OFF Using The 7 INSTANT Key 17 ARMING ALL PROTECTION WITH ENTRY DELAY O...

Страница 3: ...GUIDE TO ALARM SYSTEM FUNCTIONS 33 SUMMARY OF AUDIBLE VISUAL NOTIFICATIONS 34 PROTECTION ZONES LIST 35 OWNER S INSURANCE PREMIUM CREDIT REQUEST 37 CANADIAN DEPARTMENT OF COMMUNICATIONS DOC STATEMENT 39 FEDERAL COMMUNICATIONS COMMISSION FCC STATEMENTS 40 IN THE EVENT OF TELEPHONE OPERATIONAL PROBLEMS 41 THE LIMITATIONS OF THIS ALARM SYSTEM 42 SERVICING INFORMATION 43 WARRANTY Back Cover This manual...

Страница 4: ...e early warning in case of fire Your system may also have been pro grammed to automatically transmit alarm or status messages over the phone lines to a central alarm monitoring station Keypads Your keypads allow you to control all system functions and feature a telephone style digital keypad and a Liquid Crystal Display LCD that shows the nature and location of all occurrences and a built in sound...

Страница 5: ...rglary alarm conditions and sound an alarm Your system can be armed in one of four modes STAY AWAY INSTANT and MAXIMUM Refer to the ARMING THE SYSTEM sections for instructions in using these modes of operation Your system also provides a CHIME mode for alerting you to the opening and closing of doors and windows while the system is disarmed Memory Of Alarm When an alarm or trouble condition occurs...

Страница 6: ... display window differs slightly with each style Note Style B keypads are equipped with a READY indicator in place of the POWER indicator on style A keypads The READY indicator is lit when the system is ready for arming no protection zones open While the system is disarmed this indicator will go on and off as protection zones are opened and closed STYLE A FIXED WORD KEYPADS STYLE B FIXED WORD KEYP...

Страница 7: ...e is ON 00 ALARM CHECK FIRE AWAY STAY INSTANT BYPASS NO AC CHIME BAT NOT READY 00 00 STYLE A KEYPAD DISPLAY 00 ALARM FIRE AWAY BYPASS STAY CHECK INSTANT NO AC NOT READY CHIME BAT 00 STAY FIRE ALARM AWAY STYLE B KEYPAD DISPLAY BAT Low system battery if no zone number is shown or Low battery condition in a wireless sensor if zone number is also shown ALARM Appears when an intrusion has been detected...

Страница 8: ...r similar to STAY mode but without the entry delay feature Entering via the main door will cause an instant alarm 9 8 CODE KEY Used to assign additional user codes for other users of the system 10 9 CHIME KEY Turns CHIME mode on and off When on the opening of windows or doors while the system is disarmed will sound 3 beeps at the keypad s 11 READY KEY Displays all open protection zones 12 KEY Quic...

Страница 9: ...or emergency functions Ê Ê Ê Ê Ê Ê Ê 1 Ê Ê Ê Ê 3 Ê Some or all of these keys pairs may be programmed for panic functions by your installer see PANIC KEYS section IMPORTANT When entering codes and commands sequential key depressions must be made within 2 seconds of one another If 2 seconds elapses without a key depression the entry is aborted and must be repeated from its beginning ARMED READY Prof...

Страница 10: ... if Duress is active for your system and if so check here Ê Ê Ê This feature is intended for use when you are forced to disarm or arm the system under threat When used the system will act normally but can silently notify the central station of your situation if that service has been provided The Duress code is defined as user number 8 Important The Duress code is useful only when connected to a ce...

Страница 11: ...se by that User Number The keypad will beep once If deleting a user s code perform steps 1 2 and stop In a few moments the keypad will beep once indicating that the existing code has been deleted To assign your Duress code do the following Enter your Master code 8 8 desired 4 digit code The keypad will beep once The Master code can be changed by the main user of the system To change it do the foll...

Страница 12: ...The system must be disarmed however before the entry delay period ends or an alarm will occur The keypad will beep slowly during the entry delay period reminding you to disarm the system You can also arm the system with no entry delay at all by using either INSTANT or MAXIMUM arming modes These modes can provide greater security while you are sleeping or while you are away for extended periods of ...

Страница 13: ... easier for you to secure any open zone To display faulted zones simply press and release the READY key do not enter code first Secure or bypass the zones displayed before arming the system A Ready message will be displayed when all protection zones have been either closed or bypassed and the keypad s READY indicator light if present will be lit A B C D OFF AWAY STAY MAXIMUM TEST BYPASS INSTANT CO...

Страница 14: ... 13 etc Single digit zone numbers must be preceded by a zero e g 05 06 3 When finished the keypad will display a Bypass message along with each bypassed zone number accompanied by a beep for each Wait for these zones to be displayed to confirm their bypass 4 Arm the system as usual Bypassed zones are unprotected and will not cause an alarm if violated while your system is armed A B C D OFF AWAY ST...

Страница 15: ...o automatically bypass all open faulted zones without having to enter zone numbers in dividually To use this feature enter your security code press the BYPASS key then stop In a few moments all open zones will be displayed along with a Bypass message Wait for all bypassed zones to be displayed then arm the system as usual AC BYPASS READY THE SYSTEM CAN NOW BE ARMED WITH ZONES BYPASSED ...

Страница 16: ...ights 3 The system arms An alarm sounds immediately if a protected perimeter window or non entry exit door is then opened but you may otherwise move freely throughout the premises Later arrivals can enter through an entry exit door without causing an alarm but they must disarm the system within the entry delay period to avoid sounding an alarm A B C D OFF AWAY STAY MAXIMUM TEST BYPASS INSTANT CODE...

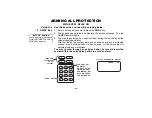
Страница 17: ...isplays the armed message The red ARMED indicator lights 3 The system arms An alarm sounds immediately if any protected perimeter door or window is then opened but you may otherwise move freely throughout the premises An alarm sounds immediately if anyone opens an entry exit door A B C D OFF AWAY STAY MAXIMUM TEST BYPASS INSTANT CODE CHIME READY 1 2 3 4 5 6 7 8 9 0 THESE KEYS NOT PRESENT ON ALL KE...

Страница 18: ... exit delay period without causing an alarm After exit delay the system arms and sounds an alarm if a protected window or non entry exit door is then opened or if any movement is detected inside your premises You may reenter through an entry exit door but must disarm the system within the entry delay period to avoid an alarm A B C D OFF AWAY STAY MAXIMUM TEST BYPASS INSTANT CODE CHIME READY 1 2 3 ...

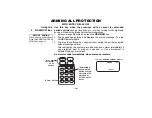
Страница 19: ...splays the armed message The red ARMED indicator lights 3 You may leave through an entry exit door during the exit delay period without causing an alarm After exit delay the system arms and sounds an alarm immediately if any protected door or window is opened or if any movement is detected inside your premises An alarm sounds immediately when someone reenters A B C D OFF AWAY STAY MAXIMUM TEST BYP...

Страница 20: ...he keypad will emit a single tone to confirm that the system is disarmed To Silence a Burglary Alarm SEE IMPORTANT NOTE AT LEFT Enter your security code and press the OFF key to silence the alarm or warning tones of a Memory of Alarm Note the zone in alarm on the keypad display and make that zone intact close door window etc Now enter the security code plus OFF sequence again to clear the keypad s...

Страница 21: ...d to right for more than one second The keypads will beep twice AWAY mode or 3 times STAY mode and the keyswitch light will flash rapidly Disarming To disarm the system turn the key to the right and release If an alarm has occurred during the armed period the keyswitch s light will not flash on disarming thus indicating memory of an alarm Turning the keyswitch key to the right a second time after ...

Страница 22: ... for at least two seconds or Press both keys of an active pair at the same time Your system may have been programmed to use special keys or combi nations of keys to manually activate emergency panic functions The functions that might be programmed are Silent Emergency Audible Emergency Personal Emergency and Fire A silent emergency will send a silent alarm signal to the central station but there w...

Страница 23: ... T I O N NUMBER ÊÊÊ A SILENT EMERGENCY Fixed Function 95 ÊÊÊ B ____SILENT ____AUDIBLE ____PERSONAL ____FIRE 07 SEE YOUR INSTALLER ÊÊÊ C AUDIBLE EMERGENCY Fixed Function 96 AND NOTE HERE OR THE KEY S FUNCTION S ÊÊÊ 1 SILENT EMERGENCY Fixed Function 95 PROGRAMMED ÊÊÊ ____SILENT ____AUDIBLE ____PERSONAL ____FIRE 07 FOR YOUR SYSTEM ÊÊÊ 3 AUDIBLE EMERGENCY Fixed Function 96 KEYS A B AND C ARE NOT PRESE...

Страница 24: ...40 seconds as a reminder that the system is in the test mode Each time a protection zone is faulted the external siren or bell should sound for one second and then turn off while the keypad sounds 3 beeps If this does not happen call for service immediately 4 Open and close each protected door and window in turn and listen for the required sounds The identification of each faulted protection point...

Страница 25: ... detector should appear on the display when each is activated 7 After all protection points have been checked and restored there should be no zone identification numbers displayed If a problem is experienced with any protection point no confirming sounds no display CALL FOR SERVICE IMMEDIATELY 8 Turn off the Test mode by entering the security code and pressing the OFF key ...

Страница 26: ... and requires your attention If the CHECK display relates to a fire zone CALL FOR SERVICE IMMEDIATELY Determine if the zone s displayed are intact and make them so if they are not If the problem has been corrected the display can be cleared if you enter the OFF sequence user code plus OFF key twice If the display persists CALL FOR SERVICE IMMEDIATELY 2 If there are wireless sensors in your system ...

Страница 27: ...e battery yourself or CALL FOR SERVICE If the battery is not replaced within 30 days a CHECK display may occur Power Failure If there is no keypad display at all and the POWER indicator if present is not lit operating power for the system has stopped and the system is inoperative CALL FOR SERVICE IMMEDIATELY If the message AC LOSS or NO AC is displayed and the POWER indicator if present is off the...

Страница 28: ...ral station for change of function or status verification If this message persists for more than 10 minutes CALL YOUR SERVICE COMPANY FC A communication failure has occurred CALL FOR SERVICE IMMEDIATELY OC The keypad is not receiving signals from the control panel and sees an open circuit If this message persists for more than 10 minutes CALL YOUR SERVICE COMPANY FOR SERVICING INFORMATION SEE PAGE...

Страница 29: ...ce the alarm In Case Of Fire Alarm 1 Should you become aware of a fire emergency before your detectors sense the problem go to your nearest keypad and manually initiate an alarm by pressing the panic key pair assigned as FIRE emergency if programmed by the installer as indicated on page 23 2 Evacuate all occupants from the premises 3 If flames and or smoke are present leave the premises and notify...

Страница 30: ...fter the second OFF sequence press the READY key to display the zone s that are faulted Be sure to check that smoke detectors are not responding to smoke or heat producing objects in their vicinity Should this be the case eliminate the source of heat or smoke 3 If this does not remedy the problem there may still be smoke in the detector Clear it by fanning the detector for about 30 seconds 4 When ...

Страница 31: ...tection Smoke Detectors for Additional Protection Heat Activated Detectors Early warning fire detection is best achieved by the installation of fire detection equipment in all rooms and areas of the premises as follows A smoke detector installed outside of each separate sleeping area in the immediate vicinity of the bedrooms and on each additional story of the family living unit including basement...

Страница 32: ... plan of the building Show windows doors stairs and rooftops that can be used to escape Indicate escape routes for each room Keep these routes free from obstruction and post copies of the escape routes in every room 4 Assure that all bedroom doors are shut while you are asleep This will prevent deadly smoke from entering while you escape 5 Try the door If the door is hot check your alternate escap...

Страница 33: ...il cleared Memory of Alarm remains until cleared Determine cause See Page 26 Disarm System Enter code Press OFF key Also silences sounders Memory of alarm remains until cleared Clear Alarm Memory After disarming enter code again Press OFF key again Keypad will beep rapidly upon entry if alarm has occurred Alarm display will remain upon disarming until cleared Duress if connected to central station...

Страница 34: ...nly a LOW BATTERY AT XMTR b TROUBLE a BAT displayed with ID number of transmitter b CHECK displayed Troubled protection zone is displayed TWO SHORT BEEPS Keypad only ARM AWAY OR MAXIMUM AWAY and if MAXIMUM INSTANT are displayed THREE SHORT BEEPS Keypad only a ARM STAY OR INSTANT b ZONE OPENED WHILE SYS TEM IS IN CHIME MODE c ZONE OPENED WHILE SYS TEM IS IN TEST MODE a STAY and if INSTANT INSTANT a...

Страница 35: ...assigned by the installer see Page 23 Zone numbers 08 and 09 are reserved for Duress and Tamper signal reporting to the central station This chart may be used to record the specific zone number assignments for your system Your installer will assist you in recording this information PROTECTION ZONE DESCRIPTIONS Zone Description Zone Description Zone Description Zone Description 01 17 34 51 02 18 35...

Страница 36: ...Ð36Ð Ð NOTES Ð ...

Страница 37: ...FA120C Type of Alarm Ê Ê Burglary Ê Ê Fire Ê Ê Both Installed by _________________________________ Serviced by ___________________________________ name name ________________________________ ___________________________________ address address B NOTIFIES Insert B for Burglary F for Fire where appropriate Local Sounding Device________ Police Dept ________ Fire Dept _______ Central Station ________ Na...

Страница 38: ...Ê All Accessible Openings Including Skylights Air Conditioners and Vents G ADDITIONAL PERTINENT INFORMATION _________________________________________________________________________________________ _________________________________________________________________________________________ _________________________________________________________________________________________ ______________________...

Страница 39: ... certifie que le matŽriel est conforme ˆ certaines normes de protection d exploitation et de sŽcuritŽ des rŽseaux de tŽlŽcommunications Le minist re n assure toutefois pas que le matŽriel fonctionnera ˆ la satisfaction de l utilisateur Avant d installer ce matŽriel l utilisateur doit s assurer qu il est permis de le raccorder aux installations de l entreprise locale de tŽlŽcommuni cations Le matŽr...

Страница 40: ... outlet so that it and the radio or television receiver are on different branch circuits If necessary the user should consult the dealer or an experienced radio television technician for additional suggestions The user or installer may find the following booklet prepared by the Federal Communications Commission helpful Interference Handbook This booklet is available from the U S Government Printin...

Страница 41: ...ble When programming or making test calls to an emergency number briefly explain to the dispatcher the reason for the call Per form such activities in the off peak hours such as early morning or late evening IN THE EVENT OF TELEPHONE OPERATIONAL PROBLEMS If your security system has been connected to the telephone line and there is trouble with regular telephone service disconnect the security syst...

Страница 42: ...ed and positioned Smoke detectors may not sense fires that start where smoke cannot reach the detectors such as in chimneys in walls or roofs or on the other side of closed doors Smoke detectors also may not sense a fire on another level of a residence or building A second floor detector for example may not sense a first floor or basement fire Moreover smoke detectors have sensing limitations No s...

Страница 43: ...rm system should be tested weekly to make sure all sensors and transmitters are working properly Wireless transmitters used with some systems are designed to provide long battery life under normal operating conditions Longevity of batteries may be as much as 4 to 7 years depending on the environment usage and the specific wireless device being used External factors such as humidity high or low tem...

Страница 44: ...EQUENTIAL OR INCIDENTAL DAMAGES FOR BREACH OF THIS OR ANY OTHER WARRANTY EXPRESS OR IMPLIED OR UPON ANY OTHER BASIS OF LIABILITY WHATSOEVER EVEN IF THE LOSS OR DAMAGE IS CAUSED BY THE SELLER S OWN NEGLIGENCE OR FAULT Some states do not allow limitation on how long an implied warranty lasts or the exclusion or limitation of incidental or consequential damages so the above limitation or exclusion ma...

Отзывы: