


RICHPOS-3600
48
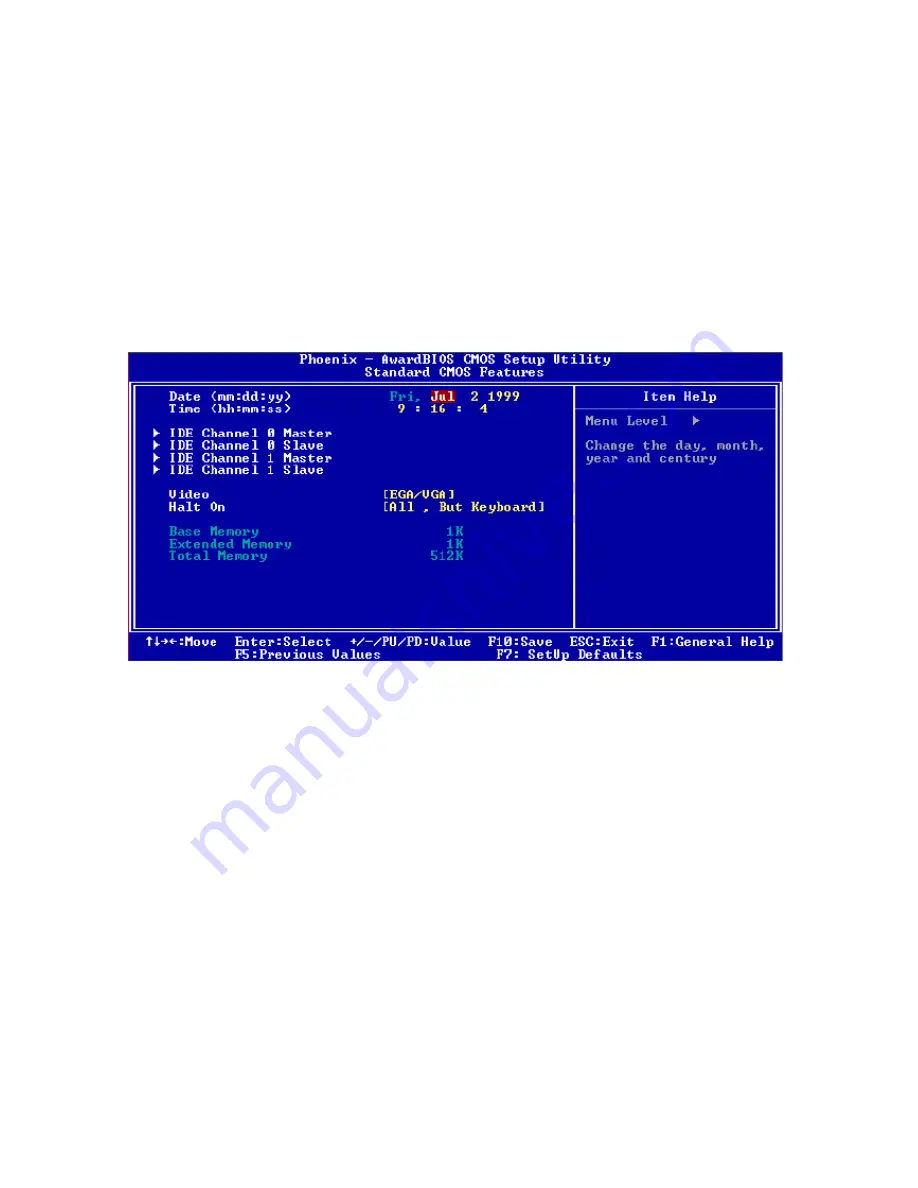
Standard CMOS Setup
Choose the
“Standard CMOS Features”
option from the
“initial setup screen”
menu, and the
screen below will be displayed. This menu allows users to configure system components such as
date, time, hard disk drive, floppy drive, display, and memory. Use the arrow keys to highlight the
item and then use the
<PgUp>
or
<PgDn>
keys to select the value you want for each item.
IDE Channel 0 Master/Slave & IDE Channel 1 Master/Slave: If you select
IDE HDD Auto-
Detection
, BIOS will show the detail specifications of your drive automatically. If your hard disk
drive type is not matched or listed, you can use Manual to define your own drive type manually.
Enter the information directly from the keyboard. This information should be provided in the
documentation from your hard disk vendor or the system manufacturer.
Figure 2: Standard CMOS Features Screen
Advanced BIOS Features
The “Advanced BIOS Features” screen appears when choosing the “Advanced BIOS Features”
item from the “Initial Setup Screen” menu. It allows the user to configure the M/B (AIMB-553)
according to his particular requirements. Below are some major items that are provided in the
Advanced BIOS Features screen. A quick booting function is provided for your convenience.
Simply enable the Quick Booting item to save yourself valuable time.
CPU Features
Delay Prior to Thermal: 4Min, 8Min, 16Min or 32Min
Execute Disable Bit: Enabled or Disabled
Hard Disk Boot Priority
If you prefer to enter into
HDD First Boot Device setting
directly as Figure 2, you could
press
<F11>
instead of <Del> when you power on system. Pop-up menu will show you a
Содержание RichPOS 3600
Страница 1: ...U Us se er r s s M Ma an nu ua al l RichPOS 3600 12 15 17 P4 High Performance POS system...
Страница 8: ...RICHPOS 3600 3 RichPOS 3600 Dimension...
Страница 18: ...RICHPOS 3600 13 8 Click Finish to complete the installation procedure and restart the system...
Страница 20: ...RICHPOS 3600 15 3 Click Advanced 4 Click Intel R Graphics Media Accelerator Driver for Mobile...
Страница 24: ...RICHPOS 3600 19 4 Click Next to continue 5 Click Finish to complete the installation procedure...
Страница 26: ...RICHPOS 3600 21 3 Click Finish and restart the system...
Страница 34: ...RICHPOS 3600 29 6 Click Next 7 Click Next 8 Click Next...
Страница 38: ...RICHPOS 3600 33 5 Select Finish to complete the installation...
Страница 40: ...RICHPOS 3600 35 5 Select Next to continue 6 Select OK to continue 7 Wait for the next page to show...
Страница 41: ...RICHPOS 3600 36 8 Select Continue Anyway to go to the next step 9 Select Finish to complete the installation...
Страница 44: ...RICHPOS 3600 39 Motherboard Configuration Mother Board Top Mother Board Bottom...
Страница 56: ...RICHPOS 3600 51 Figure 5 Integrated Peripherals Screen Figure 6 OnChip IDE Device Screen...


