background image

22

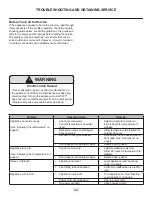
• Never attempt to repair or perform maintenance on 

the appliance until the main electrical power has been 

disconnected. Turning the appliance control "OFF" 

does not remove electrical power from the unit's wiring.

• Replace all parts and panels before operating.

!

WARNING

Electrocution Hazard

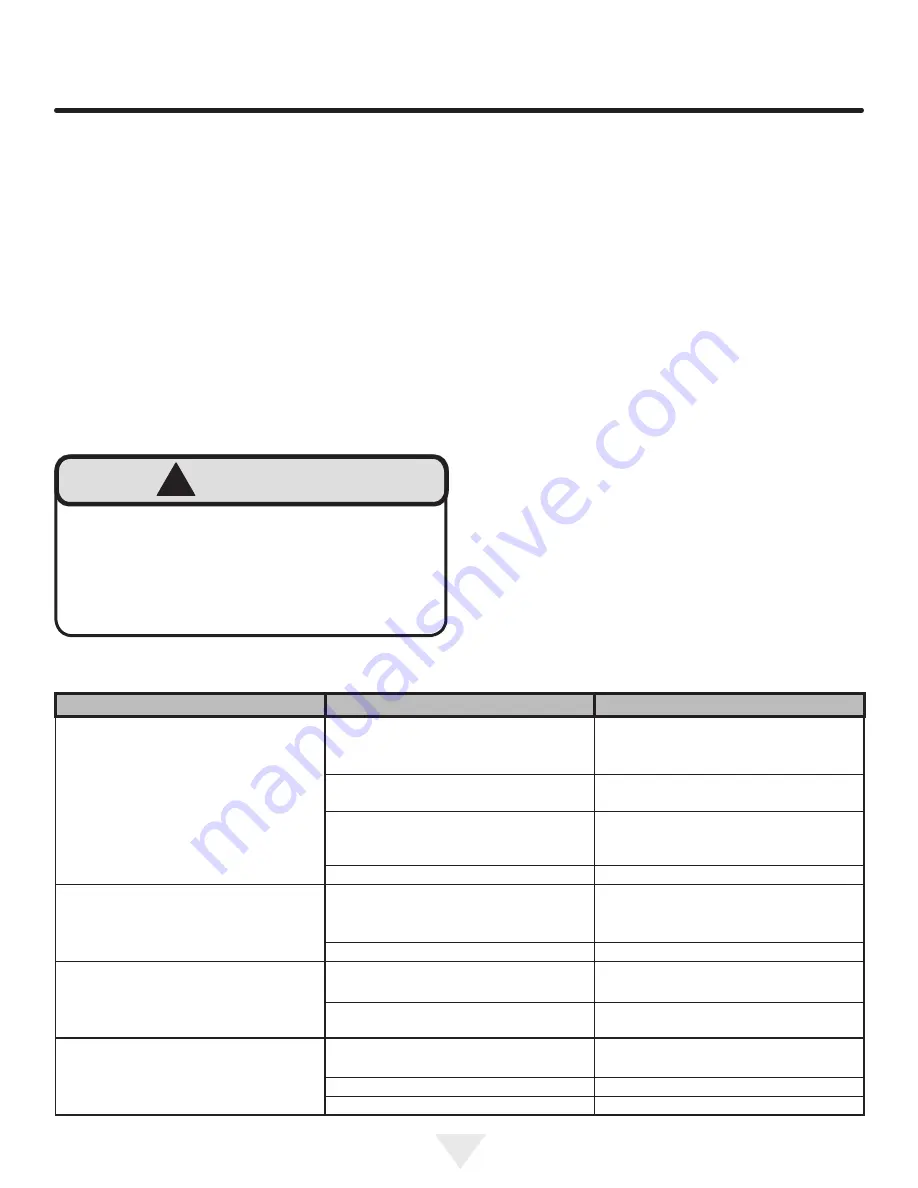
Before You Call for Service

If the appliance appears to be malfunctioning, read through 

this manual first. If the problem persists, check the trouble-

shooting guide below. Locate the problem in the guide and 

refer to the cause and its remedy before calling for service. 

The problem may be something very simple that can be 

solved without a service call. However, it may be required 

to contact your dealer or a qualified service technician.

TROUBLESHOOTING AND OBTAINING SERVICE

Problem

Possible Cause

Remedy

Appliance not cold enough

(See “Adjusting the temperature" on 

page 9)

•  Control set too warm

•  Content temperature not stabi-

lized.

•  Excessive usage or prolonged 

door openings.

•  Airflow to front grille blocked.


•  Door gasket not sealing properly.

•  Adjust temperature colder. Al-

low 24 hours for temperature to 

stabilize.

•  Allow temperature to stabilize for 

at least 24 hours.

•  Airflow must not be obstructed to 

front grille. See “clearances” on 

       page 4.

•  Replace door gasket.

Appliance too cold

(See “Adjusting the Temperature” on 

page 9)

•  Control set too cold

•  Door gasket not sealing properly.

•  Adjust temperature warmer. 

       Allow 24 hours for temperature to 

      stabilize.

•  Replace door gasket.

Noise or Vibration

•  Appliance not level

•  Fan hitting tube obstruction.

•  Level appliance, see “Leveling 

Legs” on page 4.

•  Contact a qualified service techni-

cian.

Appliance will not run.

•  Appliance turned off

•  Power cord not plugged in.

•  No power at outlet.

•  Turn appliance on. See “Starting 

your appliance” on page 9.

•  Plug in power cord.

•  Check house circuit.

Содержание 3594-DL

Страница 1: ...Kegerator 3594 DR 3594 DL Installation Operation and maintenance Instructions ...

Страница 2: ...9 Stainless steel maintenance 21 Energy saving tips 21 Troubleshooting 22 Warranty 23 Important Safety Instructions Warnings and safety instructions appearing in this guide are not meant to cover all possible conditions and situa tions that may occur Common sense caution and care must be exercised when installing maintaining or operat ing this appliance Recognize Safety Symbols Words and Labels WA...

Страница 3: ...rtant Keep your carton and packaging until your appliance has been thoroughly inspected and found to be in good condi tion If there is damage the packaging will be needed as proof of damage in transit Afterwards please dispose of all items responsibly Note to Customer This merchandise was carefully packed and thoroughly inspected before leaving our plant Responsibility for its safe delivery was as...

Страница 4: ... and the grille openings kept clean Firemagic does not recommend the use of a custom made grille as air flow may be restricted See Figure 2 INSTALLING YOUR APPLIANCE Leveling Legs Adjustable legs at the front and rear corners of the appli ance should be set so the unit is firmly positioned on the floor and level from side to side and front to back The overall height of your appliance may be adjust...

Страница 5: ...s see Figure 6 If the circuit does not have a grounding type receptacle it is the responsibility and obligation of the customer to provide the proper power supply The third ground prong should not under any cir cumstances be cut or removed INSTALLING YOUR APPLIANCE Front grille screw Front grille Figure 5 Figure 3 Figure 4 Do not remove ground prong Electrical Shock Hazard Do not use an extension ...

Страница 6: ...s on the floor so the side of the bracket lines up with the side of the cabinet mark and the V notches on the anti tip bracket line up with the end of the 211 2 54 6 cm line Rear of cabinet line 5 Fasten the anti tip bracket to the floor using the supplied screw See Figure 8 6 Slide the cabinet back into position making sure the rear cabinet leveling leg slides under the anti tip bracket engag ing...

Страница 7: ...tches in bracket V notches in bracket When the floor mounted anti tip bracket is used the mini mum adjusted height of the cabinet is increased by 3 8 9 mm Figure 8 Front of cabinet line Rear of cabinet line Figure 8a 211 2 54 6 cm Rear Leveling leg Screw Side of cabinet line ...

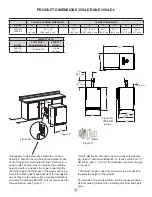
Страница 8: ... E F G H J 3594 DR 3594 DL 24 61 cm 34 to 35 86 4 to 88 9 cm 237 8 60 7 cm 333 4 to 343 4 85 7 to 88 3 cm 2323 32 60 2 cm 2611 32 66 9 cm 4613 32 117 9 cm 269 16 67 5 cm PRODUCT DATA MODEL ELECTRICAL REQUIREMENTS PRODUCT WEIGHT 3594 DR 3594 DL 115V 60Hz 15A 140 lbs 63 6 kg Figure 10 3594 DR shown 211 2 54 6 cm 121 4 31 1 cm 1115 16 30 3 cm 11 27 9 cm Figure 9 Depth dimension of rough in opening ma...

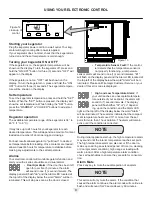
Страница 9: ...t the top left of the display below the word Alarm will be il luminated Please call Firemagic Customer Service or your dealer if this error code is displayed High and Low Temperature Alarm If your unit reaches an unacceptable tempera ture outside of your set point the alarm will sound in 1 second intervals The display panel will flash either Hi or Lo depend ing upon the condition and the Alarm LED...

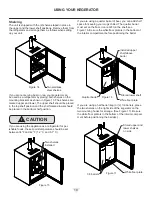
Страница 10: ...elf space for keeping your mugs chilled The quarter barrel must set on the floor it cannot fit on the shelf see Figure 16 Be sure the white floor plate is in the bottom of the interior compartment before positioning the barrel Figure 16 1 6 barrels Installed upper shelf above barrel Figure 15 Quarter barrel Figure 17 If you are using a half barrel keg or 2 1 6 barrels place the two shelves on the ...

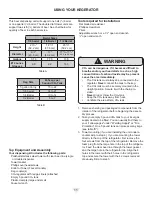
Страница 11: ...f it becomes difficult to breathe and or your head starts to ache a high concentration of carbon dioxide may be present Leave the area immediately The CO2 tank must always be connected to the regulator Never connect the tank to the keg The CO2 tank must be securely mounted in the upright position Secure it with the chain pro vided Never drop or throw the CO2 tank Keep the CO2 tank away from heat V...

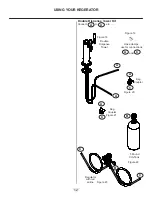
Страница 12: ...A A C C C C Regulator with red airline Keg Coupler Keg Coupler Double Dispense Tower A C Hose clamps use for connections and A A Double Dispense Tower Kit Connect to etc Figure 20 Figure 21 Figure 23 Figure 19 Figure 18 USING YOUR KEGERATOR ...

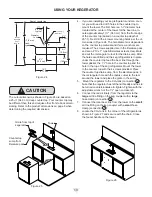
Страница 13: ...ar around the tower and place the grate in the sump 5 Mount the regulator to the CO2 tank connection Note that the regulator has left hand threads and has to be turned counterclockwise to tighten Tighten with the adjustable wrench or the 11 8 open end wrench 6 Connect the red air line s from the regulator to the large air line fitting on the keg coupler with a large hose clamp connection 7 Connect...

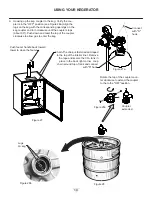
Страница 14: ... on the keg coupler and turn clockwise until the coupler stops about 90 Push down and twist the top of the coupler clockwise to allow gas to enter the keg Figure 27 Push faucet handle back toward tower to close the faucet Chain The chain is fastened and taped to the top of the interior liner Remove the tape and secure the CO2 tank in place in the back right corner Loop chain around top of tank and...

Страница 15: ...es at the bottom of the regulator 2 Be sure the faucet handle is closed on the tower see Figure 31 3 Loosen the lock nut by turning counterclockwise us ing the 1 2 open end wrench until loose this will allow adjustment of the pressure adjustment screw 4 With the flat bladed screwdriver turn the adjustment screw clockwise to increase the pressure or coun terclockwise to decrease the pressure 5 Open...

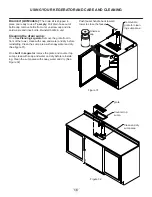
Страница 16: ...e standing kegerator remove the grate from in front of the tower clean with soap and water and dry before reinstalling Clean the sump area with soapy water and dry See figure 31 On a built in kegerator remove the grate and counter top sump clean with soap and water and dry before reinstall ing Clean the sump area with soapy water and dry See Figure 32 grate Counter top sump Clean and dry sump area...

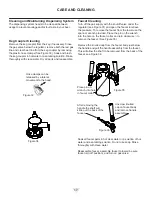
Страница 17: ...ble faucet to tower be sure faucet is in off position and turn on gas valve Figure 35 Figure 36 After removing the handle the shaft will slide out the back of the faucet Unscrew knurled cap on faucet body and remove handle assembly Place pin on wrench into hole in faucet collar CARE AND CLEANING Keg Coupler Cleaning Remove the keg coupler from the keg if necessary Close the gas valve below the reg...

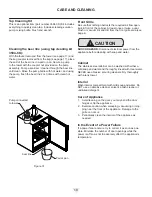
Страница 18: ...ect it as soon as pos sible Minimize the number of door openings while the power is off so as not to adversely affect the appliance s temperature Front Grille Be sure that nothing obstructs the required air flow open ings in front of the cabinet At least once or twice a year brush or vacuum lint and dirt from the front grille area see page 4 Cleaning the beer line using tap cleaning kit 3594 CK Wi...

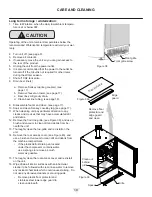
Страница 19: ...t 14 Remove the rear access cover see Figure 40 and use a brush and vacuum to clean dirt and debris from the machine compartment 15 Thoroughly clean the rear access cover and re install on the unit 16 Wipe down all interior surfaces with anti bacterial cleaner to be followed with clean rinse water to remove any residual chemicals which could cause staining Do not use any abrasive cleaners or scour...

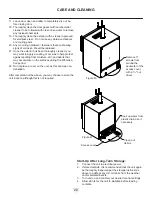
Страница 20: ...emicals 19 Thoroughly clean the exterior with a cleaner approved for stainless steel Do not use any abrasive cleaners or scouring pads 20 Any mounting hardware fasteners that are showing signs of corrosion should be replaced 21 Once the exterior has been thoroughly cleaned you may want to apply a coating of car wax to help protect against spotting from moisture dirt and debris that may accumulate ...

Страница 21: ...lthough some products are called stainless steel clean ers some may contain abrasives which could scratch the surface compromising the protective chrome oxide film and some many contain chlorine bleach which will dull tarnish or discolor the surface if not completely removed After the stainless surfaces have been thoroughly cleaned a good quality car wax may be applied to help maintain the finish ...

Страница 22: ... Appliance not cold enough See Adjusting the temperature on page 9 Control set too warm Content temperature not stabi lized Excessive usage or prolonged door openings Airflow to front grille blocked Door gasket not sealing properly Adjust temperature colder Al low 24 hours for temperature to stabilize Allow temperature to stabilize for at least 24 hours Airflow must not be obstructed to front gril...

Страница 23: ...ided by separate specific written programs from the Peterson Co All repair work must be performed by a qualified professional service person and requires prior ap proval of Peterson 4 Contact your nearest authorized Fire Magic Dealer For the name of the nearest Fire Magic Dealer please call 1 626 369 5085 THIS WARRANTY DOES NOT COVER THE FOLLOWING Damages from improper installation Damages in ship...

Страница 24: ...product designs subject to change without notice Such revisions do not entitle the buyer to corresponding changes improvements additions replacements or compensation for previously purchased products 41014111 EN Rev B 9 21 15 ...

Отзывы: