


English
- 22 -
Connectivity
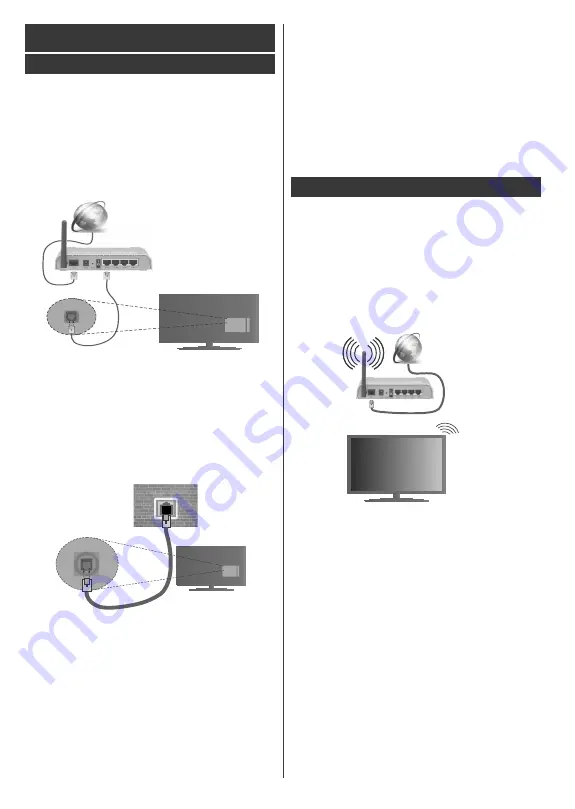
Wired Connectivity
To Connect to a Wired Network
You must have a modem/router connected to an
active broadband connection.
Connect your PC to your modem/router. This can
be a wired or wireless connection.
Connect your TV to your modem/router via an
ethernet cable. There is a LAN port at the rear
(back) of your TV.
Broadband ISP connection
LAN (ethernet) cable
LAN input on the rear
side of the TV
To configure wired settings please refer to
the Network/Internet Settings section in the
System>Settings Menu.
You might be able to connect your TV to your LAN
depending on your network’s con
¿
guration. In such
a case, use an ethernet cable to connect your TV
directly to the network wall outlet.
LAN input on the rear
side of the TV
network
wall socket
&RQ¿JXULQJ:LUHG'HYLFH6HWWLQJV
Network Type
The
Network Type
can be selected as
Wired
Device,
Wireless Device
or
Disabled
, in accordance with the
active connection to the TV set. Select this as
Wired
Device
if you are connecting via an ethernet.
Internet Speed Test
Highlight
Internet Speed Test
and press the
OK
but-
ton. TV will check the internet connection bandwidth
and display the result when complete.
Advanced Settings
Highlight
Advanced
Settings
and press the
OK
button. On the next screen you can change the IP
and DNS settings of the TV. Highlight the desired one
and press Left or Right button to change the setting
from
Automatic
to
Manual
. Now you can enter the
Manual IP
and / or
Manual DNS
values. Select the
related item in the drop down menu and enter the
new values using the numeric buttons of the remote.
Press the
OK
button to save settings when complete.
Wireless Connectivity
To Connect to a Wireless Network
The TV cannot connect to the networks with a hidden
SSID. To make your modem’s SSID visible, you should
change your SSID settings via the modem’s software.
To Connect to a wireless LAN, you should perform
the following steps:
To con
¿
gure your wireless settings please refer
to the
Network/Internet Settings
section in the
System>Settings
Menu
.
Broadband
ISP
connection
A Wireless-N router (IEEE 802.11a/b/g/n) with
simultaneous 2.4 and 5 GHz bands is designed to
increase bandwidth. These are optimized for smoother
and faster HD video streaming,
¿
le transfers and
wireless gaming.
The frequency and channel differ depending on
the area.
The transmission speed differs depending on the
distance and number of obstructions between the
transmission products, the con
¿
guration of these
products, the radio wave conditions, the line traf
¿
c
and the products that you use. The transmission may
also be cut off or may get disconnected depending
on the radio wave conditions, DECT phones or any
other WiFi 11b appliances. The standard values of
the transmission speed are the theoretical maximum
values for the wireless standards. They are not the
actual speeds of data transmission.
The location where the transmission is most effective
differs depending on the usage environment.
Содержание 55FME290B-P
Страница 1: ......
Страница 33: ...English 32 W E hy W E 10103144 D E D W A s 140 cm K t 86 t t K t 0...
Страница 34: ......


