Finlux 47S7010 Скачать руководство пользователя страница 20

English   

- 19 -

Managing Stations: Sorting the 

Channel List

You can select broadcasts to be listed in the channel 

list. To display specific types of broadcast, you should 

use the Active channel list setting.

Select Active  channel  list  from  the  Channel  list 

menu by using “ ” /“ ” button. Press 

OK

 button to 

continue.

You can select a broadcast type option from the list 

by using “ ” /“ ” and

 OK

 buttons.

On-Screen Information

You can press 

“INFO”

 button to display on-screen 

information.  Details  of  the  station  and  current 

programme  will  be  displayed  on  the  information 

banner.

The  information  banner  gives  information  on  the 

channel selected and the programmes on it. The name 

of  the  channel  is  displayed,  along  with  its  channel 

list number. 

Hint:  Not  all  channels  broadcast  the  programme 

data.  If  the  name  and  time  of  the  programme  are 

not  available,  then  the  information  banner  will  be 

displayed with blanks. 

If the selected channel is locked, you must enter the 

correct four-digit numeric code to view the channel 

(default code is 

0000

). “

Enter PIN

” will be displayed 

on the screen in such a case.

Media Playback Using Media 

Browser

If the USB stick is not recognized after power off/on or 

First Time Installation, unplug the USB device, turn the 

TV off and on again and re-insert the USB device.

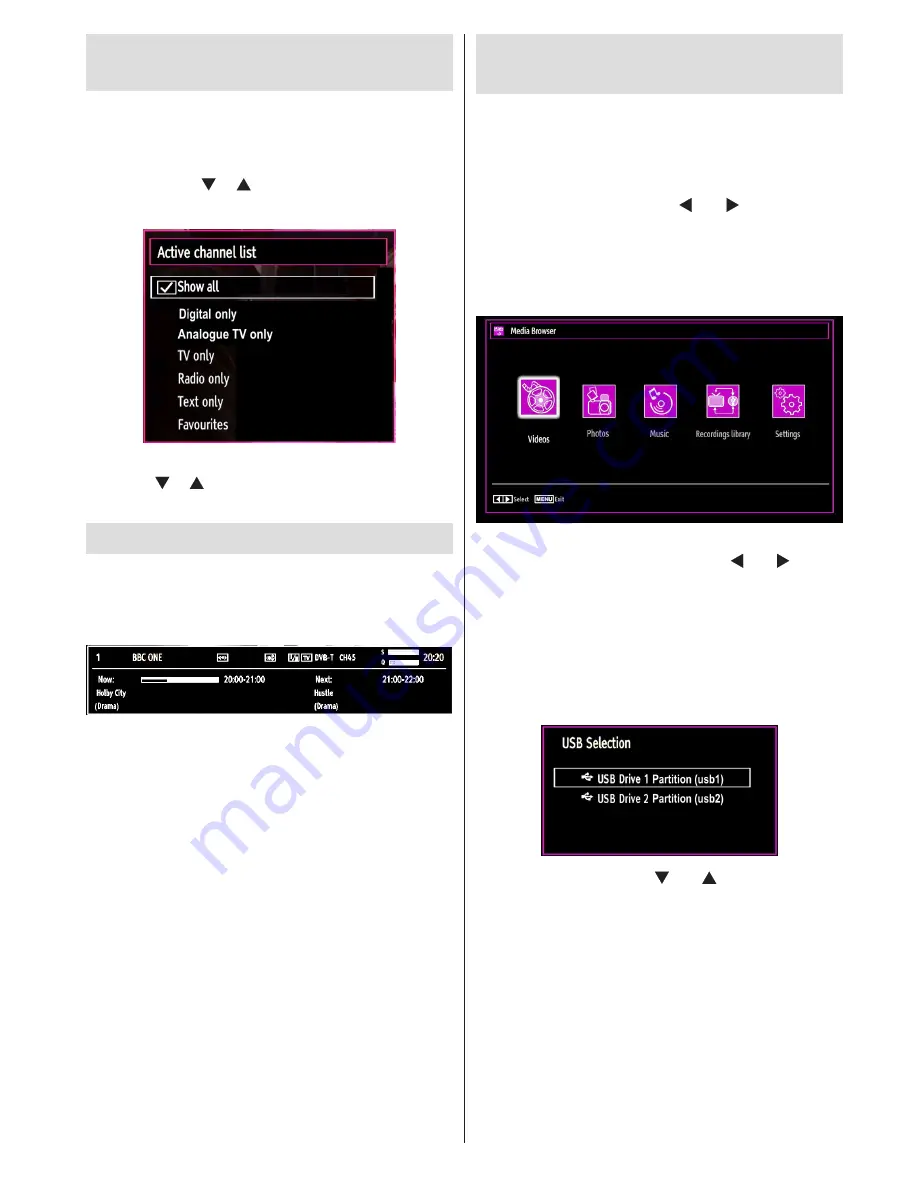
To  display  Media  Browser  window,  press  either 

“MENU”

 button on the remote control and then select 

Media Browser by pressing “ ” or “ ” button. Press 

OK

 button to continue. Media Browser menu options 

will be displayed. 

Also,  when  you  insert  USB  devices,  the  media 

browser screen will be displayed automatically:

You can play music, picture and video files from the 

connected USB memory stick. Use “ ” or “ ” button 

to select Videos, Photos, Music, Recordings library 

or Settings. 

You can connect two USB devices to your TV. If both 

USB devices include music, picture or video files, USB 

selection OSD will be displayed on the screen. The 

first USB device connected to the TV will be named 

as USB Drive1.

Select a device by using “ ” or “ ” button and press 

OK.

Содержание 47S7010

Страница 1: ...colour television owner s manual 47S7010...

Страница 2: ...rmation 19 Media Playback Using Media Browser 19 Viewing Videos via USB 20 Viewing Photos via USB 20 Slideshow Options 20 Playing Music via USB 21 Recordings Library 21 Media Browser Settings 22 Times...

Страница 3: ...ception and display sources possible receiver DVD player DVD recorder VCR PC etc This device is only suitable for dry indoor use This appliance is intended solely for private domestic use and may not...

Страница 4: ...manner Find out about the legal regulations which apply in your area Do not try to recharge batteries there is a danger of explosion Replace batteries only with the same or equivalent type This symbol...

Страница 5: ...crystal shutters with a sharp tool and do not clean it using chemicals This may degrade the screen quality Do not apply force to the liquid crystal Do not drop or bend the product If the receiving ra...

Страница 6: ...cable distribution system has therefore to be provided through a device providing electrical isolation below a certain frequency range galvanic isolator see EN 60728 11 Package Contents 1 2 3 4 5 6 7...

Страница 7: ...l be unavailable when the TV is in Power Save Mode When the TV is not in use please switch off or disconnect the TV from the mains plug This will also reduce energy consumption Note that annually usin...

Страница 8: ...mode selection Changes picture mode 19 in Media Browser video mode Recordings Library 20 No function 21 Play in Media Browser mode 22 Programme recording 23 No function 24 Rapid reverse in Media Brow...

Страница 9: ...eo You can connect the component video and audio sockets with a device that has component output Connect the component video cables between the COMPONENT VIDEO INPUTS on on the TV and the component vi...

Страница 10: ...the system Connect to 4 the HEADPHONE jack to listen to the TV from headphones optional Side audio video connection input is used for connecting video and audio signals 5 of external devices To make...

Страница 11: ...very hazardous operation Especially do not repeatedly quickly plug and unplug the drive This may cause physical damage to the USB player and especially the USB device itself Do not pull out USB module...

Страница 12: ...If the disk have more than two partitions crash may occur First partition of the usb disk is used for PVR ready features It also must be formatted as primary partition to be used for PVR ready feature...

Страница 13: ...s SPDIF signal Remote Control Handset Inserting Batteries Remove the battery cover located on the back of the handset by gently pulling backwards from the indicated part Insert two AAA R3 or equivalen...

Страница 14: ...put Selection Once you have connected external systems to your TV you can switch to different input sources Press SOURCE button on your remote control consecutively for directly changing sources You c...

Страница 15: ...ane with timeline schedule Blue button Filter Views filtering options RECORD the TV will start to record the selected progamme You can press again to stop the recording Red button Prev Time Slice Disp...

Страница 16: ...a programme in EPG menu press the OK button and and Options screen will be displayed Select Record option and press the OK button After this operation a recording becomes set to the selected programme...

Страница 17: ...vailable stations are stored the Channel List will be displayed on the screen If you like the order of the channels please select Yes and than press OK Press OK button to quit channel list and watch T...

Страница 18: ...y new channels that are not on the list will be stored Analog Fine Tune Select Analog Fine Tune from the Installation menu by using or and OK buttons Analog fine tune screen will be displayed Analog F...

Страница 19: ...the channel that you want to rename and select Edit Name option Press OK button to continue Pressing or button moves to the previous next character Pressing or button toggles the current character i...

Страница 20: ...cted channel is locked you must enter the correct four digit numeric code to view the channel default code is 0000 Enter PIN will be displayed on the screen in such a case Media Playback Using Media B...

Страница 21: ...witch back to previous menu Viewing Photos via USB When you select Photos from the main options available image files will be filtered and listed on this screen Jump Numeric buttons Jump to selected f...

Страница 22: ...usic or video file playback will continue randomly and the random playback will continue 0 9 Numeric buttons Jumps to the selected file Play This OK button Plays the selected file Previous Next Left R...

Страница 23: ...tch back to watching normal broadcast Press STOP button to quit timeshifting mode Similtaneous timeshifting recording s duration depends on your connected USB disk s file size and defined Max Timeshif...

Страница 24: ...autions carefully for your safety before using the 3D function Read and understand 3D Mode and 3D Images precautions section on page 4 You must use 3D glasses parallel to your TV The picture may not b...

Страница 25: ...glasses when this message is displayed on the screen Supported 3D Content Resolutions See Appendix F for supported 3D Content resolutions Changing Image Size Picture Formats You can change the aspect...

Страница 26: ...tton to exit Picture Settings Menu Items Mode For your viewing requirements you can set various screen modes The Picture mode can be set to one of these options Cinema Game Dynamic Sports and Natural...

Страница 27: ...u are watching films to see the fast motion scenes clearly Colour Shift Adjust the desired colour tone Reset Resets the picture settings to factory default settings While in VGA PC mode some items in...

Страница 28: ...ettings ikon by using or button Press OK button to view Settings menu Operating Settings Menu Items Press or button to highlight a menu item Press OK button to select an item Press MENU button to exit...

Страница 29: ...on by using or button Press OK button to view Settings menu Use or button to highlight Language and press OK to continue Use or button to set an item Settings are stored automatically Menu displays th...

Страница 30: ...enu will be displayed Parental Settings Menu Operation Select an item by using or button Use or button to set an item Press OK button to view more options If you set Country option as UK in the first...

Страница 31: ...RED button Select YES by using or buttons to delete the timer Select NO to cancel Recording Configuration Select Recording Configuration item in the Settings menu to configure recording settings The f...

Страница 32: ...uttons select Time Zone Use or buttons to change the Time Zone between GMT 12 or GMT 12 Date Time on the top of the menu list will then change according to the selected Time Zone Changes are automatic...

Страница 33: ...le To use Standby search please make sure that you select Standby Search as On Other Features Displaying TV Information Programme Number Programme Name Sound Indicator time teletext channel type and r...

Страница 34: ...aerial Is the picture or teletext unrecognisable Check if you have entered the correct frequency Please retune the channels The picture quality may degrade when two peripherals are connected to the T...

Страница 35: ...80P 60Hz O HDMI1 HDMI2 HDMI3 HDMI4 480I 60Hz O 480P 60Hz O 576I 50Hz O 576P 50Hz O 720P 50Hz O 720P 60Hz O 1080I 50Hz O 1080I 60Hz O 1080P 50Hz O 1080P 60Hz O 1080P 24 HZ O X Not Available O Available...

Страница 36: ...6Hz 6 800x600 60Hz 7 800x600 70Hz 8 800x600 72Hz 9 800x600 75Hz 10 1024x768 60Hz 11 1024x768 70Hz 12 1024x768 72Hz 13 1024x768 75Hz 14 1152x864 75Hz 15 1280x768 60Hz 16 1360x768 60Hz 17 1280x768 75Hz...

Страница 37: ...sec dat MPEG1 2 MPEG2 vob MPEG2 avi MPEG2 PCM MP3 MAX 1920x1080 30P 20Mbit sec Xvid 1 00 Xvid 1 01 Xvid 1 02 Xvid 1 03 Xvid 1 10 beta1 2 PCM Music mp3 MPEG 1 Layer 1 2 MP3 32Kbps 320Kbps Bit rate 32K...

Страница 38: ...tware is found and downloaded successfully with next power up the TV opens with new software version Note on reboot operation Reboot is the last step in software upgrade operation if download of new s...

Страница 39: ...p FC SBS TB SBS TB SBS TB SBS TB Not Supported SBS TB 1080i FC SBS TB SBS TB SBS TB SBS TB Not Supported SBS TB OTHER SBS TB SBS TB SBS TB Not Supported Not Supported SBS Side By Side TB Top Bottom MB...

Страница 40: ...ion Film Type Circular Light Penetration Rate 45 Polarization Efficiency 99 9 Lens Thickness 0 90mm Lens Treatment Hard coated 3D Imaging Viewing Range Note Viewing angle TV size and other circumstanc...

Страница 41: ...green or green and yellow The wire which is coloured blue or black must be connected to the terminal which is marked with the letter N or coloured Black The wire which is coloured brown or red must b...

Страница 42: ...50208658 www finluxdirect com Customer helpline 0845 459 5282...

Отзывы: