background image

Page 1 


www.fimcoindustries.com 

1000 FIMCO Lane, P.O. Box 1700, North Sioux City, SD  57049      

Toll Free Phone: 800-831-0027 : Toll Free Fax: 800-494-0440 

[5194834   


(02/19)] 

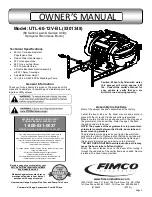
Technical Specifications 

 

60 Gal. Corrosion-Resistant    


Polyethylene Tank 

 

Deluxe Pistol-Grip Handgun 

 

25 Ft. Handgun Hose 

 

26 Ft. max. vertical throw,    


35 Ft. horizontal throw 

 

3-Nozzle Boomless Nozzle Assembly   


w/30 Ft. Spray Coverage 

 

Adjustable Boom Height


 

12 Volt, 4.5 GPM, 60 PSI Diaphragm Pump


Model: UTL-60-12V-BL (5301348) 

(60 Gallon Lawn & Garden Utility 

Sprayer w/”Boomless’ Boom) 

Assembly Instructions 

Most of the sprayer has been assembled at the factory. 


Center  the  boom  tube  on  the  boom  mounts  and  secure  in 

place with the (2) round U-bolts and whiz nuts provided. 

Make  sure  the  U-bolts  are  positioned  within  the  grooves  of 

the grommets on the boom tube. Refer to page 2 to attach  

the end nozzles to the boom. 

NOTE: The purpose of these grommets is to prevent met-

al-to-metal contact between the U-bolts, boom tube and 

boom mounting brackets. 

The grommets will ‘compress’ as you tighten the whiz lock-

nuts onto the U-bolts. Tighten just so that the boom tube will 

NOT rotate within the grommets. Alternate the tightening of 

the locknuts to provide even pressure on the grommet. 

**DO NOT OVER TIGHTEN the whiz locknuts, as this may 

cause the boom tube to flatten slightly! 

Attach  the  boom  feeder  hose  to  the  boom  after  routing  it 

through the underside of the carrier frame as needed. Secure 

in place with a hose clamp provided. 

Caution:  When  fully  filled  with  water, 

this  sprayer  will  weigh  approx.  620 

lbs..  Consult  the  owner’s  manual  for 

your  vehicle  to  verify  that  you  are 

within it’s load carrying capacity.  

OWNER’S MANUAL


BEFORE RETURNING THIS PRODUCT

FOR ANY REASON, PLEASE CALL

1-800-831-0027

MONDAY-FRIDAY, 8:00 AM TO 5:00 PM CST

If you should have a question or experience a problem with

your Fimco Industries Product: Visit our website @ 

www.fimcoindustries.com or call the Toll free number above. Our 

technical support representatives will be happy to help you. 

In most cases a customer service rep. can resolve

the problem over the phone.

To obtain prompt, efficient service, always remember to give the 

following information....

• Correct Part Description and/or part number

• Model number and Serial Number

Part descriptions and numbers can be obtained from the

illustrated parts list section(s) of this manual.

General Information 

Thank you for purchasing this product. The purpose of this 

manual is to assist you in operating and maintaining your lawn 

& garden Utility sprayer.  

Retain a copy of your receipt for your 

unit, as it will be required to validate 

any warranty service. 


Warranted against manufacturer or 

workmanship defects from date of 

purchase with copy of receipt: 


Homeowner Usage: Sprayer-One Year and Pump-Two Years. 


Commercial Usage: Sprayer and Pump-90 Days.


Содержание 5301348

Страница 1: ... slightly Attach the boom feeder hose to the boom after routing it through the underside of the carrier frame as needed Secure in place with a hose clamp provided Caution When fully filled with water this sprayer will weigh approx 620 lbs Consult the owner s manual for your vehicle to verify that you are within it s load carrying capacity OWNER S MANUAL BEFORE RETURNING THIS PRODUCT FOR ANY REASON...

Страница 2: ...ive Item 3 against O ring Item 2 and slide both into the nozzle body opening firmly 4 Firmly tighten flynut Item 4 onto threads of nozzle body 5 Repeat for other side NOTE If water is shooting back on the boom tube item 2 is not in the correct placement Item 2 is shipped inside of the end nozzle assembly Remove place on tube 15 End Nozzle Information 5275122 This nozzle mounting stem Has a ratchet...

Страница 3: ...om nozzles Connect the lead wire to a fully charged 12 volt battery You may use either a stand alone battery or the battery on your towing vehicle Connect to the positive red terminal first then connect to the negative black terminal Then connect the end of the lead wire to the end of the pump When disconnecting disconnect the end of the pump wire from the lead wire then disconnect the negative bl...

Страница 4: ... valves if allowed to soak untreated for a length of time ALWAYS flush the pump as instructed after each use DO NOT allow chemicals to sit in the pump for extended times of idleness Follow the chemical manufacturer s instructions on dispos al of all waste water from the sprayer Winter Storage Prepare the sprayer for end of season storage by running RV antifreeze through the system This will keep i...

Страница 5: ...r defective check valve Check for clogged strainer filter Check for cracks in the pump housing Check for empty product supply Low Pressure Low Flow Check for leaks in the discharge line Check for restriction in the discharge line Check for debris in nozzle orifice Check for clogged strainer Check for proper voltage try another 12 volt battery Pulsating flow surging Low flow may cause pump to surge...

Страница 6: ...ed to a good 12 volt power source and everything on Slip the two red wires off the terminals and touch them together If the motor runs it means the pressure switch is bad and needs to be replaced If it still doesn t run try bypassing the switch in the lead wire or using another lead wire Even if a tester shows power to the pressure switch it still could be the switch in the wire that is causing th...

Страница 7: ...p and before it shuts off reach down and shut the valve to the Closed position lever is perpendicular to the flow of fluid then shut off your pump Unscrew the knurled nut from the shut off valve leaving the valve connected to the tank Swing swivel the intake assembly towards you Look in the nut you JUST unscrewed There is a screen washer there Remove the screen and clean as necessary Replace when ...

Страница 8: ...loded View Parts List UTL 60 12V BL 5301348 See DETAIL A DETAIL A Ref 1 1 Right Hand RH and Left Hand LH sides of the sprayer are determined as if you are standing behind the sprayer looking at it facing forward ...

Страница 9: ...Page 9 Exploded View Parts List Boomless Wet Boom Assembly 5275260 Center Nozzle Assembly 5275123 End Nozzle Assembly 5275122 ...

Страница 10: ...obtain warranty service under this Limited Warranty you must 1 provide written notice to Fimco Ind of the defect during the Warranty Period and within thirty 30 days after the defect becomes apparent or the repair becomes necessary at the following address Fimco Ind 1000 Fimco Lane North Sioux City SD 57049 and 2 make the Equipment available to Fimco Ind or an authorized dealer within a reasonable...

Отзывы: