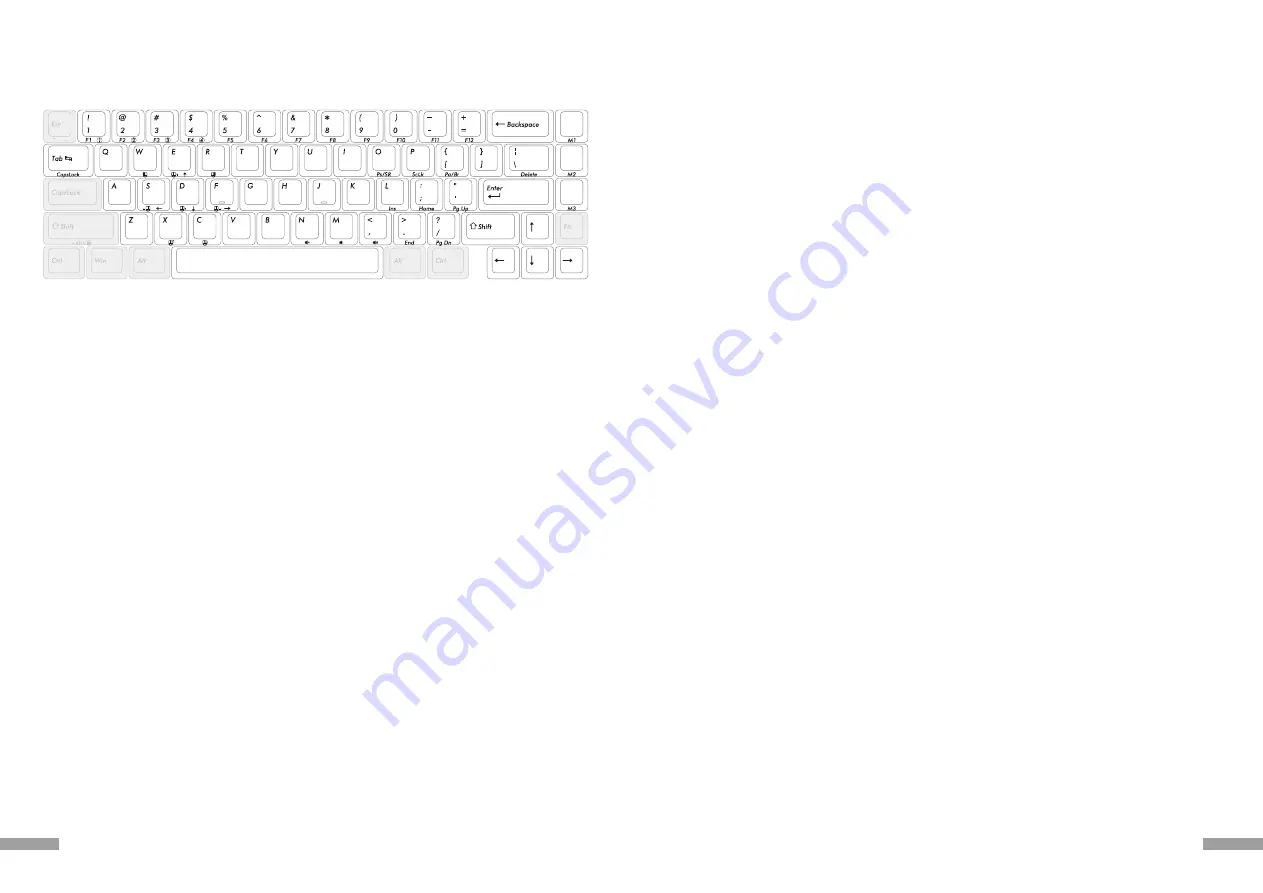
◆About Macro settings
The Majestouch Xacro allows you to set Macros for M1~M3 keys on Layer 1 (Basic layer), and all keys except for
the DIP switch-swapped keys on layer 2 to 4, and the left shift key.
Keys that can be set as Macros
●Hardware Macro setting procedure
1. Turn on the DIP⑪ on the back side, and then connect it to the PC.
2. Select a layer by pressing Fn + Alt + [1] or [2] or [3] or [4]. (LED4 White, Blue, Green, Purple)
* In Layer 1, you can only set Macros for M1 to M3 keys.
3. Press and hold Fn + Ctrl for one second to enter the hardware Macro setting mode. (LED4 will light up red)
4. Press the target key for which you want to register a Macro. (LED4 flashes yellow)
5. Enter the contents of the Macro. (LED4 flashes red, LED3 lights up blue at the time of input)
6. Press Fn + Alt to confirm the content. (LED4 flashes green)
7. Repeat 3 to 5.
8. Press and hold Fn + Ctrl for 1 second to exit the hardware Macro setting mode. → Return to normal mode.
* If any key is not pressed for about 15 seconds during 4, 5, 6, 7, and 8, the system will return to normal mode.
●Set the keystroke interval
・Stroke interval 5ms … Fn + T
・Stroke interval 10ms … Fn + Y
・Stroke interval 25ms … Fn + U
Notes
* Macro contents can be registered up to 32 strokes. (This includes keystroke interval registration.)
* If the keystroke interval is not set, the keystroke interval will be programmed at 15 ms.
* Hardware Macro settings are not available when the dedicated software "FILCO Assist" is running.
Xacro M3A 67US
◆How to delete Macro
1. Enter the hardware Macro setting mode by pressing and holding Fn + Ctrl for 1 second. (LED4 lights up in red)
2. Press the key you want to delete the Macro once.
3. The Macro deletion is complete when LED4 flashes red and then green three times.
4. After the Macro deletion is completed, the unit will return to the hardware Macro setting mode. (LED4 lights up
in red)
5. Exit the hardware Macro setting mode by pressing and holding Fn + Ctrl for one second. → Return to normal mode.
* If any key is not pressed for about 15 seconds at the time of 2, 4, or 5, it will return to normal mode.
●To initialize a layer (how to delete Macros for each layer)
1. Press and hold Fn + Left Shift + [1] or [2] or [3] or [4] for 2 seconds.
2. The LED corresponding to the layer will blink 4 times at 0.5 second intervals. → The data deletion is completed.
3. It will return to the original layer.
●Keyboard Initialization Procedure (Reset to Factory Default)
1. Unplug the USB cable (disconnect the PC) and turn on the DIP⑫.
2. Plug in the USB cable (connect to PC) After all LEDs light up, LED4 flashes red for 3 seconds.
3. LED4 will light up blue.
4. After about 20 seconds, LED4 will light up green.
5. Unplug the USB cable again (disconnect from the PC), turn off the DIP⑫, and insert the USB cable (connect to
the PC) to complete the keyboard initialization.
◆Software Macro Registration
The Majestouch Xacro series can be used with the dedicated software "FILCO Assist" for software Macro registra-
tion.
With "FILCO Assist", you can create Macros and register text while checking on the PC monitor, and create original
profiles by simply dragging and dropping them. This easy-to-use software allows you to check the status of your
keyboard at a glance.
For detailed instructions on how to use "FILCO Assist", please visit [https://www.diatec.co.jp/filcoassist/].
◆About Hardware Macros and Software Macros
Software can be used to overwrite Macros later on in a profile set up with hardware Macros, or to overwrite
hardware Macros later on in a profile set up with software Macros. Even when the profile is exported by software,
the data rewritten by the hardware Macro will not be reflected.
Also, if a hardware Macro overwrites a profile created with the software, the profile name will be changed to
'ghost' and displayed because it will be recognized as a different profile in the software.
◆About firmware and software updates
Firmware and software updates may be provided to make the keyboard more comfortable to use. Please follow
the instructions to download and update the latest information on the following website.
Firmware update information https://www.diatec.co.jp/support/
Software update information
https://www.diatec.co.jp/filcoassist/
* Firmware update can only be performed on a Windows PC. Be sure to connect to a Windows PC to update.
* "FILCO Assist" is only compatible with Windows OS. Please be aware of this in advance.
13
12
Содержание Majestouch Xacro M3A 67US
Страница 18: ...Memo 33 32...


