FIBARO WALLI FGWCEU-201 Скачать руководство пользователя страница 26

26

Z-Wave specIfIcatIon
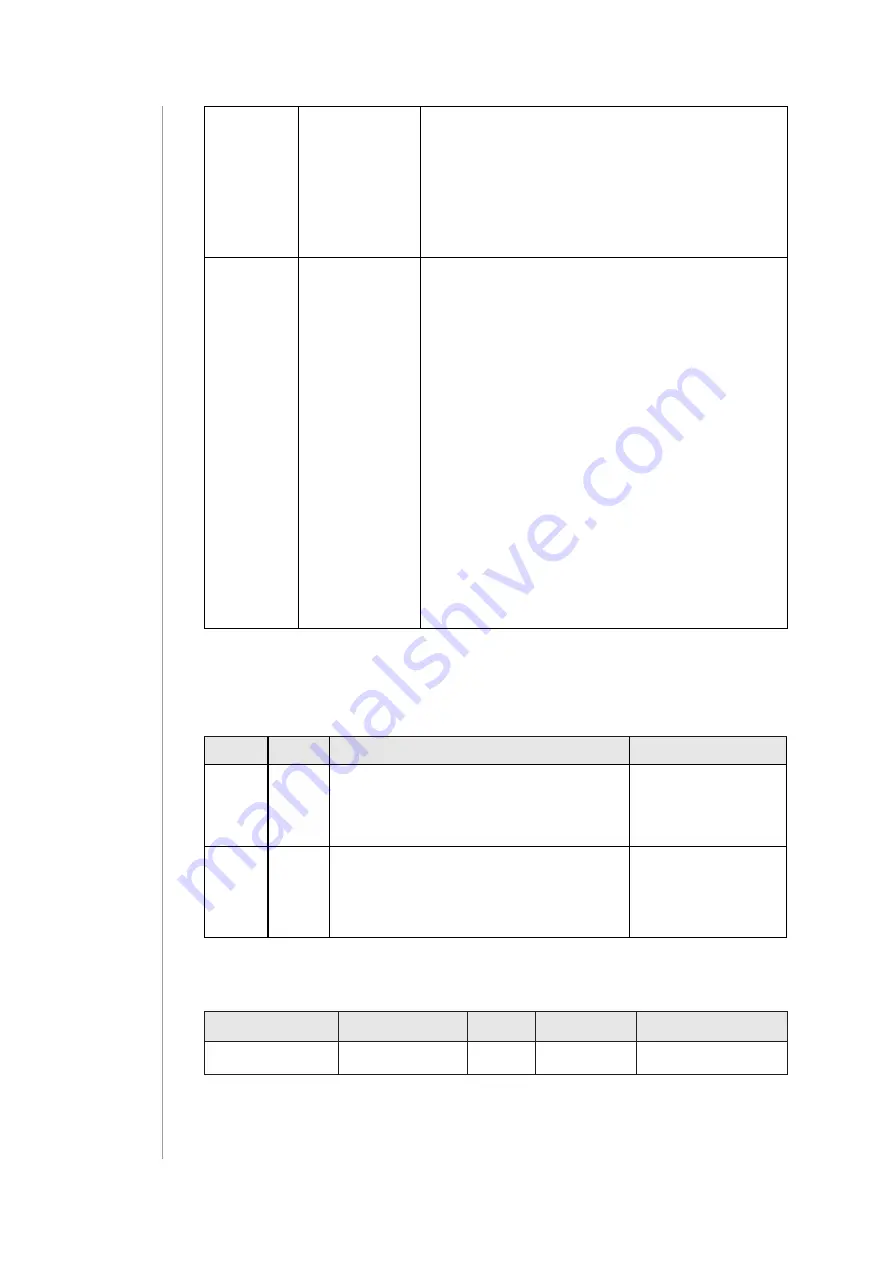
0x04

On/Off Cycles

Used to set the number of On/Off periods.
Available values:
• 0x00 .. 0xFE (0 .. 254 times)
• 0xFF (indicate until stopped)
If this is specified, the On/Off Period MUST 

also be specified.

0x05

On time with-

in an On/Off 

period

Used to set the length of the On time dur-

ing an On/Off period. It allows asymetic 

On/Off periods.
Available values
• 0x00 (symmetric On/Off period – On time 

equal to Off time)

• 0x01 .. 0xFF (0.1 .. 25.5 seconds)
Example: 300ms ON and 500ms OFF is 

achieved by setting On/Off period (0x03) = 

0x08 and On time within an On/Off Period 

(0x05) = 0x03
This value is ignored if On/Off periods is 

not defined. 

This value is ignored if On/Off periods val-

ue is less than this value.

Protection CC

Protection  Command  Class  allows  to  prevent  local  control  using 

buttons.

Type State

Description

Hint

Local

0

Unprotected - The device is not 

protected, and may be operated 

normally via the user interface.

Inputs control 

radio

Local

2

Buttons cannot send control 

frames e.g Basic, Switch Multilev-

el, other functionality is available 

(menu)

Inputs do not 

control radio

Setting state value 1 will be rejected by the device.

Sensor Multilevel CC

Sensor Type

Scale

Size

Precision

Description

Temperature

Celsius (C)

2B

1

Air temperature

Содержание WALLI FGWCEU-201

Страница 1: ...FIBARO WALLI CONTROLLER FGWCEU 201 OPERATING MANUAL EN v1 1 ...

Страница 2: ......

Страница 3: ...Installing on a mounting box with an external power supply 8 5 Adding to Z Wave network 9 5 1 Adding manually 9 5 2 Adding using SmartStart 10 6 Removing from Z Wave network 11 7 Operation 12 7 1 Controls 12 7 2 Operating modes 12 7 3 Powering modes 14 7 4 Temperature sensor 15 7 5 Waking up 15 7 6 Visual indications 15 7 7 Menu 16 7 8 Resetting to factory defaults 17 8 Configuration 18 8 1 Associ...

Страница 4: ...from not following the instructions of operating manual CAUTION Risk of Explosion if battery is replaced by an incorrect type Dis pose of used batteries according to the instructions Do not modify Do not modify this device in any way not included in this manual This product is intended for indoor use only in dry locations Do not use in damp or wet locations near a bathtub sink shower swimming pool...

Страница 5: ...or VDC powered Equipped with a built in temperature sensor Supports Z Wave network Security Modes S0 with AES 128 en cryption and S2 Authenticated with PRNG based encryption Works as a Z Wave signal repeater when VDC powered all non battery operated devices within the network will act as re peaters to increase reliability of the network May be used with all devices certified with the Z Wave Plus c...

Страница 6: ...ty 0 90 RH without condensation Radio protocol Z Wave 700 series chip Radio frequency band 868 0 868 6MHz 869 7 870 0MHz Max transmitting power 13dBm Range up to 50m outdoors up to 40m indoors depending on terrain and building structure Dimensions Height x Width x Depth 86 x 86 x 20 mm Compliance with EU directives RoHS 2011 65 EU RoHS 2015 863 RED 2014 53 EU Radio frequency of individual device m...

Страница 7: ...Installing on a smooth surface with battery supply 1 Remove the button cover 2 Remove the paper strip protecting the battery 3 LED ring light means the device is powered 4 Insert the button cover back 5 Remove the mounting frame from the device 6 Use the included double sided adhesive tape to stick the mounting frame to the smooth and clean surface 7 Push the device onto the mounting frame of the ...

Страница 8: ...ower supply inside the mounting box leaving the power connector outside Assemble the device 5 Remove the mounting frame from the device 6 Push the power connector through hole in the mounting frame 7 Place the mounting frame onto the mounting box and secure it with screws 8 Plug the power connector into the device 9 Push the device onto the mounting frame of the device you should hear an audible c...

Страница 9: ...gain 5 1 Adding manually To add the device to the Z Wave network manually 1 Set the main controller in Security non Security Mode add mode see the controller s manual 2 Quickly three times click one of the buttons 3 If you are adding in Security S2 Authenticated input the underlined part of the DSK label on the box 4 LED will start blinking yellow wait for the adding process to end 5 Adding result...

Страница 10: ...needs to support Security S2 see the controller s manual 2 Enter the full DSK string code to your controller If your controller is capable of QR scanning scan the QR code placed on the label on the box 3 Power the device 4 Wait for the adding process to start up to few minutes which is signalled with yellow LED blinking 5 Adding result will be confirmed by the Z Wave controller s message and the L...

Страница 11: ...move the device from the Z Wave network 1 Set the main controller into remove mode see the controller s manual 2 Quickly three times click then press and hold one of the buttons for 12 seconds 3 Release the button when the device glows green 4 Quickly click the button to confirm 5 LED will start blinking yellow wait for the removing process to end 6 Successful removing will be confirmed by the Z W...

Страница 12: ...utton Clicked once 1 Key Pressed 1 time Clicked twice 1 Key Pressed 2 times Clicked thrice 1 Key Pressed 3 times Held 1 Key Held Down Released 1 Key Released 2nd button Clicked once 2 Key Pressed 1 time Clicked twice 2 Key Pressed 2 times Clicked thrice 2 Key Pressed 3 times Held 2 Key Held Down Released 2 Key Released Double Button This mode is enabled by setting parameter 20 to 1 In this mode th...

Страница 13: ...ifferent type in this mode 1st and 2nd button work in the same way Click alternately ON with last level OFF 2xClick send pre set level set in parameter 152 Hold alternately increasing decreasing level until released Switch Controller This mode is enabled by setting parameter 20 to 3 In this mode the device uses associations to control Z Wave binary switches group 6 Click 1st ON Click 2nd OFF Dimme...

Страница 14: ...Z Wave Venetian blinds with slats controllers groups 6 7 in Step By Step mode al ternately sends commands for movement and stopping 1st button opens and stops Click open stop 2xClick send pre set level set in parameter 152 Hold opening slats until released 2nd button closes and stops Click close stop 2xClick stop Hold closing slats until released 7 3 Powering modes External supply mode In external...

Страница 15: ...ent temperature and reports it to the controller only when it changes by at least 0 1 C but not more often than every 10 minutes It is recommended to use battery or 12V DC power supply for reliable temperature measurement 7 5 Waking up When on battery power the device needs to be woken up to receive information about the new configuration from the Z Wave controller like parameters and associations...

Страница 16: ... is specified in parameters 13 150 and 151 7 7 Menu Menu allows to perform Z Wave network actions In order to use the menu 1 Quickly three times click then press and hold one of the buttons 2 After 3 seconds LED ring signals adding status Blinking green entering the menu added as non secure S0 S2 non authenticated Blinking magenta entering the menu added as Security S2 Authenticated Blinking red e...

Страница 17: ...ay of re moving the device from the Z Wave network Use reset procedure only if the primary controller is missing or inop erable To remove the device properly follow the removing procedure described in Removing from Z Wave network on page 11 1 Quickly three times click then press and hold one of the buttons for 21 seconds 2 Release the button when the device glows yellow 3 Quickly click the button ...

Страница 18: ...signing single device only main controller by default 2nd association group On Off 1 is used to turn the associated devices on off 3rd association group Dimmer 1 is used to change level of as sociated devices 4th association group On Off 2 is used to turn the associated devices on off 5th association group Dimmer 2 is used to change level of as sociated devices 6th association group Multidevice is...

Страница 19: ...group Multilevel Start Change 3rd group Multilevel Stop Change 3rd group Commands sent to association groups in Switch Controller Mode parameter 20 set to 3 1 click 2 click Hold Release Button 1 on Basic Set 6th group Button 2 off Basic Set 6th group Commands sent to association groups in Dimmer Roller Shut ter Controller Mode parameter 20 set to 4 1 click 2 click Hold Release Button 1 on Multilev...

Страница 20: ...to association groups in Venetian Blinds Step By Step Controller Mode parameter 20 set to 6 1 click 2 click Hold Release Button 1 Multilevel Start Up Stop Change 6th group Multilevel Set 6th group Multilevel Start Up Change 7th group Multilevel Stop Change 7th group Button 2 Multilevel Start Down Stop Change 6th group Multilevel Stop Change 6th group Multilevel Start Down Change 7th group Multilev...

Страница 21: ...ghtness Description This parameter allows to adjust the LED frame brightness Parameter size 1B Default value 100 100 Available values 0 LED disabled 1 100 1 100 brightness 20 Operation mode Description This parameter defines operation of the device Choose the mode depending on the type of the device you want to control remotely Parameter size 1B Default value 0 scene controller Available values 0 ...

Страница 22: ...lable values 0 LED disabled 1 White 2 Red 3 Green 4 Blue 5 Yellow 6 Cyan 7 Magenta 8 Blinking red white blue 151 LED ring second button Description This parameter defines the colour of second button indicator lower part of the LED ring for indications using Indicator CC Parameter size 2B Default value 1 white Available values 0 LED disabled 1 White 2 Red 3 Green 4 Blue 5 Yellow 6 Cyan 7 Magenta 8 ...

Страница 23: ...ameter is not relevant for Scene Controller Mode Parameter size 2B Default value 99 Available values 0 99 or 255 153 2nd button double click value Description This parameter defines value of Basic Set or Multilevel Set frame depending on selected mode sent to associated devices after double click This parameter is used only in Double Button Mode Parameter size 2B Default value 99 Available values ...

Страница 24: ...V2 7 COMMAND_CLASS_VERSION 0x86 V3 YES 8 COMMAND_CLASS_MANUFACTURER_SPECIFIC 0x72 V2 YES 9 COMMAND_CLASS_DEVICE_RESET_LOCALLY 0x5A V1 YES 10 COMMAND_CLASS_POWERLEVEL 0x73 V1 YES 11 COMMAND_CLASS_SECURITY 0x98 V1 12 COMMAND_CLASS_SECURITY_2 0x9F V1 13 COMMAND_CLASS_SUPERVISION 0x6C V1 14 COMMAND_CLASS_CONFIGURATION 0x70 V4 YES 15 COMMAND_CLASS_FIRMWARE_UPDATE_MD 0x7A V5 YES 16 COMMAND_CLASS_CENTRAL...

Страница 25: ...4 only in always on external supply mode Indicator ID 0x50 Identify Indicator CC available commands Command Indicator ID Property ID Value Other SET All 0x03 0x00 0xFF SET All 0x04 0x00 0xFF SET All 0x05 0x00 0xFF GET All Device send Indica tor Report SUPPORTED GET All Device send Sup ported Report Indicator CC properties Property ID Description Values and requirements 0x03 On Off Periods Starts t...

Страница 26: ... 0x03 0x08 and On time within an On Off Period 0x05 0x03 This value is ignored if On Off periods is not defined This value is ignored if On Off periods val ue is less than this value Protection CC Protection Command Class allows to prevent local control using buttons Type State Description Hint Local 0 Unprotected The device is not protected and may be operated normally via the user interface Inpu...

Страница 27: ...erred to herein are trademarks of their respective holders Declaration of conformity Hereby Fibar Group S A with its registered office in Wyso gotowo ul Serdeczna 3 62 081 Wysogotowo declares that the device is in compliance with the essential require ments and other relevant provisions of Directive 2014 53 EU The full text of the EU declaration of conformity is available at the follow ing interne...

Отзывы: