


INSTALLING THE SIDE GRIP/HANDLE.
For your own safety, always use the side grip/control handle.
Install it by screwing it firmly on the end of the sander. The
side grip/control handle can be pivoted for easy operation.
See image on the left.
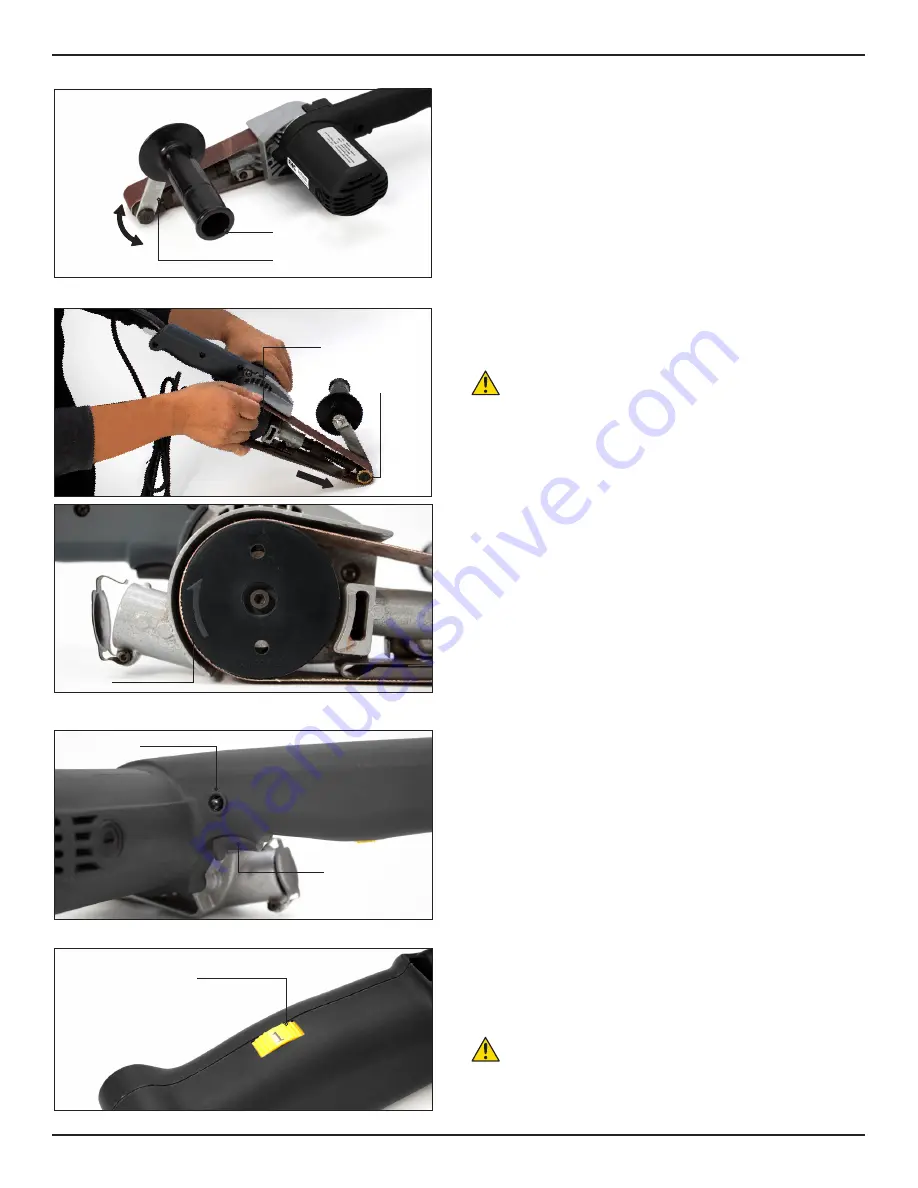
INSTALLING OR REMOVING
THE ABRASIVE BELT
CAUTION:
Always make sure that the tool is switched off and
unplugged before installing or removing the belt.
Loop the belt over the front pulley. Hold the tool as shown below
and press down to retract the front pulley so that you can slip the
other end of the belt over the rear pulley. When pressing down the
tool be careful not to allow the front pulley to turn unexpectedly
causing you to lose control of the tool.
NOTE: The arrow on the inside of the belt and that marked on the
rear pulley, must point in the same direction. See diagram below.
SWITCH ACTION
CAUTION: Before plugging the tool into an electrical socket, always
check to see that the trigger switch operates correctly and returns
to the “OFF” position when released. If it does not operate properly,
do not use the tool. Have it repaired immediately. To start the tool,
simply push the trigger switch. Release the trigger switch to stop.
For continuous operation, push the trigger switch and then push i
the lock button. To stop the tool from the locked position, push the
trigger switch fully, then release it.
SPEED ADJUSTING DIAL
The belt running speed can be adjusted and maintained
between 656 ft and 3280 ft per minute by turning the adjusting
dial. The dial is marked 1 (lowest speed) to 6 (full speed)
CAUTION:
Adjust the speed adjusting dial only within the range
of numbers 1 through 6. Do not force the dial beyond
this range or damage to the tool may result.
PAGE
3
OF
4
LIT0025
12.20.19
Side Grip
Grip Holder
Side Grip
Holder
Can Pivot
Speed Adjusting Dial
Lock Button
Switch
Trigger
Arrow
Rear Pulley
Front Pulley
Press Down to
Retract Front Pulley
FHC GLASS DETAIL BELT SANDER - 1-1/18" X 21" INSTRUCTION MANUAL
FRAMELESS HARDWARE COMPANY


