background image

7

SUN M20 - M30

KodL MNOOPPQO - RevL SS - TQUQSTQ

IT

O

L

M

S

H

E

F

I

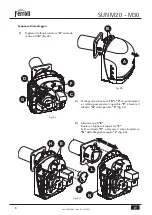
  4)


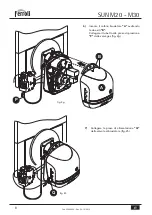
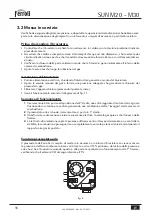
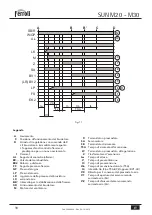
Inserire  la  flangia/boccaglio 

“L” 

sul  corpo  caldaia  interponendo  la 
guarnizione di tenuta caldaia/flangia 

“S”

.  Collegare  il  collettore 

“M”


(destro o sinistro) al boccaglio tramite 
le viti 

“O”

 (fig. 2e).


  5)


Infilare il corpo bruciatore sul perno 

“I” 

e fissarlo con il dado 

“H”

 . Inserire 

il  coperchio 

“F” 

ricollegando  le 

connessioni

 “D” 

e

 “C” 

(fig. 2c)


con i 

relativi passacavi


e avvitarlo tramite 

le viti 

“E”

 (fig. 2f).

fig. 2e

fig. 2f
Содержание SUN M 20

Страница 1: ...LA MANUTENZIONE EN OPERATING INSTALLATION AND MAINTENANCE INSTRUCTIONS FR MODE D EMPLOI INSTALLATION ET ENTRETIEN ES INSTRUCCIONES DE USO INSTALACI N Y MANTENIMIENTO BG 0 1 2 3 1 45 EL 6789 8 0 9 ABC...

Страница 2: ...cattiva manutenzione possono causare danni a persone animali o cose esclusa qualsiasi responsabilit del costruttore per i danni causati da errori nell installazione e nell uso e comunque per inosserva...

Страница 3: ...LLLLLLLLLLLLLLLLLLLLLLLLLLLLLLLLLLLLLLLLLLLLLLLLLLLLLLLLLLLLLLLLLLLLLLLLLLLLLLLLLLLLLLLLLTT 3 Servizio e manutenzione 12 MLT RegolazioniLLLLLLLLLLLLLLLLLLLLLLLLLLLLLLLLLLLLLLLLLLLLLLLLLLLLLLLLLLLLLLLL...

Страница 4: ...ti richiamatadal ventilatore aderisce alle pale della girante e ne riduce la portata d aria oppure causa l ostruzione del disco di stabilit fiamma pregiudicandone l efficienza Non permettere che il br...

Страница 5: ...zare solo prodotti originali L INSTALLAZIONE E LA TARATURA DEL BRUCIATORE DEVE ESSERE EFFETTUATA SOLTANTO DA PERSONALE SPECIALIZZATO E DI SICURA QUALIFICAZIONE OTTEMPERANDO A TUT TE LE ISTRUZIONI RIPO...

Страница 6: ...B fig 2b fig 2b fig 2c fig 2d A B D F C G E F N L H 2 Scollegareleconnessioni D e C neipuntiindicati e i relativi passacavi sul coperchio F Staccare il tubetto G dal coperchio F fig 2c 3 Allentare le...

Страница 7: ...a guarnizione di tenuta caldaia flangia S Collegare il collettore M destroosinistro alboccagliotramite le viti O fig 2e 5 Infilare il corpo bruciatore sul perno I e fissarlo con il dado H Inserire il...

Страница 8: ...TQUQSTQ IT A B P Q 6 Inserire il cofano bruciatore A avvitando le due viti B Collegare il tubetto alla presa di pressione P della valva gas fig 2g 7 Collegare la presa di alimentazione Q della valvola...

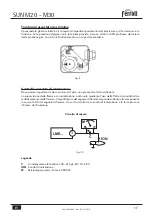
Страница 9: ...La linea a cura dell installatore il quale a seconda del tipo di valvola dovr garantire una pressione di alimentazione in funzionamento del bruciatore come riportato in tabella dati tecnici vedi sez 4...

Страница 10: ...re serranda ecc sono diretta mente accessibili Svitare la presa pressione gas I e la vite di regolazione L Scollegare le connessioni elettriche nei punti indicati in fig 2c a pag 5 Staccare il tubetto...

Страница 11: ...aldaia In caso di guasto al cavo di alimentazione del bruciatore la sua sostituzione va fatta solo da persona abilitata Il bruciatore va collegato ad una linea elettrica monofase 230 Volt 50 Hz Far ve...

Страница 12: ...a vite di regolazione L fig 6 Si modifica cos la posizione del deflettore rispetto al boccaglio e di conseguenza il passaggio del l aria La serranda aria azionata dal servomotore La regolazione delle...

Страница 13: ...PQO RevL SS TQUQSTQ IT V 0 1 5 0 75 2 3 N 0 2 5 2 5 2 5 fig 7 Regolazione combustione 2 stadio Regolazione combustione 1 stadio GAS GRUPPO VALVOLE MODULANTE Mod 3 4 1 1 4 I segni e si riferiscono alla...

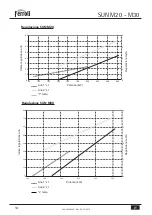
Страница 14: ...00 220 240 260 0 1 2 3 4 0 10 20 30 40 50 100 150 200 250 300 60 70 80 350 4 3 2 1 0 Regolazione SUN M20 Regolazione SUN M30 Yria T stL Yria Q stL _ _ testa Yria T stL Yria Q stL _ _ testa Wndice rego...

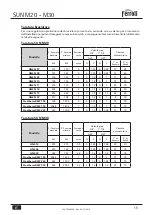
Страница 15: ...0 1 2 18 70 Prextherm RSW 190 206 5 147 4 1 0 1 2 0 1 15 70 Prextherm RSW 240 261 170 9 2 0 1 3 0 1 05 12 70 Prextherm RSW 300 326 209 5 2 2 0 1 6 0 1 2 25 70 Taratura SUN M30 Modello P Focolare mass...

Страница 16: ...nendo il rapporto aria gas impostato 3 2 Messa in servizio Verifiche da eseguire alla prima accensione e dopo tutte le operazioni di manutenzione che abbiano com portato la disconnessione dagli impian...

Страница 17: ...nizzazione Deve essere rispettato il valore minimo di 1 A e non presentare forti oscillazioni La supervisione della fiamma con ionizzazione ottenuta mediante l uso dell effetto di conduttivit e raddri...

Страница 18: ...o per la stabilizzazione della fiamma C D Funzionamento del bruciatore M Motore del ventilatore R Termostato o pressostato SA Servomotore SB Termostato di sicurezza TSA Tempo di sicurezza all accensio...

Страница 19: ...stibile Xalfunzionamento rilevatore xamma Zifettosit nella taratura del bruciatore 0 assenza di combu stibile Xancata accensione0 difettosit trasformatore di accensione M y lampeggi h h h On V difetto...

Страница 20: ...stione sia quella indicata dal costruttore della cal daia Eseguire l analisi completa dei fumi di combustione e verificare il rispetto dei limiti imposti dalle norme vigenti Tabella dei codici di erro...

Страница 21: ...Manutenzione Il bruciatore richiede una manutenzione periodica con cadenza almeno annuale che deve essere ese guita da personale abilitato Le operazioni basilari da effettuare sono controllo e pulizi...

Страница 22: ...egolazione testa 2 Trasformatore 3 Coperchio per ispezione testa di combustione 4 Spine per collegamento elettrico 5 Motore 6 Pressostato aria 7 Apparecchiatura 8 Servomotore regolazione aria 9 Ventol...

Страница 23: ...ermica 85 135 270 110 150 365 Ventola 215 82 rsx 42 pale Valvola gas D 3 4 1 1 4 Regolatore Modulante opz RWF 40 Testa e 95 105 Motore monofase 370 W Combustibile G20 G25 G31 Alimentazione elettrica 2...

Страница 24: ...a gas sommare la perdita lato fumi della caldaia al valore ricavato dal grafico G20 Rampa gas cod 094001X0 La rampa gas 094001X0 pu essere utilizzata con qualsiasi pressione in ingresso compresa tra 2...

Страница 25: ...a lato fumi della caldaia al valore ricavato dal grafico G20 Rampa gas cod 094001X0 La rampa gas 094001X0 pu essere utilizzata con qualsiasi pressione in ingresso compresa tra 20 35 mbar Rampa gas cod...

Страница 26: ...Arancio Azzurro Viola Grigio Verde Blu Bianco IT 4 5 Schema elettrico Versione Bistadio progressivo Legenda F Fusibile EI Elettrodo di ionizzazione EA Elettrodo di accensione IG Interruttore generale...

Страница 27: ...NC NC 13 14 5 8 9 12 1 4 Arancio Azzurro Viola Grigio Verde Blu Bianco Scollegare il Faston IT Legenda F Fusibile EI Elettrodo di ionizzazione EA Elettrodo di accensione IG Interruttore generale TS T...

Страница 28: ...te garanzia i guasti e gli eventuali danni causati da trasporto non effettuato a cura dell azienda inosservanza delle istruzioni e delle avvertenze previste dall azienda produttrice e riportate sui ma...

Страница 29: ...ions Incorrect installation or poor maintenance can cause damage or physical injury The manufacturer de clines any responsibility for damage caused by er rors in installation and use or by failure to...

Страница 30: ...LLLMP QLO lectrical connectionsLLLLLLLLLLLLLLLLLLLLLLLLLLLLLLLLLLLLLLLLLLLLLLLLLLLLLLLLLLLLLLLLLLLLLLLLLLLLLLLLLLLLLLLLLLLLM 3 Service and maintenance 39 MLT Yd ustmentsLLLLLLLLLLLLLLLLLLLLLLLLLLLLLLL...

Страница 31: ...materials or objects corrosive gases and volatile substances and that it is not dusty In fact dust drawn by the fan sticks to the blades and reduces the air flow or obstructs the flame stability disk...

Страница 32: ...ries only use original products BURNER INSTALLATION AND SETTING MUST ONLY BE CARRIED OUT BY QUALIFIED AND SPECIALISED PERSONNEL ACCORDING TO ALL THE INSTRUCTIONS GIVEN IN THIS TECHNICAL MANUAL THE CUR...

Страница 33: ...he two screws B fig 2b fig 2b fig 2c fig 2d A B D F C G 2 Detachtheconnections D and C whereindicated and the respective cable glands on the cover F Detach the tube G from the cover F fig 2c 3 Loosen...

Страница 34: ...ng the boiler flange seal S Connect the manifold M right or left to the nozzle by means of the screws O fig 2e 5 Insert the burner body on the pin I and fix it with the nut H Fit the cover F reconnect...

Страница 35: ...odL MNOOPPQO RevL SS TQUQSTQ A B P Q 6 Fit the burner casing A tightening the two screws B Connect the tube to the gas valve pressure point P fig 2g 7 Connect the valve supply point Q to the burner fi...

Страница 36: ...am in Fig 3 The line is to be prepared by the installer and depending on the type of valve must ensure a supply pressure with burner operation as given in the technical data table see section 4 3 Key...

Страница 37: ...r shutter etc can be directly accessed Unscrew the gas pressure point I and the adjustment screw L Undo the electrical connections where indicated in fig 2c on page 5 Detach the tube G from the cover...

Страница 38: ...or to be ope ned If the burner power cable is damaged it must only be replaced by qualified personnel The burner must be connected to a single phase 230 Volt 50 Hz electric line Have the efficiency an...

Страница 39: ...after loosening it This changes the position of the baffle with respect to the nozzle and therefore the air passage The air shutter is operated by the servomotor Adjustment of the max open closed pos...

Страница 40: ...odL MNOOPPQO RevL SS TQUQSTQ V 0 1 5 0 75 2 3 N 0 2 5 2 5 2 5 fig 7 Combustion adjustment 2nd stage Combustion adjustment 1st stage GAS MODULATING VALVE ASSEMBLY Model 3 4 1 1 4 The signs and refer to...

Страница 41: ...180 200 220 240 260 0 1 2 3 4 0 10 20 30 40 50 100 150 200 250 300 60 70 80 350 4 3 2 1 0 SUN M20 Adjustment SUN M30 Adjustment Yir Tst stL Yir Qnd stL _ _ head Yir Tst stL Yir Qnd stL _ _ head Yir a...

Страница 42: ...m RSW 190 206 5 147 4 1 0 1 2 0 1 15 70 Prextherm RSW 240 261 170 9 2 0 1 3 0 1 05 12 70 Prextherm RSW 300 326 209 5 2 2 0 1 6 0 1 2 25 70 SUN M30 setting Model P Firebox max P Firebox min Head positi...

Страница 43: ...pletion towards the required power maintaining the set air gas ratio 3 2 Commissioning Checks to be made at first lighting and after all maintenance operations involving disconnecting from the systems...

Страница 44: ...g 9 Ionisation current check The minimum value of 1 A must be respected without wide fluctuations Supervision of the flame with ionisation is obtained through the effect of conductivity and rectificat...

Страница 45: ...B Flame stabilisation interval C D Burner operation M Fan motor R Thermostat or pressure switch SA Servomotor SB Safety thermostat TSA Ignition safety time W Control pressure switch or thermostat Z Ig...

Страница 46: ...afet time _ Y_ ault fuel valves lame detector fault ault burner ad ustment0 no fuel o ignition0 fault ignition transformer M y ashes h h h On _ V_ fault oss of air pressure signal after _tTS_ _ V_ is...

Страница 47: ...the combustion chamber is that indicated by the boiler manufacturer Do a complete analysis of the combustion fumes and check compliance with the limits set by current standards Table of error codes O...

Страница 48: ...from the room and correctly positioned 3 3 Maintenance The burner requires periodical maintenance which must be performed by qualified personnel at least once a year The basic operations to carry out...

Страница 49: ...18 13 2 1 11 12 10 19 Key 1 Head adjustment screw 2 Transformer 3 Combustion head inspection cover 4 Plugs for electrical connection 5 Motor 6 Air pressure switch 7 Unit 8 Air adjustment servomotor 9...

Страница 50: ...x 1st stage Heat output 85 135 270 110 150 365 Fan 215 82 rsx 42 blades Gas valve D 3 4 1 1 4 Modulating Regulator opt RWF 40 Head e 95 105 Single phase motor 370 W Fuel G20 G25 G31 Power supply 220 2...

Страница 51: ...gas train minimum inlet pressure add the boiler fume side loss to the value obtained from the graph G20 Gas train code 094001X0 The gas train 094001X0 can be used with any inlet pressure of 20 35 mba...

Страница 52: ...t pressure add the boiler fume side loss to the value obtained from the graph G20 Gas train code 094001X0 The gas train 094001X0 can be used with any inlet pressure of 20 35 mbar Gas train code 094000...

Страница 53: ...T1 T2 S3 L1 N T1 T2 S3 B4 h w h w Orange Sky blue Violet Grey Green Blue White 4 5 Wir ing diagram Two stage progressive output version Key F Fuse EI Ionisation electrode EA Ignition electrode IG Mai...

Страница 54: ...3 L1 N T1 T2 S3 B4 h w h w R NA NA N L C C NC NC 13 14 5 8 9 12 1 4 Orange Sky blue Violet Grey Green Blue White Disconnect the Faston Key F Fuse EI Ionisation electrode EA Ignition electrode IG Main...

Отзывы: