background image

52


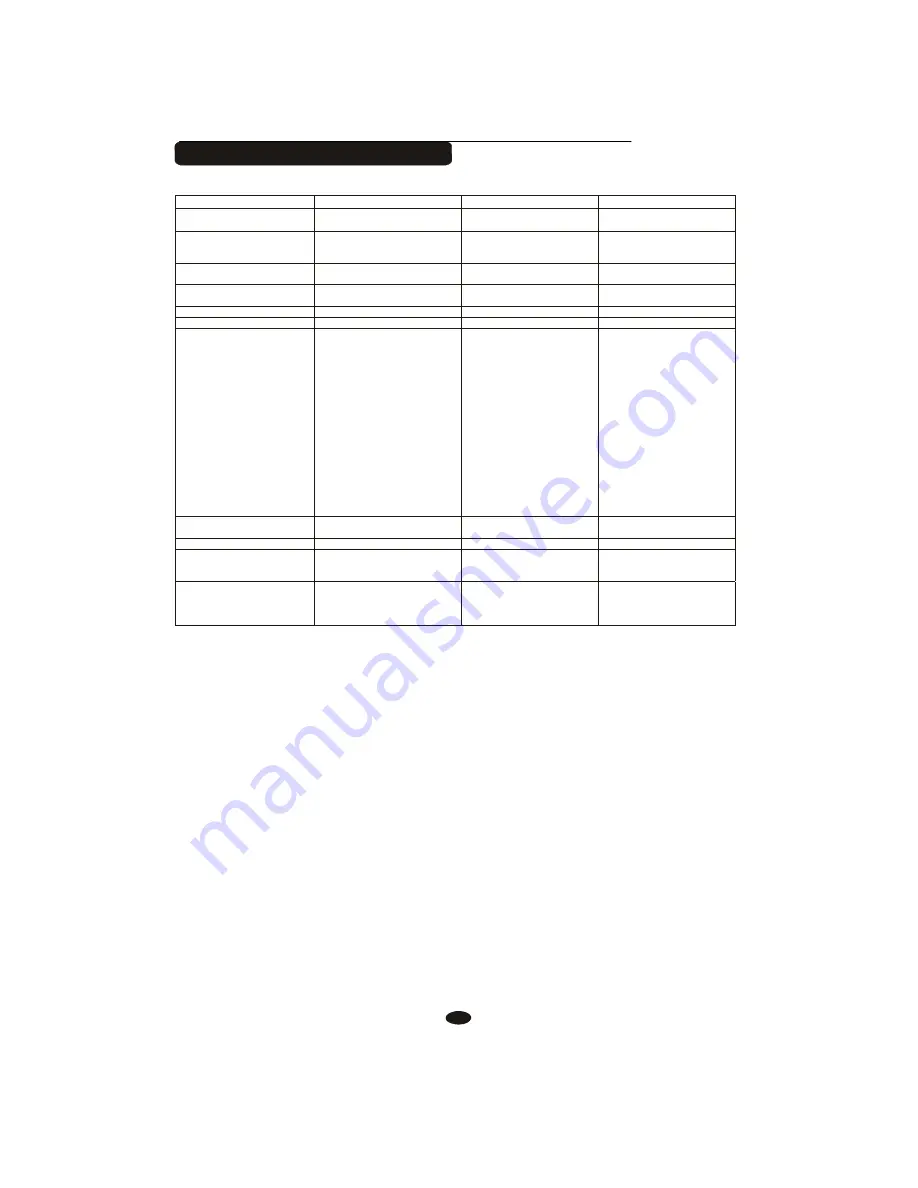
MIDI Implementation Chart


F u n c t i o n 


T r a n s m i t t e d 

R e c o g n i z e d 

R e m a r k s 


Basic      Default


Channel   Changed


(*1) 
(*1)


1-16CH


1-16CH


Mode   Default 
Messages 
Altered


Mode  3


X


********

Mode  3


X


Note


Number  :True  voice


0~127


********

0~127


0~127


Velocity       Note  ON 
Note  OFF


O 9nH,v=1~127


O 9nH,v=0 or 8nh

O 9nH,v=1~127


O 9nH,v=0 or 8nh


Affter  Key's


X


X

Pitch  Bender


X


O

Control  Change      0,32


1


5


6


7


10


11


64


65


66


67


80,81


91,93


100,101


120


121


122


O


O


O(*2) 
O


O

Bank  Select 
Modulation 
Portamento time 
Data  Entry 
Volume


Pan 
Expression 
Sustain 
Portamento 
Sostenuto 
Soft  pedal 
DSP  TYPE 
DSP  DEPTH


RPN  LSB,MSB 
All sound  off


Reset all Controllers


Local  control


Programe


Change  : True


O 0-127


0-127


O 0-127


0-127


System  Exclusive


X


O

System   : Song  Position

: Song  Select


Common  : Tune


X


X

X


Aux  

:  Local  on/off


: All Notes  Off


Messages : Active  Sense


: Reset


X


O


Mode1:OMNI ON,POLY 

Mode2:OMNI ON,MONO 

O:   Yes


Mode3:OMNI OFF,POLY   Mode4:OMNI OFF,MONO 

X:  NO


*1: Main voice track (01-16).Default: 01


Split voice track (01-16).Default: 02


Dual voice track (01-16).Default: 03


Percussion track (01-16).Default: 10


*2: Registered parameter number:


#0: Pitch sensivity


#1: Fine tuning cents


#2:  Coarse tuning  in half-tones


Содержание TG8834U

Страница 1: ......

Страница 2: ...olarized plug hase two blades with one wider than the other A grounding type plug has two blades and a third grounding prong The wide blade or the third prong are provided for your safety if the provided plug does not fit into your outlet consult an elec trician for replacement of the obsolete outlet 10 Protect the power cord from being walked on or pinched particularly at plugs convenience recept...

Страница 3: ...to provide reasonable protection against harmful interference in a residential installation This equipment generates uses and can radiate radio frequency energy and if not installed and used in accordance with the instructions may cause harmful interference to radio communications However there is no guarantee that interference will not occur in a particular installation If this equipment does cau...

Страница 4: ...s the most advanced PCM tone generation technology This digital piano lets you record your performances and Registration settings to a USB Disk Each user song lets you record up to sixteen independent tracks In order to obtain maximum performance and enjoyment please read this manual thoroughly while trying out the various features described ...

Страница 5: ...ttings 37 Recalling the Settings 38 Saving the Registration Data to Adjusting Reverb Depth 12 USB Disk 38 Chorus 12 Use Registration Data from USB Adjusting Chorus Depth 12 39 Sustain 13 Song Recording 40 Touch 14 Quick Recording 40 Function 15 Voices 22 Selecting a Voice 22 Dual Mode 23 Multi Track Recording 42 Delete Song 45 File Button 46 Filter Button 46 Split Mode 24 Adjusting Song s V olume ...

Страница 6: ...1 ...

Страница 7: ...RIATION Button 21 SPLIT Button 22 HARMONY Button 23 DUAL Button 24 TWIN Button 25 FUNCTION Button 26 ENTER Button 27 TOUCH Button 28 VOICE Button 29 STYLE Button 30 GRAND PIANO Button 31 Number Buttons 0 9 and Buttons 32 LEFT Button 33 RIGHT Button 34 DEMO Button 35 STORE BANK Button 36 SAVE Button 37 M1 M6 Button 38 FILE Button 39 RECORD Button 40 PLAY LOAD Button 41 TRACK Button 42 FILTER Button...

Страница 8: ...he piano is turned off when connecting and disconnecting the power 2 Turn the volume switch to reach the minimum level before turning on the power Using Headphones Two sets of standard stereo headphones can be plugged in here for private practice or late night playing The internal speaker system is automatically shut off when a pair of headphones is plugged into PHONES jacks PHONES 1 PHONES 2 ...

Страница 9: ...n actual acoustic piano letting you sustain the sound of the voices even after releasing your fingers from the keys SUSTAIN 2 Sostenuto Pedal Center If you play a note or chord on the keyboard and press the sostenuto pedal while the notes are held those notes will be sustained as long as the pedal is held but all subsequently played notes will not be sustained SOSTENUTO ...

Страница 10: ... Digital Interface is a world standard communica tion interface which allows electronic musical instruments to communicate with each other by sending and receiving compatible note program change and other types of MIDI data MIDI IN MIDI OUT MIDI OUT MIDI IN NOTE MIDI IN Receives MIDI data from another MIDI device MIDI OUT Transmits MIDI data to another MIDI device ...

Страница 11: ...m Using USB MIDI This product allows the transfer of MIDI over USB There is a specific way in which the MIDI signals are routed for maximum flexibility In a standard Digital Piano the built in keyboard sends MIDI signals to the internal sound bank as well as the 5 pin MIDI output In this digital piano the keyboard not noly sends MIDI to the internal sound bank just like normal but also sends MIDI ...

Страница 12: ...itch Turn the power on by pressing the POWER switch the panel LCD display will light POWER OFF ON RHY1 RHY2 BASS CRD1 CRD2 PAD PHR1 PHR2 Adjust the Volume Use MASTER VOLUME control to adjust the volume to your desired level MASTER VOLUME RHYTHM BASS Demo Play There are 3 preset piano songs that you can play individually Here s how you can select and play the demo songs 1 Listen to the Demo Song Pr...

Страница 13: ...T RI IGHT RHY1 RHY2 BASS CRD1 CRD2 PAD PHR1 PHR2 DEMO 3 Adjust Demo Song s Volume Each song has two tracks performance left hand and right hand You can use RHYTHM control to adjust left hand volume and use BASS CHORD control to adjust right hand volume MASTER VOLUME RHYTHM BASS While the demo song is playing you can deactivate the corresponding track by pressing the LEFT or RIGHT button LEFT RI IG...

Страница 14: ...mpo by tapping in tempo on TAP TEMPO button Tap on the button 2 times while rhythm is playing The rhythm tempo are set as your desired speed If you want to set the tempo before starting rhythm you have to tap the button 4 times TAP TEMPO RHY1 RHY2 BASS CRD1 CRD2 PAD PHR1 PHR2 TAP TEMPO Transpose The Transpose function allows you to change the pitch of the instrument in semitone steps up to a maxim...

Страница 15: ...emitone through 0 normal pitch to 63 up one semitone TUNE RHY1 RHY2 BASS CRD1 CRD2 PAD PHR1 PHR2 Reverb The REVERB button selects a number of digital reverb effects that you can use for extra depth and expressive power Press REVERB button use and buttons to select reverb type No reverb is produced when you select OFF and the indicator is off REVERB RHY1 RHY2 BASS CRD1 CRD2 PAD PHR1 PHR2 1 2 3 4 5 ...

Страница 16: ...en you select OFF and the indicator is off CHORUS RHY1 RHY2 BASS CRD1 CRD2 PAD PHR1 PHR2 The chorus types in the list below can be selected from the chorus display 1 2 3 4 5 6 7 8 Chorus1 Chorus2 Chorus3 Chorus4 Feedback Flanger ShtDelay FbDelay NOTE Press CHORUS button repeatedly to turn on or turn off the chorus effect Adjusting Chorus Depth Reference F2 Reverb and Chorus Depth P 16 ...

Страница 17: ...le turning on the metronome function Time signature 1 4 2 4 3 4 4 4 6 4 3 8 6 8 9 8 METRO RHY1 RHY2 BASS CRD1 CRD2 PAD PHR1 PHR2 To set the tempo of metronome please see the details in TEMPO section P 10 Sustain Press SUSTAIN button so that its icon appears to turn sustain on It can be used as a damper pedal Turning sustain on to sustain notes after the keys are released Press SUSTAIN button again...

Страница 18: ...ASS CRD1 CRD2 PAD PHR1 PHR2 No Name Description 00 Fixed means that regardless of how hard you play the keyboard will transmit a velocity value of 100 01 Hard is defined as a curve which makes it easier to play quietly The curve generates lower velocities for the same force 02 Normal is defined as a curve which will be mid way between the other two 03 Soft is defined as a curve which makes it easi...

Страница 19: ... F F5 5 MIDI Reception and Transmission F F6 6 Local Control F F7 7 Auto Track Press FUNCTION button repeatedly to select desired function F1 through F7 FUNCTION RHY1 RHY2 BASS CRD1 CRD2 PAD PHR1 PHR2 F F1 1 Pan In this function you can set the stereo position of each orchestration part to create a board stereo image of your sound Press FUNCTION button to select M PAN Use and buttons to select S P...

Страница 20: ...epth In this function you can adjust the reverb and chorus depth for the selected voice Press FUNCTION button to select M RevVo Use and buttons to select S RevVo D RevVo M ChrVo S ChrVo D ChrVo FUNCTION RHY1 RHY2 BASS CRD1 CRD2 PAD PHR1 PHR2 M RevVo Main Voice Reverb Depth S RevVo Split Voice Reverb Depth D RevVo Dual Voice Reverb Depth M ChrVo Main Voice Chorus Depth S ChrVo Split Voice Chorus De...

Страница 21: ... 3 Octave Press FUNCTION button to select M Octav Use and buttons to select S Octav and D Octav FUNCTION RHY1 RHY2 BASS CRD1 CRD2 PAD PHR1 PHR2 M Octav Main Voice Octave S Octav Split Voice Octave D Octav Dual Voice Octave Press ENTER button to confirm and use and buttons to set the octave value 2 to 2 ENTER RHY1 RHY2 BASS CRD1 CRD2 PAD PHR1 PHR2 ...

Страница 22: ...C Point Chord Point Press ENTER button to confirm use and buttons or number buttons 0 9 to set the point Range 00 87 ENTER RHY1 RHY2 BASS CRD1 CRD2 PAD PHR1 PHR2 F F5 5 MIDI Reception and Transmission In this function you can select MIDI reception and transmission track and turn on or turn off MIDI IN and MIDI OUT function Press FUNCTION button to select MIDI R0 Use and buttons to select MIDI R1 M...

Страница 23: ...he parameters ENTER RHY1 RHY2 BASS CRD1 CRD2 PAD PHR1 PHR2 NOTE When selecting MIDI S1 S3 mode the transmission is enabled automatically and use button or number buttons to select MIDI channel 1 16 for which you want to specify a new transmission F F6 6 Local Control In this function you can turn on or turn off the speaker system of your piano Press FUNCTION button to select Local FUNCTION RHY1 RH...

Страница 24: ... are sent to the Sound Engine Local off There will be no sound produced by the brain s tone generator MIDI function can work as usual F F7 7 Auto Track Here you can turn on or turn off AUTO TRACK function for recording mode And the setting will be saved automatically when the power is off Press FUNCTION button to select AutoTrk FUNCTION RHY1 RHY2 BASS CRD1 CRD2 PAD PHR1 PHR2 ...

Страница 25: ...2 PAD PHR1 PHR2 OnAutoTrk when you want to record more tracks data select OnAutoTrk the piano brain will assign the next track for you automatically OffAutoTrk when you want to select tracks by yourself here you have to select OffAutoTrk function first then press TRACK button on the panel to select the track you want ...

Страница 26: ... current voice number and the name will display on the Message Display section VOICE RHY1 RHY2 BASS CRD1 CRD2 PAD PHR1 PHR2 Use and buttons or number buttons 0 9 to select the desired voice according to the voice list 1 2 3 4 5 6 0 7 8 9 RHY1 RHY2 BASS CRD1 CRD2 PAD PHR1 PHR2 NOTE When the keyboard is in Split or and Dual mode press VOICE button repeatedly can switch Main Voice Mode and Split Voic...

Страница 27: ... 4 seconds the LCD Display will go back to the first voice mode SPLIT HARMONY DUAL TWIN RHY1 RHY2 BASS CRD1 CRD2 PAD PHR1 PHR2 Dual Mode 2 Setting the Dual Voice Volume Reference Adjusting Keyboard Volume P 25 NOTE To change the dual voice Pan Octave and Reverb Chorus Depth please see the details in FUNCTION section P 15 3 Exit the Dual Mode Press DUAL again the Dual Cursor turns off and the Dual ...

Страница 28: ... 0 9 buttons to select the left voice SPLIT HARMONY DUAL TWIN RHY1 RHY2 BASS CRD1 CRD2 PAD PHR1 PHR2 Split Cursor 2 Changing the Split Point Reference F4 Split and Chord Point P 18 3 Setting the Split Voice Volume Reference Adjusting Keyboard Volume P 25 NOTE To change the split voice Pan Octave and Reverb Chorus Depth please see the details in FUNCTION section P 15 4 Exit the Split Mode Press SPL...

Страница 29: ...ile the Split Cursor is flashing KB VOL 2 Dual Voice Volume RHY1 RHY2 BASS CRD1 CRD2 PAD PHR1 PHR2 In Dual mode press KB VOL button can adjust the Dual voice volume while the Dual Cursor is flashing KB VOL RHY1 RHY2 BASS CRD1 CRD2 PAD PHR1 PHR2 3 Main Voice Volume You can adjust the main voice volume by pressing KB VOL button when the Dual or Split Cursor does not flash KB VOL RHY1 RHY2 BASS CRD1 ...

Страница 30: ...ddition various panel settings such as voice effect Tempo etc that match the selected style can be recalled with just a single button O T S Press O T S button repeatedly can turn on or turn off One Touch Setting O T S RHY1 RHY2 BASS CRD1 CRD2 PAD PHR1 PHR2 Twin Mode Press TWIN button to select Twin mode In this mode the keyboard will be separated into two play areas Right from C3 to C7 Left from A...

Страница 31: ...is available for normal playing The defaultAuto Accompaniment split point is the F2 key The Auto Accompaniment section of the keyboard Auto Accompaniment Auto Accompaniment Normal Consists of all keys to its left Left hand fingering specifies the auto accompaniment chords The right hand plays normally Using AutoAccompaniment Only Rhythm Track 1 Press the STYLE Button STYLE RHY1 RHY2 BASS CRD1 CRD2...

Страница 32: ... Style Press the START STOP button again to stop the accompaniment Using Auto Accompaniment All Tracks 1 Press the STYLE Button STYLE 2 Selecting a Style RHY1 RHY2 BASS CRD1 CRD2 PAD PHR1 PHR2 Style Cursor Using and buttons or number buttons 0 9 When selecting style 100 holding the 1 button till the 1 is displayed then you can enter the tens and ones digits 1 2 3 4 5 6 0 7 8 9 RHY1 RHY2 BASS CRD1 ...

Страница 33: ...2 4 Turn On the Synchronized Start Press SYNCHRO button The beat lamp will flash in time with the tempo it s called synchronized start standby The auto accompaniment starts as soon as you play a chord with your left hand CHORD FADE SYNCHRO RHY1 RHY2 BASS CRD1 CRD2 PAD PHR1 PHR2 5 Stop Playing the Style Press the START STOP button again to stop the accompaniment Use RHYTHM volume control to adjust ...

Страница 34: ...ord on the AUTO ACCOMPANIMENT section of the keyboard SYNCHRO START STOP RHY1 RHY2 BASS CRD1 CRD2 PAD PHR1 PHR2 Starting the Accompaniment with an Introduction Any of your instrument accompaniment patterns can be started with an appropriate introduction by pressing the INTRO ENDING button directly If you press the SYNCHRO button and then press the INTRO ENDING button the accompaniment will start f...

Страница 35: ...D PHR1 PHR2 Stopping the Accompaniment An accompaniment progress can be stopped immediately by pressing the START STOP button and also can be stopped with an appropriate ending by pressing the INTRO ENDING button SYNCHRO START STOP INTRO ENDING Variation While the style is playing you can add variation in the rhythm accompaniment by pressing the VARIATION button This switches between the Main Aand...

Страница 36: ...r appears on the display SPLIT HARMONY DUAL TWIN RHY1 RHY2 BASS CRD1 CRD2 PAD PHR1 PHR2 Harmony Cursor The Harmony is derived from the chords you have played if you use Automatic Accompaniment or turn on the Chord function Chord Function Turn on this mode the specified left hand section of the keyboard becomes the Auto Accompaniment section and chords played in this section are automatically detec...

Страница 37: ...s C If you press a C key in the left hand section of the keyboard for example a C major accompaniment will be played Press another key in the left hand section of the keyboard to select a new chord The key you press will always determine the root of the chord played Cm i e C for a C chord Minor Chords Simultaneously press the root key and a black key C7 to its left Seventh Chords Simultaneously pr...

Страница 38: ...4 5 b 7 or 1 2 3 4 5 b 7 C7 11 C7 11 7 13 1 3 5 6 b 7 C7 13 C7 13 7b9 1 b 2 3 5 b 7 C7 b 9 C7 b 9 7b13 1 3 5 b 6 b 7 C7 b 13 C7 b 13 7 9 1 2 3 5 b 7 C79 C7 9 M7aug 1 3 5 7 CM7aug CM7aug 7aug 1 3 5 b 7 C7aug C7aug sus4 1 4 5 Csus4 Csus4 1 2 5 1 2 5 C1 2 5 C Fingered Mode Fingered Mode is ideal if you already know how to play chords on a keyboard since it allows you to supply your own chords for the...

Страница 39: ...your USB Disk Insert the USB Disk into the USB terminal Press FILE button use and buttons to select RINGWAY Style RTY or YAMAHA Style STY FILE RECORD PLAY LOAD MULTI DELETE RHY1 RHY2 BASS CRD1 CRD2 PAD PHR1 PHR2 Press PLAY LOAD button FILE RECORD PLAY LOAD MULTI DELETE RHY1 RHY2 BASS CRD1 CRD2 PAD PHR1 PHR2 RHY1 RHY2 BASS CRD1 CRD2 PAD PHR1 PHR2 ...

Страница 40: ...s STYLE RHY1 RHY2 BASS CRD1 CRD2 PAD PHR1 PHR2 NOTE Some YAMAHA Styles have four variations Main A Main B Main C and Main D only two variations Main A and Main B will be recognized by your instrument Only one User Style can be loaded once And the User Style will be lost after playing MIDI file You need to reload the User Style again when you want to use it ...

Страница 41: ...d Bank Press the STORE BANK button repeatedly to select the bank 1MmryBank 4MmryBank STORE BANK RHY1 RHY2 BASS CRD1 CRD2 PAD PHR1 PHR2 2 Memorizing the Settings to the Preset M1 M6 While Holding Down the STORE BANK Press M1 M6 Button STORE BANK M1 M2 M3 M4 M5 M6 RHY1 RHY2 BASS CRD1 CRD2 PAD PHR1 PHR2 NOTE Anytime you store to a REGISTRATION MEMORYbutton all settings previously stored in that butto...

Страница 42: ...1 CRD2 PAD PHR1 PHR2 2 Press the Desired Registration Memory Preset M1 M6 Button The settings stored to a REGISTRATION MEMORYbutton can be recalled simply by pressing the appropriate button M1 M6 M1 M2 M3 M4 M5 M6 RHY1 RHY2 BASS CRD1 CRD2 PAD PHR1 PHR2 Saving the Registration Data to USB Disk Insert the USB Disk into the USB terminal The USB cursor will appear on the LCD Display USB ...

Страница 43: ... select REG file then press PLAY LOAD button display shows Load OK FILE RECORD PLAY LOAD MULTI DELETE RHY1 RHY2 BASS CRD1 CRD2 PAD PHR1 PHR2 24 Registrations will be loaded to the memory store 4 6 on the panel You can recall the information you have loaded by pressing M1 M6 Delete REG File from USB Insert the USB Disk into the USB terminal Use and buttons to select REG file you want to delete then...

Страница 44: ...companiment parts It provides two different ways to record Quick Recording and Multi Track Recording All the recording data will be saved automatically as MIDI Format 0 File to your USB Disk Quick Recording 1 Insert the USB Disk into the USB Terminal USB 2 Start Recording Press the RECORD button to start recording The first two measures are tempo prompt only It cannot record any data FILE RECORD P...

Страница 45: ... RHY2 BASS CRD1 CRD2 PAD PHR1 PHR2 Quick Recording automatically makes track assignments as below Track 1 Main Voice Track 2 Split Voice Track 3 Dual Voice You also can use accompaniment styles to record The accompaniment style will be recorded on track9 track16 The quick recording method is different from the multi recording method In quick recording mode track4 track8 are not allowed to record b...

Страница 46: ...ack On Reference F7 AutoTrack P 20 USB 1 3 Start Recording Press the RECORD button to start recording The first two measures are tempo prompt only It cannot record any data When the recording is finished the recording file will be saved with the name 1 MUSIC000 FILE RECORD PLAY LOAD MULTI DELETE RHY1 RHY2 BASS CRD1 CRD2 PAD PHR1 PHR2 1 4 To Stop Recording by Pressing RECORD Button Again FILE RECOR...

Страница 47: ...he recording file will be saved as a new file named 2 MUSIC001 FILE RECORD PLAY LOAD MULTI DELETE RHY1 RHY2 BASS CRD1 CRD2 PAD PHR1 PHR2 1 6 Use the Same Operation as Step 5 to Record More Tracks The Name of the New File Will be Saved in Sequence 1 7 To Stop Recording by Pressing RECORD Button Again FILE RECORD PLAY LOAD MULTI DELETE 2 Select Tracks by Yourself 2 1 Insert the USB Disk Into the USB...

Страница 48: ...Trk to select the Split Voice track 01 16 OFF D RecTrk to select the Dual Voice track 01 16 OFF 2 4 Start Recording Press RECORD button to start recording The first two measures are tempo prompt only It cannot record any data When the recording is finished the recording file will be saved with the name 1 MUSIC000 To Stop Recording by Pressing RECORD Button Again FILE RECORD PLAY LOAD MULTI DELETE ...

Страница 49: ...2 BASS CRD1 CRD2 PAD PHR1 PHR2 2 7 Use the Same Operation as Step 3 and Step 6 to Record More Tracks The Name of the New File Will be Saved in Sequence 2 8 To Stop Recording by Pressing RECORD Button Again Delete Song Insert the USB Disk into the USB terminal Use and buttons to select xMUSICxxx file you want to delete then hold down the RECORD button and press PLAY LOAD button LCD shows FILE RECOR...

Страница 50: ...D2 PAD PHR1 PHR2 Use and buttons to select ON or OFF 1 2 3 4 5 6 0 RHY1 RHY2 BASS CRD1 CRD2 PAD PHR1 PHR2 7 8 9 For example a midi file is prepare for playing but track 1 or track 2 you would not like to play it with other tracks so you can press FILTER button to select FLtTrk01 or FLtTrk02 use or button to turn off it Track 1 or track 2 will be closed Press FILTER button repeatedly to select FltT...

Страница 51: ...SB VOL button while playing song FILTER USB VOL RHY1 RHY2 BASS CRD1 CRD2 PAD PHR1 PHR2 Use and buttons or number 0 9 buttons to adjust the song s volume Range 00 127 Default 100 1 2 3 4 5 6 0 RHY1 RHY2 BASS CRD1 CRD2 PAD PHR1 PHR2 7 8 9 ...

Страница 52: ... Factory Set 1 Turn off the power POWER OFF ON 2 Hold down and buttons then turn the power on it can restore all internal settings to factory set 1 2 3 4 5 6 0 7 8 9 RHY1 RHY2 BASS CRD1 CRD2 PAD PHR1 PHR2 ...

Страница 53: ...49 CHANNEL number CHANNEL number Appendix Voice List ...

Страница 54: ... 12 GUITAR POP 13 JAZZ ROCK 14 SWING FUNK 15 POP ROCK BALLAD 16 PIANO BALLAD 17 LOVE SONG 18 6 8 MODERN 19 6 8 SLOW ROCK 20 SHOW BALLAD 21 POP BALLAD 22 16BEAT BALLAD DANCE 23 RAP 24 DANCE POP 25 HOUSE 26 SWING HOUSE 27 CLUB DANCE 28 CLUB LATIN 29 GARAGE 30 TECHNO 31 DANCE 8BEAT 32 HIP HOP 33 CHILL OUT DISCO 34 70 S DISCO 35 LATIN DISCO 36 DISCO 37 DISCO PARTY 38 DISCO FEVER 39 NEWYORK DISCO SWING...

Страница 55: ...A Hi Hat Open Analog HH 1Open Dance Hita 3 Mtrnm Bell 47 B Mid Tom L Room Tom 4 Rock Tom 4 E Tom 4 Analog Tom 4 Dance Tom 4 Brush Tom 4 Gt FretNoiz 48 C Mid Tom H Room Tom 5 Rock Tom 5 E Tom 5 Analog Tom 5 Brush Tom 5 Gt CutNoise 49 C Crash Cymbal Analog Cymbal Dance Cha 1 Hand Cym L Open Gt CutNoise 50 D High Tom Room Tom 6 Rock Tom 6 E Tom 6 Analog Tom 6 Brush Tom 6 String Slap 51 D Ride Cymbal ...

Страница 56: ... Select Modulation Portamento time Data Entry Volume Pan Expression Sustain Portamento Sostenuto Soft pedal DSP TYPE DSP DEPTH RPN LSB MSB All sound off Reset all Controllers Local control Programe Change True O 0 127 0 127 O 0 127 0 127 System Exclusive X O System Song Position Song Select Common Tune X X X X X X Aux Local on off All Notes Off Messages Active Sense Reset O O X X O O O O Mode1 OMN...

Страница 57: ...53 Specifications ...

Страница 58: ...ving the piano to a new location always remember to raise the level of the Pedal Board support so that it is not touching the floo r Once the piano is in place you can adjust it so it is in firm contact with the floor again 10505413V4 0 ...

Страница 59: ......

Страница 60: ......

Отзывы: