Maintenance and Troubleshooting:
The Standard Insert
8-6
Polishing scratches the soft material and makes the aperture
unusable for high resolution. All apertures must be cleaned and must
not have scratches at the center hole. The top aperture should not
have any scratches or defects.
PLATINUM APERTURES INSTALLING
1.
Place the aperture holder with its open slotted end on the aperture
positioning tool pin. Set the nut height so that the top of the spike is
below the holder top to leave enough space to put apertures in.
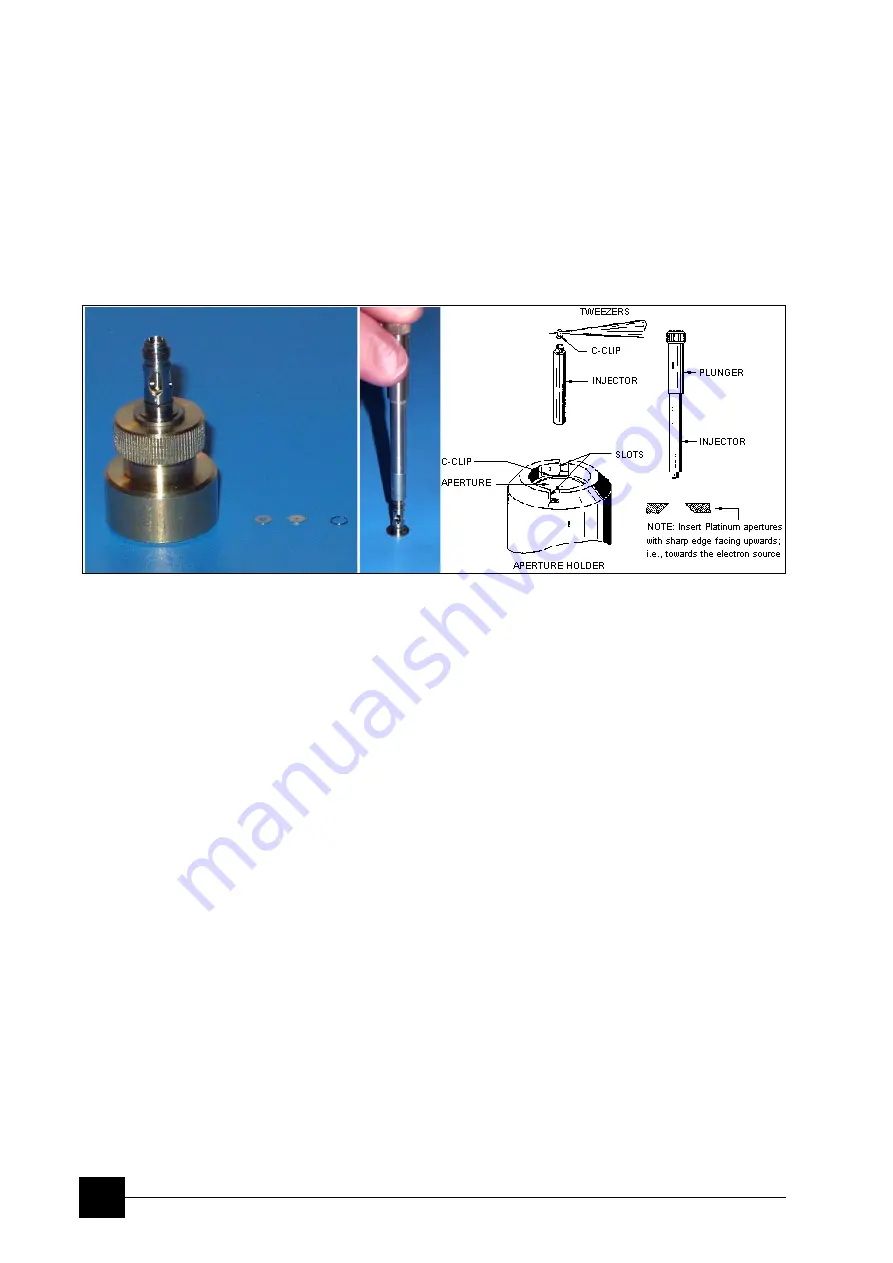
FIGURE 8-4
INSTALLING APERTURES TO THE INSERT
2.
Using tweezers, step by step carefully insert all the apertures (5
pcs.), sharp edge uppermost, into the seating on the upper end of
the holder. Gradually screw the nut down.
3.
Using the tweezers, insert the c-clip into the tube of the injector
provided.
4.
Depress the plunger slightly until the plane of the c-clip within the
tube is approximately at a right angle to the axis of the tube.
Release the plunger.
5.
Place the injector vertically into the aperture holder, so that the
tube rests on top of the aperture.
6.
Depress the plunger to push out the c-clip. The pressure must be
continued while retracting the body of the injector so that the c-clip
remains in place in the holder seating.
Use the large end of the aperture removal tool to seat the c-clip
firmly into the bottom of the injector so it is flat. Blow with clean air
to remove any fibres etc.
7.
Remove the injector and check that the aperture is properly
clamped by the c-clip. This can be done either by inverting the
holder over a Petri dish and tapping lightly; or by observing the
position of the c-clip with a magnifying glass.
Note:
Always check the mounted aperture under a binocular microscope or with a
magnifying glass to make sure that no hairs or other contaminants are on
the aperture or between the aperture and the c-clip.
Be careful not to lose small parts, especially the c-clip!
The following additional instructions on inserting the apertures should
also be noted:
•
The platinum apertures must be installed so that the polished side
faces up, or towards the electron beam source.
Содержание Quanta FEG 250
Страница 8: ...C vi...
Страница 28: ...System Operation Quanta FEG System States 3 10...
Страница 108: ...Alignments 1 Gun Alignment 6 6...
Страница 114: ...Alignments 154 Water Bottle Venting 6 12 154 Water Bottle Venting...
Страница 152: ...System Options Automatic Aperture System 9 4...
Страница 154: ...System Options Nav Cam 9 6 401 NAV CAM AUTOBRIGHTNESS...
Страница 177: ...System Options Cooling Stage Waterless Cooling Stage 9 29...


