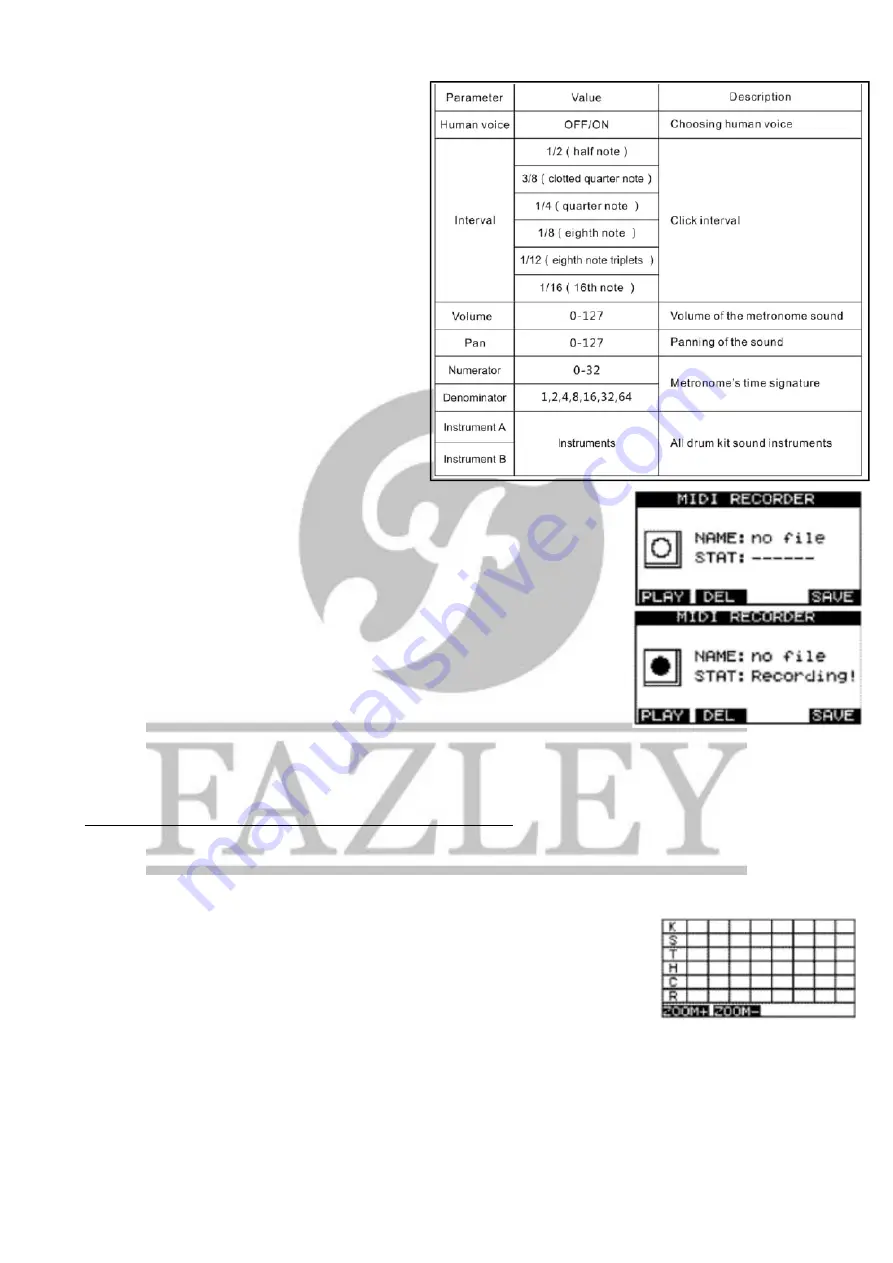
You can configure the built-in metronome as you
wish by pressing the Tempo button. Then, press the
F1 function button to go to Setup. When you see
Click Setup on the display, you can edit the
metronome settings. Please note, the settings are
on two separate pages, you can toggle between
them using the F1 and F2 function keys.
Use the Cursor to browse the parameters and use
the '+' / '-' buttons or the rotary knob to adjust them.
You will find an overview of the settings and
possible values in the image next to this.
Recording and playback
When you want to record a MIDI track, press REC
and the MIDI Recorder will appear. Press REC again to access the recording
menu.
Recording will begin as soon as you hit the first trigger pad. When you're done
playing your rhythm, press the REC button and you'll see Record Finish on the
display, which means the recording has been saved.
The DDK-10 will record a built-in limit of 5,000 pad hits before it automatically
stops. If you want press REC again, it will record over the old data unless you
saved it.
Save the recorded data by pressing down and holding the F4 Save function after
recording. Give your recording a name using the character window and press F4
to save.
Playing back a MIDI recording
Press the REC button to open the MIDI recorder. Browse through the various files and select the one you
want using the '+' / '-' buttons or the rotary knob. Press F1 Playback to playback the selected file.
Please note, the file will not play if the Mute function is activated.
When the track reaches the end, the recording will stop automatically and Play Finish will appear on the
display.
Using the SCOPE (timing) function
The SCOPE function provides you with insight about your timing. Press the SCOPE
key to go to the SCOPE menu. When you play a rhythm, the trigger pads are shown
on the display as x's.
The display will refresh after a certain number of beats (depending on your selected
screen size). You can change the size of the display by using the ZOOM+ and ZOOM-
buttons (F1 and F2 keys).
Optimising the pad settings
You can adjust the pad response to suit your personal preference. Bear in mind that such adjustments will
have an effect on the sound of the entire kit.
All information and illustrations shown in this user manual are subject to change without further notice.
User manual version: 1.0
Creation date + author initials: 05-05-2015 RV Revision date + author initials:


