background image

!


42.

43.

44.

FastbInd FotoMount F32 & F42 user Manual  |  Version 2.2  |  © Maping co 2011

18

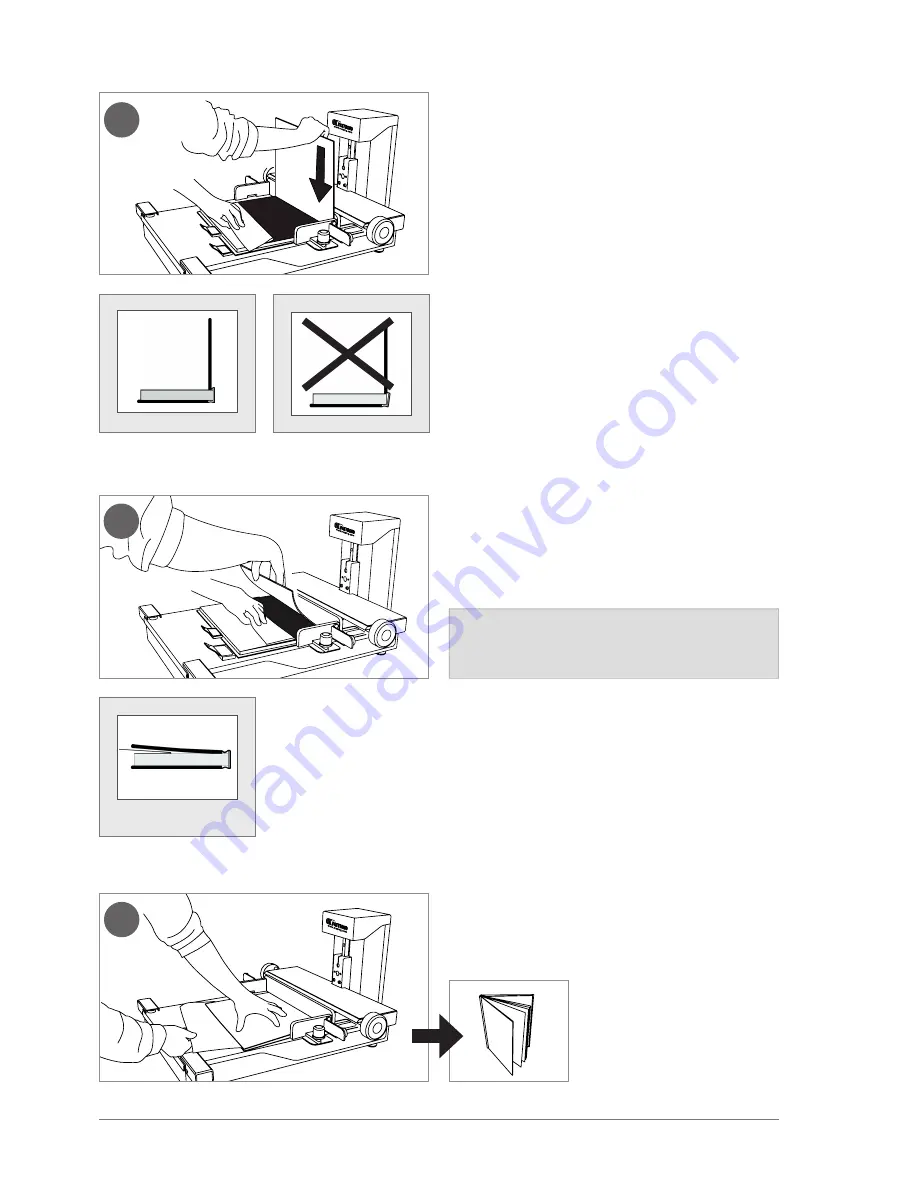
bend  the  cover  slightly  to  arc  and  close  it  to  halfway. 
leave the silicon paper in the halfway.

4. HoW to uSE: Step by step


|

 step 3: Mounting the cover

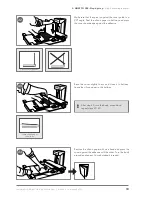
Make sure that the spine is against the cover guide in a 
90º angle. peel the silicon paper to halfway and press 
the cover board edge against the adhesive.

remove the silicon paper with one hand and press the 
cover against the adhesive with the other. turn the book 
around and repeat. your photobook is ready!

after step 43, turn the book  around and 
repeat steps 42–43.

correct cover position

leave silicon paper

to halfway

Содержание FOTOMOUNT F32

Страница 1: ... PARTS 06 2011 Manufacturer Maping Co Kuusiniemi 10 02710 Espoo Finland Tel 358 9 562 6022 Fax 358 9 562 6215 Email support maping com FASTBIND FOTOMOUNT F42 Photo Album Binding Machine SPARE PARTS 06 2011 FOTOMOUNT F32 USER MANUAL Photo Album Binding Machine FOTOMOUNT F42 ...

Страница 2: ......

Страница 3: ...2 Main parts and controls 4 3 How to use main steps 5 4 How to use step by step 6 Step 1 Mounting the book block 6 Step 2 Trimming 14 Step 3 Mounting the cover 15 5 Copyright trademarks and warranty 18 Table of contents ...

Страница 4: ......

Страница 5: ...astbind FotoMount Mounting Sheets for the content and attach your book block to the cover with Fastbind FotoMount End Sheets Both supplies are available in 200 and 850 micron thickness to suit your needs With these you can manage all album sizes Fastbind FotoMount F32 and F42 utilize the pioneering Fastbind Mountinglift system patents pending Take the advantage and produce professional deluxe Phot...

Страница 6: ...ts and mounting sheets 5 Positioning guide for pictures 6 Side limiter 7 Thumb screw 8 Flange 9 Counterweight s lock screws Cover guide Locking the counterweight 2 MAIN PARTS AND CONTROLS To prevent transportation damage always lock the counterweight with screws before moving the machine Cover AND CONTENT positioning holderS Fotomount F32 Cover positioning holder Content positioning holder ...

Страница 7: ... 5 Positioning guide for pictures 6 Side limiter 7 Thumb screw 8 Flange of the cover guide 9 Counterweight s lock screws 10 Extension table Cover AND CONTENT positioning holderS Locking the counterweight To prevent transportation damage always lock the counterweight with screws before moving the machine extension table installation Fotomount F42 2 8 7 6 Cover positioning holder Content positioning...

Страница 8: ...F32 F42 user manual Version 2 2 Maping Co 2011 6 3 How to use Main steps A Fastbind PhotoBook end sheet B Fastbind PhotoBook mounting sheet C Creased and folded picture Mounting the book block Trimming Mounting the cover 3 How to use Main steps ...

Страница 9: ...t and remove the silicon paper from the side that has circles Place the end sheet on FotoMount the adhesive side up The arrows on the other side of the end sheet should point towards yourself F32 Lock the sheet with magnets clamps F42 Lock the sheet with content positioning holders Place them to front edge on glue free area 4 How to use Step by step Step 1 Mounting the book block F32 F42 ...

Страница 10: ...els away from yourself Raise Mountinglift slightly Raise Mountinglift smoothly Pull Mountinglift towards yourself Bring Mountinglift back down Lock the hand wheels by rotating them towards yourself Release Mountinglift and move it on top of the end sheet Push Mountinglift forward 4 How to use Step by step Step 1 Mounting the book block ...

Страница 11: ...nt F32 F42 user manual Version 2 2 Maping Co 2011 9 Take a picture that is creased in the center Fold the picture Place the picture accordingly Attach the picture to the adhesive surface 4 How to use Step by step Step 1 Mounting the book block ...

Страница 12: ...ay to the end Sweep outwards from the center at the front area of the picture Release Mounting lift by rotating the hand wheels Push Mounting lift to back and raise it sligthly To avoid air bubbles hold the picture with one hand and sweep with the other 4 How to use Step by step Step 1 Mounting the book block ...

Страница 13: ...ure Return the Mountinglift to the front position and lock it on its place by turning the hand wheels towards yourself Remove the silicon paper from a Fastbind FotoMount Mounting Sheet Place the mounting sheet the adhesive side down and the arrows pointing towards yourself Adhesive side down 4 How to use Step by step Step 1 Mounting the book block ...

Страница 14: ...Release Mountinglift by rotating the hand wheels Sweep outwards from the center at the top of the mounting sheet Attach the mounting sheet to the picture Hold the mounting sheet with one hand and sweep with the other Sweep outwards from the center at the front area of the mounting sheet 4 How to use Step by step Step 1 Mounting the book block ...

Страница 15: ...wards yourself Repeat steps 5 24 for the remaining pictures except for the last picture repeat steps 5 15 Now it is time for the last sheet of your book block Take a Fastbind FotoMount End Sheet and remove the silicon paper from the side that has circles Place the end sheet so that adhesive side is down and the arrows point towards yourself Adhesive side down 4 How to use Step by step Step 1 Mount...

Страница 16: ...ea of the end sheet Push Mounting lift to back and raise it sligthly Attach the end sheet to the picture Hold with one hand and sweep with the other Sweep outwards from the center at the front area of the end sheet Release Mounting lift by rotating the hand wheels 4 How to use Step by step Step 1 Mounting the book block A A A A A ...

Страница 17: ...se the magnet clamps F42 content positioning holders and remove the mounted block The mounting phase is now completed Use a paper guillotine for trimming Trim the mounted block from 3 sides Block is now ready for cover mounting 4 How to use Step by step Step 2 Trimming Step 2 Trimming A ...

Страница 18: ... cover Step 3 Mounting the cover Raise Mountinglift and push it to back position Place the cover guide and push it forward until the flange is under the Mountinglift 4 How to use Step by step Step 3 Mounting the cover Push the cover guide to right against the shoulder Lower the Mountinglift against the flange Flange Pushed to Back position ...

Страница 19: ...the spine stick Release the side limiter and move it sideways to position the book block in the center of the cover Side limiter can be flipped around depending on the thickness of the cover board Correct position depends on cover board thickness Position 1 for cover board thicknesses 2 5 mm 0 098 Position 2 for cover board thicknesses 2 5 mm 0 098 4 How to use Step by step Step 3 Mounting the cov...

Страница 20: ...cover Make sure that the spine is against the cover guide in a 90º angle Peel the silicon paper to halfway and press the cover board edge against the adhesive Remove the silicon paper with one hand and press the cover against the adhesive with the other Turn the book around and repeat Your photobook is ready After step 43 turn the book around and repeat steps 42 43 Correct cover position Leave sil...

Страница 21: ...pection to be defective by our factory authorized service outlet or by the manufacturer at Espoo Finland All transportation charges on parts submitted for repair or replacement under this warranty shall be paid for by the purchaser All service under this warranty will be furnished and performed by factory authorized service stations or by the manufacturer Warranty service does not extend the warra...

Отзывы: