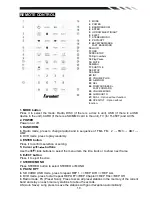
background image


11 

 
9.   / seek- buttons  

In DVD mode, Press   button to skip to the previous track.


Press and hold   button for two 

seconds to activate fast reverse (REW) search in a track.  
In RADIO mode, press   button to start searching automatic, press and hold for two seconds to 
start manual searching.   button Frequency down. 

10. LOUD 

Press to set LOUD on or OFF. 

11. OSD button  

In DVD mode press it to enter the OSD menu, press and hold for 2 seconds to set video setup. 
(RED /GREEN /BLUE /BRIGHT / CONTRAST /SHARP /COLOR RESET /BACK) 

12. STOP/PBC button 

Press it to Stop playback from the current position, press it again to final stop to the very 
beginning. Press PLAY/PAUSE button to play. 
Press and hold for two seconds to set PBC on/ off in VCD mode. 

13. Digit 0-9 buttons 

In radio mode, select 1-6 the desired band; In DVD mode, select track. 

14. PLAY/PAUSE button 

In DVD mode, press it to pause playback, press again to resume. 

15. Mute button 

: Short press this button to mute the volume output, press it again to resume volume.  

16. MENU button  

Press it to show main menu, in DVD mode, long press it to enter TITLE MENU (Enable only if 
the DVD disc with title menu). 

17. SUBTITLE button  

Press it to select the subtitle language (Available only if the disc with subtitle function). 

18. SETUP button 

In DVD mode press it to enter the setup menu. 

19. ANGLE Button 

In DVD mode, press it repeatedly to change the viewing angle (Available only with a recorded 
DVD file or DVD disc that has this function).  

20. INT Button  

Press it to activate the intro function. You can play the beginning of every track for 10 seconds 
in sequence.  

21. VOL+ button 

Press to increase volume level. 

22. A-B/ZOOM button 

During playback, press it at the starting point of section you want to repeat(A), press this button 
again at the ending  point of the section you want to repeat (B), section A-B repeating starts. 
Press it again to cancel the A-B repeat function. 
Press it and hold for two seconds in DVD mode to zoom the image in or out in the sequence of 
ZOOM 2-> ZOOM 3-> ZOOM 4-> ZOOM 1/2-> ZOOM 1/3-> ZOOM 1/4. 

23.SEL button 

Press it to enter the SOUND SETTING menu, and press Cursor UP/DN buttons to choose an 
item and press cursor left/right buttons to set the item. Press SEL button again to exit the menu.  

24.   / seek + buttons  

In DVD mode, Press   button to skip to the next track.  Press and hold   button for two 
seconds to activate fast forward (FF) search in a track.  
In RADIO mode, press   button to start searching automatic, press and hold for two seconds to 
start manual searching.   button Frequency up. 

25. VOL- button 

Press to decrease volume level. 

Содержание TI-450

Страница 1: ...Screen DVD CD MP3 MP4 AM FM Radio Built in TV tuner Owner s Manual Take the time to read through this owner s manual Familiarity with installation and operation procedures will help you obtain the bes...

Страница 2: ...car interior by means of ventilation or air conditioning Operate in well ventilated areas Do not turn on or off the product in short intervals When turning the unit off wait for at least 10 seconds pr...

Страница 3: ...U 13 RADIO PLAYER 13 DVD PLAYER 14 DISC USB SD MMC interface 15 TV Mode 15 AV IN Mode 16 SETTING CONTROL 16 SOUND CONTROL 16 DISPLAY CONTROL 17 RADIO CONTROL 17 GENERAL CONTROL 17 DVD SET UP MENU 17 S...

Страница 4: ...installation and operation of the unit 1 Washer Spring Washer M5 Nut 1 each 2 Mounting Strap 1 3 Bolt 1 4 Screw4 6 4 5 Mounting Collar 1 6 Release Key 2 7 Screw 5 20 1 1x AV IN Cable Trim ring Power...

Страница 5: ...is a sudden stop like an emergency stop INSTALLATION Figure 1 Insert Half Sleeve into dash board hole and bend mount tabs outwards to fix it If necessary place the mount strap at the rear of the unit...

Страница 6: ...Note To watch video the parking wire should be connected to break signal 2 cables is connected to a Hands Free device not included Parking wire Note The parking wire is connected with brake signal fo...

Страница 7: ...the loudspeakers minus to the car body GND The unit is using a BTL circuit and each loudspeaker must be connected with insulated cables according the diagram Loudspeaker cables and or optional extern...

Страница 8: ...side first and then press the left side until hear a click sound 3 MENU button Press it to show main menu in DVD mode long press it to enter TITLE MENU Enable only if the DVD disc with title menu 4 P...

Страница 9: ...d hold the number 1 6 buttons on remote to store into the preset station 1 6 or press MEMO button on front panel and rotate VOL knob to select the preset station 1 6 and press ENTER button to store 13...

Страница 10: ...lect STEREO or MONO 8 P SCN RPT In SD CARD USB mode press to repeat REP 1 REP DIR REP ALL In DVD mode press to start repeat REP OFF REP Chapter REP Title REP Off In Radio mode PS Preset Scan Press to...

Страница 11: ...uage Available only if the disc with subtitle function 18 SETUP button In DVD mode press it to enter the setup menu 19 ANGLE Button In DVD mode press it repeatedly to change the viewing angle Availabl...

Страница 12: ...battery leakage and corrosion Do not place any objects between the remote control unit and the sensor on the unit Do not drop the remote control onto the floor it will damage it beyond repair Do not...

Страница 13: ...io tap RADIO button on main menu screen Mute the sound Touch this button can choose FM1 FM2 FM3 AM1 AM2 Touch this button can scan the stations from 1 6 Long Touch it to save the stations with good re...

Страница 14: ...b USB c MEMORY card main MEMORY card slot in inner panel PLAY PAUSE button In DVD mode press it to pause press again to start STOP button press it to stop playback Press this button to fast reverse R...

Страница 15: ...he track press again to resume Press it button to restart a track FR 2 4 8 20 play will be display Press it button to skip to the next track FF 2 4 8 20 play will be display Press it to skip to the pr...

Страница 16: ...NG CONTROL Your device has default system settings You can customize the settings to suit your personal needs Once you change settings your new settings will remain until you change it again To start...

Страница 17: ...he system settings main menu press the up or down arrow buttons to move to the highlighted menu item and select one of the Setup Pages SCREEN Screen setting 16 9 4 3 FULL Backlight Backlight setting L...

Страница 18: ...er a new password and confirm WARNING 5 Rating PARENTAL SETUP if you forget your password there is no possibility to reset the password again Do not forget your password and write it down or store the...

Страница 19: ...m information including serial number of the software CALIBRATION The calibration of the screen is useful when some malfunction occur with the touch screen and it needs adjustment CALIBRATION procedur...

Страница 20: ...setting 6 Press ENTER on the remote again to confirm tap BACK to return to the setup page 7 Press the icon to be back to main menu 8 Press the icon to be back to TV main menu Note This function is ava...

Страница 21: ...Memory Select memory on or off is to set whether memory the searched station or not press ENTER on remote or tap the screen button to select Other functions Subwoofer Connect the subwoofer to the uni...

Страница 22: ...dance may damage the unit Do not use 3 cable loudspeakers and do not connect the loudspeakers minus to the car body GND using a BTL circuit and each loudspeaker must be connected with insulated cables...

Страница 23: ...one If the amplifiers turn off before all wires are attached use an external replay to provide remote on voltage excessive current required Nothing happens when buttons are pressed Display is not Accu...

Страница 24: ...THE AMBIENT TEMPERATURE RETURNS TO NORMAL NO SOUND VOLUME IS IN MINIMUM ADJUST VOLUME TO A DESIRED LEVEL WIRING IS NOT PROPERLY CONNECTED CHECK WIRING CONNECTION THE OPERATION KEYS DO NOT WORK THE BU...

Страница 25: ...UROPE AREA 87 5 108MHz Step 50KHz Frequency range SOUTH AMERICA AREA 87 5 108MHz Step 100KHz Frequency range RUSSIA AREA 87 5 108MHz Step 50KHz 65 74MHz Step 10KHz Frequency range U S A AREA 87 5 107...

Отзывы: