Reference picture 1.
1
.
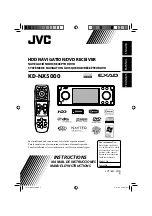
V1/V2 SELECT
2
.
UP
3
.
MENU
4
.
DOWN
5
.
ON/OFF
6
.
MODE (16:9/4:3)
Precaution
1.Be sure to distinguish the anode and the cathode when connect the power.
2.Keep this machine away from too hot, or under effect of moisture, dust or oil smoke, avoid this machine
from dropping or impacting, never extrude or chafe this machine with sharp objects.
3.Dangerous high voltages are present inside the enclosure. Do not open the cabinet, Refer servicing to
qualified personnel only.
4.Installation should be very fasten. Preventing the fallen unit hurt people when moving on or a sudden
brake.
5.DC12v should best be connected to the power adapter to prevent from the over-voltage drop the may
influence the normal work of the monitor.
6.A few high lights or dark spots may occur on the LCD screen. It is a very common phenomenon to the
active matrix display technology, and never necessary means any defects or faults.
TROUBLE SHOOTING
WARNING
For the sake of your safety,
never watch the video during driving.
3
4
PROBLEM
DARK
SCREEN
NO PICTURE
NO COLOR
WITH A LITTLE REGULAR
LIGHT SPOTS OR BLACK
HORIZONTAL LINE IN THE PICTURE
UNCLEAR
PICTURE
THE OUTER COVER OF THE
MONITOR HAS BEEN DEFORMED
POSSIBLE
REASON
SOLUTION
CHECK THE POWER FUSE OR POWER SWITCH
CHECK THE VIDEO LINE PLUG IS FLEXIBLE OR NOT.
INCREASE THE BRIGHTNESS AND CONTRAST RATIO
1 VIDEO SOURCES HAVE NO OUTPUT
2 THE VIDEO CONCENTRIC PLUG
BECOMES FLEXIBLE.
CHECK THE OUTPUT OF VCD
OR DVD REPLACE WITH THE
NEW VIDEO CABLE TIGHTEN
THE VIDEO INPUT CABLE
1 VIDEO SOURCES IS
NOT COLORFUL
2 COLOR RATIO SHOULD
BE RE-ADJUSTED
CHECK THE VIDEO
SOURCES ENTER INTO
THE MENU TO RE-ADJUST
IT IS VERY COMMON
PHENOMENON TO
THE ACTIVE MATRIX
DISPLAY TECHNOLOGY.
IT'S NORMAL THAT THERE'S
SOME LIGHT SPOTS IN THE
VISION RANGE OF LCD SCREEN
1 POOR QUALITY OF
THE VIDEO SOURCES
2 BRIGHTNESS AND CONTRAST ARE
NOT IN THE GOOD CONDITION.
REPLACE WITH THE
HIGH QUALITY VIDEO DISC
1 EXTERNAL TEMPERATURE IS TOO HIGH
2 THE POWER HAS NOT BEEN
SWITCH OFF FOR A LONG TIME
THE SURROUND TEMPERATURE
COULD NOT EXCEED TO 0-60
DEGREE TURN OFF THE POWER
AFTER USING THE UNIT
1 NO 12V VOLTAGE
2 BRIGHTENSS OR
CONTRAST RATION IS TOO SMALL
3 NO HIGH VOLTAGE
2
1
3
4
5
6
USING REMOTE
CONTROL UNIT
Insert your finger nails into
A and B on the diagram below.
Press A according to the direction,
then pull out the battery
holder. Reference picture 1.
Reference picture 3
Fit th e batte ry hold er
back to its pla ce.
Refe re nce pic tu re 3.
Reference picture 2.
Remove the old battery,
then insert the new battery
into the battery holder with the side
facing upwards. Reference picture 2.
To prevent leakage of fluid from the lithium battery, remove the
battery when not using the remote control unit for long periods of time (one month or more).
If the battery leaks fluid, carefully wipe it out of the battery case, then change to a new lithium battery.
1
.
“ ” “-”
“ ” “
”
2
.
“ ” “-”
“ ” “
”
3
.
“ ” “-”
“ ” “
”
4
.
“ ” “-”
“ ” “
”
5
.
Channel
“ ” “-”
“ ” “
”
6
.
“ ” “-”
“ ” “
”
7
.
“ ” “-”
8
.
“ ” “-”
“ ” “
”
9
.
Brightness: please press the manual of unit or the remote control, then
press
+
on the unit or
on the remote control to select
you need.
Contrast: please press the manual of unit or the remote control twice,
then press
+
on the unit or
on the remote control to
select you need.
Color: please press the manual of unit or the remote control thrice, then
press
+
on the unit or
on the remote control to select
you need.
Tint: please press the manual of unit or the remote control four times,
then press
+
on the unit or
on the remote control to
select you need.
select: please press the manual of the unit or remote control
five times, then press
+
on the unit or
on the remote
control to select you need.
Language : please press the manual of unit or the remote control six
times, then press
+
on the unit or
on the remote control
to select you need.
Mode: please press the manual of unit or remote control seven times, then
press
+
on the unit or “mode” on the remote control to select
you need.
Reset: please press the manual of unit or the remote control eight times,
then press
+
on the unit or
to resent originally setup.
Exit: Exit the manual