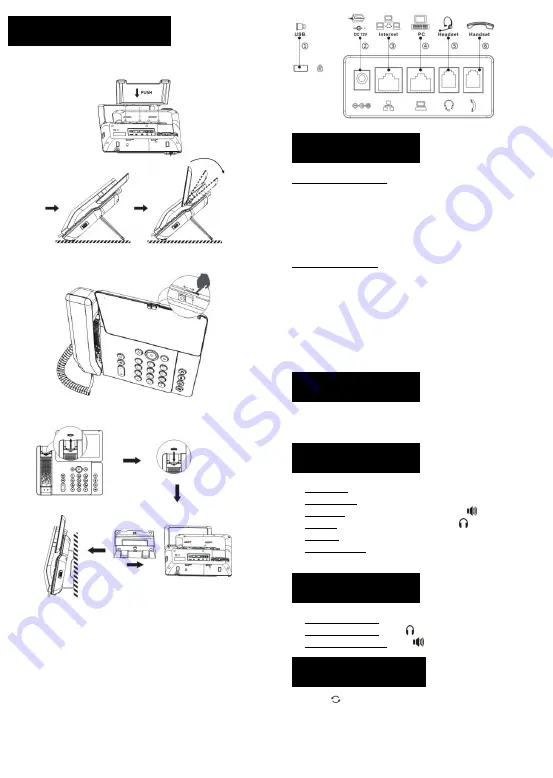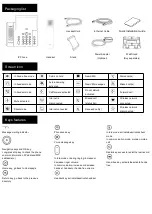
Installation the device
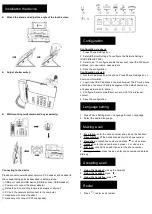
Attach the stand and adjust the angle of the touch screen
Adjust shutter switch
Wall mounting (wall stand need buy separately)
Connecting to the device
Please connect power adapter, network, PC, handset, and headset to
the corresponding ports as described in below picture.
①
USB port: connect USB device (USB lash drive, USB Headset)
②
Power port: connect the power adapter.
③
Network port: connecting local area network or Internet.
④
PC port: the network port connect to the computer.
⑤
Headset port: connect headset.
⑥
Handset port: connect IP Phone handset.
Configuration
Configuration via phone
1. Press Phone Settings icon.
2. Select Ethernet Settings: To configure the Network Settings
(DHCP/Static/PPPoE).
3. Select Line: To configure enable the account, input the SIP server
address, port, user name, password etc.
4. Save the configuration.
Configuration via web
1. Get the IP address from the phone: Press Phone Settings icon >
Common Information.
2. Login: Input the IP address in the web browser. The PC and phone
should be in the same IP address segment (The default username
and password are both ‘admin’.)
3. Configure: Select network/account, etc. And fill the relevant
content.
4. Save the configuration.
Language setting
1
.
Press Phone Settings icon > Language & Input > Language.
2
.
Select the desired language.
Making a call
1
.
Pre-dialing:
enter the phone number and pick up the handset.
2
.
Direct dialing:
lift the handset and enter the phone number.
3
.
Handsfree:
enter phone number and press
or vice versa.
4
.
Headset:
enter phone number and press
or vice versa.
5
.
Dial icon:
click dail icon and then enter the phone number.
6
.
Designated line:
press line key, enter phone number and press
dial key.
Accepting a call
1
.
Using the handset:
pick up the handset.
2
.
Using the headset:
press
.
3
.
Using the handsfree:
press
.
Redial
1
.
Press
, redial a call number.


