9
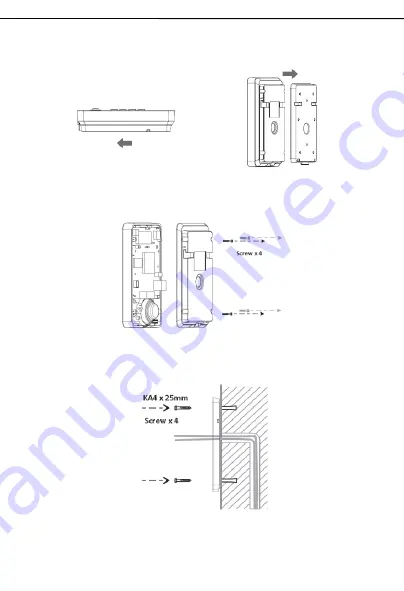
Step 3: Removing hanging shell
A.
Remove the hanging shell in Figure 3 and Figure 4.
Figure 3
Figure 4
B.
With Phillips screwdriver, unpacks the Back Panel and the main part of intercom as shown in Figure 5.
Figure 5
Step 4: Hanging shell Fixing and Cabling
Figure 6
A. Select the hole for cable supply; cable length of 15cm to 20cm is recommended.
B. With 4 KA4 x 25mm screws, tighten the Wall-mounted hanging shell as shown in Figure 6.
Содержание i20S
Страница 1: ...SIP Door Phone Quick Installation Guide i20S WWW FANVIL COM ...
Страница 5: ...500 500 ...
Страница 14: ......


