


2. Operation in RAID function
3
Note:
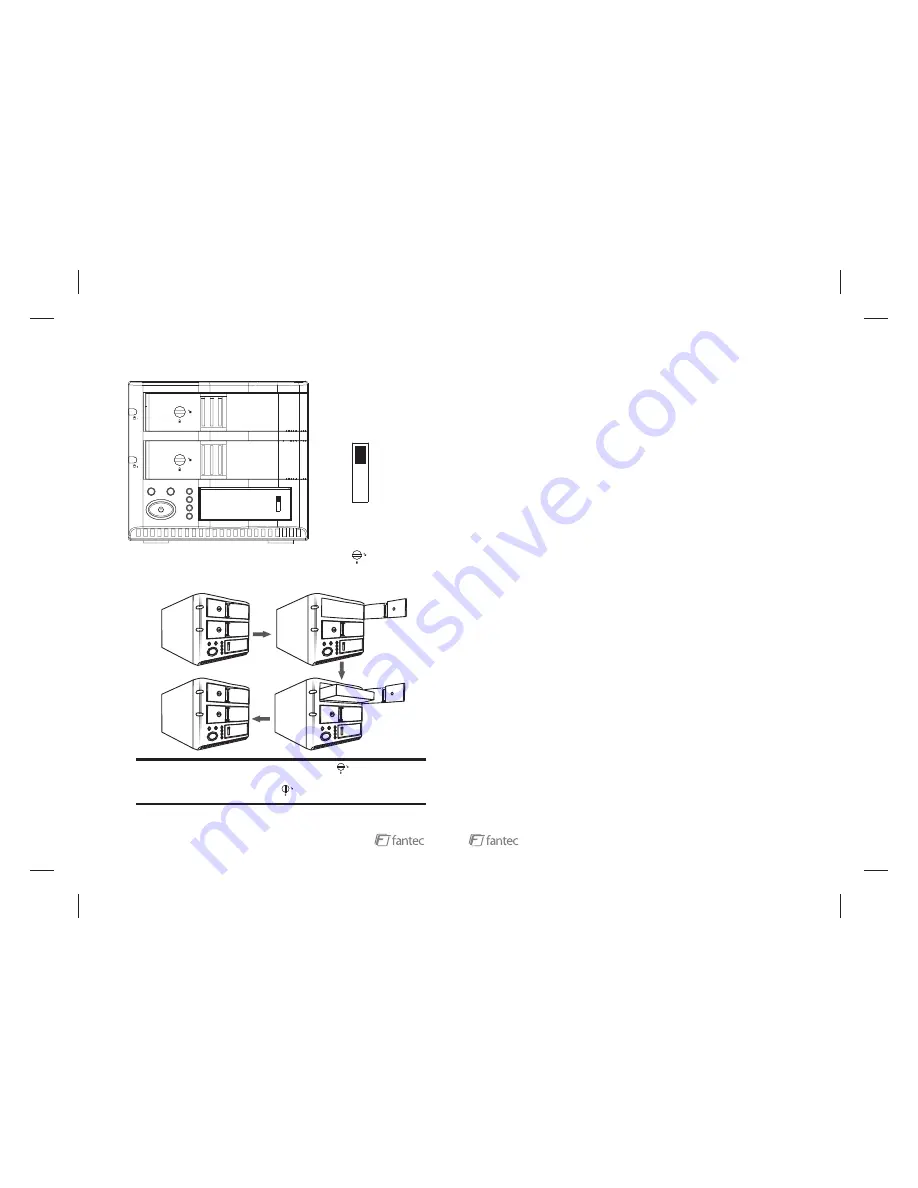
Sway from side to side the lock at the instructed point
, which you could
open the doorknob to install/ unload the hard disk. In Contrast, when you sway from
side to side the lock at the instructed point
, then you may not open it.
The Hard Disk Installation:
Sway from side to side the lock
, and pull the
doorknob to insert 1 or 2 hard disk.Close the doorknob and the installation will be
completed (The step will be represented in terms of following graphs)
20
RAID
DUP
ATTENTION:
Please set the switch
to RAID operation.
RAID
DUP
Note:
Troubleshooting:
When the system is ready, the HDD status LED will display blue and Function LED will display
green color.
(9) Connect USB cable to PC.
(10) When your PC detects the FANTEC MR-35HDC as USB storage device, you can start using
it. In order to initialize and format the hard disks, please refer to page 10.
(1) HDD Status LED (left side)
a. No HDD detect or HDD detect fail = Red light
b. Off Line = purple light
c. Active normally = blue light
d. HDD access = blue/purple twinkle
e. HDD with Bad Sector = red twinkle 2 time/ 8sec
f. RAID Fail = red twinkle 1 time /2sec
(2) Modus LED (right of the power switch)
a. Mode active normally = stay green
b. Mode no action = twinkle in green
(3) Buzzer
a. HDD with bad sector = beep 2 time/ 8sec
b. RAID Fail = beep 1 time /2sec
c. Push down the Mute button to end the buzzer beep.
When the unit works in RAID1 mode and one of the HDDs was replaced (due to a damage or
exchange), please press the Start button until it beeps two times in order to activate the rebuild of
the RAID1 system. After the rebuild has finished it will beep again for one time.
The rebuild will be executed from slot 1 to slot 2, if HDD in slot 2 was replaced. If HDD in slot 1
was replaced, the rebuild will operate from slot 2 to slot 1.
Note:
RAID1 Rebuild in continuous operation and USB connection to PC:
RAID1 Rebuild in continuous operation without connection to PC:
RAID1 Rebuild after power off the device and active USB connection:
RAID1 Rebuild after power off the device without connection to PC:
If you change the HDD
in running operation, the rebuild towards the new HDD has to be activated by “Start” button.
If you change the HDD in
running operation, the rebuild towards the new HDD has to be activated by “Start” button.
Please remove the
dameged HDD and power on the device. After your PC has recognized the healthy HDD insert
the new HDD and press “Start” to activate the rebuild.
Please remove the
damaged HDD and insert the new HDD. Now power on the device. The rebuild will start
automatecally.
All rebuild processes are indicated by a purple/red twinkle of the new HDDs stauts LED. If the
rebuild is not started yet, the LED of the healthy HDD will stay blue, the LED of the new HDD will
stay purple.
6. RAID1 Rebuild Mode (data recovery)


