(H1)
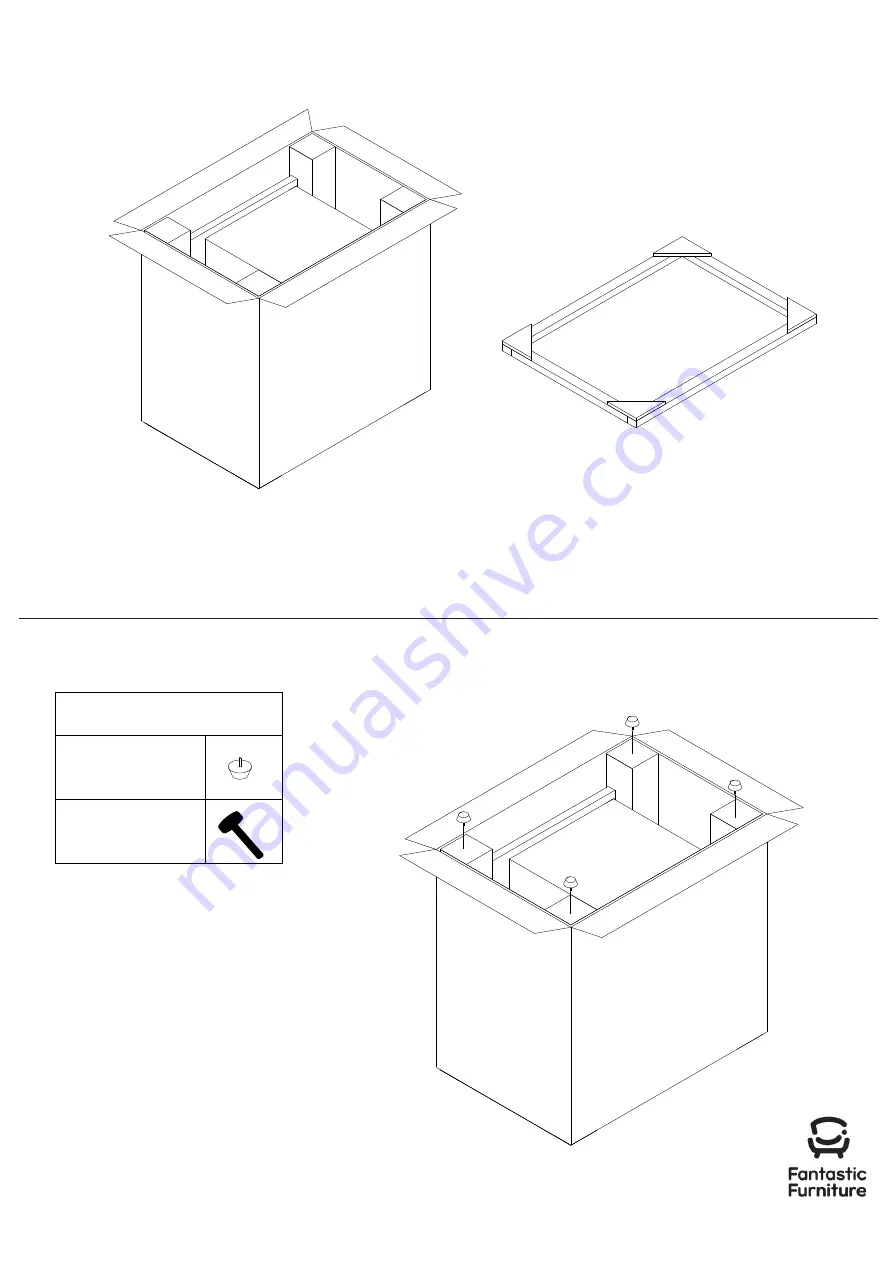
4 x Gliders
You will need
Mallet
Page 5
fantasticfurniture.com.au
Turn the carton upside down (Bottom up).
Open the carton and remove the pallet (P3).
(P3)
Use a mallet to nail the gliders (H1) to the legs.
Step 1
Step 2
Страница 1: ...Version 1 0 TORONTO Bedside fantasticfurniture com au ...
Страница 2: ...e a home you ll love Page 2 fantasticfurniture com au Fantastic buy Share how it looks at home on Instagram for your chance to win a 250 Fantastic Furniture Gift Card fantasticfurniture Love it Share it NOTE ANY MANDATORY CONSUMER STATEMENTS SAFETY REQUIREMENTS OR WEIGHT RATINGS SHOULD BE ON THIS PAGE ...
Страница 3: ...re or getting components back to front Always use a soft surface such as carpet or cardboard when assembling your product to avoid scratching or damaging the surface of the product Bulky items such as wardrobes and bunk beds should be assembled in the room they will be used as they may not fit through a door once assembled Never use any glue until you are certain that the parts belong together Peri...
Страница 4: ...What you need to assemble the product Tool not provided Mallet H1 4 x Gliders Hardware pack Please make sure you have all these parts before you start Page 4 fantasticfurniture com au ...
Страница 5: ...x Gliders H1 You will need Mallet Page 5 fantasticfurniture com au Turn the carton upside down Bottom up Open the carton and remove the pallet P3 P3 Use a mallet to nail the gliders H1 to the legs H1 Step 1 Step 2 ...
Страница 6: ...iture com au Gently turn carton over and remove carton from bedside Unwrap bedside and move into final position Seek advice from a qualified trades person on how to attach the safety strap to your specific wall Step 3 Step 4 ...
Страница 7: ...Page 7 Job Complete In the interest of our environment please dispose of all packing thoughtfully fantasticfurniture com au ...