OWNER’S MANUAL
READ AND SAVE THESE INSTRUCTIONS
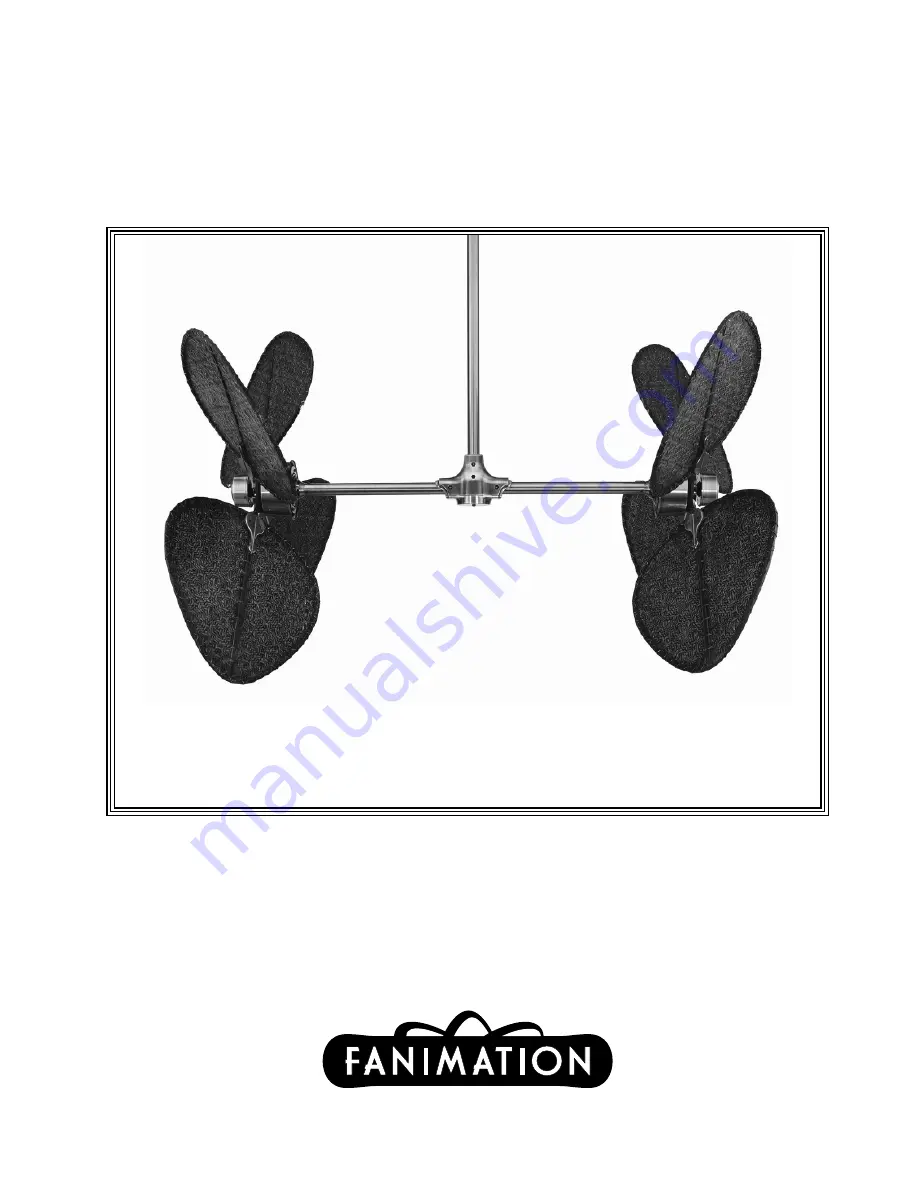
Model No. FP240**
The Palisade
®
Ceiling Fan
Standard & Damp Location Models
Damp Location Model; Top of fan is marked, “Suitable For Use In Damp Locations”
Net Weight 21 kg (46 lbs)
Страница 1: ...ANUAL READ AND SAVE THESE INSTRUCTIONS Model No FP240 The Palisade Ceiling Fan Standard Damp Location Models Damp Location Model Top of fan is marked Suitable For Use In Damp Locations Net Weight 21 k...
Страница 2: ...ce panel disconnecting means to prevent power from being switched on accidentally When the service disconnecting means cannot be locked securely fasten a warning device such as a tag to the service pa...
Страница 3: ...ade to Hub Mount g Hardware Bag Seventeen 10 32 x screws Hanger Ball Adapter Assembly Ceiling Canopy Hanger Bracket Assembly 2 speed C3 wall control Ceiling Canopy Hanger Bracket Assembly 2 speed C3 W...
Страница 4: ...Loosen Loosen Figure 2 WARNING To avoid fire or shock follow all wiring instructions carefully Any electrical work not described in these instructions should be done or approved by a licensed electri...
Страница 5: ...d the blade holders when installing balancing the blades or cleaning the fan Do not insert foreign objects in between the rotating blades This Lag Bolt is fastened securely Hanger Bracket is loose and...
Страница 6: ...ure 2 4 Carefully ROTATE the Hanger Bracket and Crossbar Pole Assembly together to orientate the fan in the desired position Figure 2 5 Carefully remove the Crossbar Pole Assembly from the Hanger Brac...
Страница 7: ...acket Figure 3 6 Attach the safety cable to ceiling support cable Slide cable clamp onto safety cable from fan Place the end of cable through the loop of ceiling support cable Pull as much cable throu...
Страница 8: ...e tight including switch caps located on ends of motors and below the connecting harness 120 VAC Supply User Supplied Black Wire Hot White Neutral Blue Wire Light Fixture Green Wire Ground To From mou...
Страница 9: ...Make wiring connections with wire nuts as shown in Figure 1 One black wire from wall control unit to black hot supply One black wire from wall control unit to black wire leading to ceiling outlet box...
Страница 10: ...am Pad Adhesive Side Down Screw 14 mm 2 per blade supplied with PADKT Figure 2 Side A Fan Blade Side B PADKT Instructions PADKT Foam Pad Set is Supplied in PADxx Blade Set Cartons Only Foam Pads Must...
Страница 11: ...hite dot 4 pcs These colored dots indicate which motor switch set up red or white dot to attach these blade holders to 2 Using the HDWBH240 Blade Holder to Hub screws attach the blade holders to the c...
Страница 12: ...nly a soft brush or lint free cloth to avoid scratching the finish Abrasive cleaning agents are not required and should be avoided to prevent damage to finish CAUTION Do not use water when cleaning yo...
Страница 13: ...ll of the switch housing CAUTION Make sure main power is turned off 5 Some fan motors are sensitive to signals from solid state variable speed controls Solid state controls are not recommended choose...
Страница 14: ...ag Bolt for Support Cable Mounting Hardware Bag Containing HDWFP240 3 20 x Screw 4 6 5 32 32 x 1 Threaded Rods 2 5 32 External Lockwasher 2 5 32 32 Knurled Knobs 2 22 Allen Wrench 5 mm 23 3 8 x 2 Lag...
Страница 15: ...ation shown is not to scale or its actual configuration may vary wires omitted for clarity Exploded View Side B Side A 16 12 1 11 17 13 14 20 18 19 10 4 7 16 6 3 2 The Palisade FP240 Figure 1 5 8 8 9...
Страница 16: ...Copyright 2007 Fanimation 2007 05 10983 Bennett Parkway Zionsville IN 46077 888 567 2055 FAX 866 482 5215 Outside U S 317 733 4113 Visit Our Website www fanimation com...