F&V F1 Скачать руководство пользователя страница 6

The easiest way to ues the 7” LCD Monitor is to mount it directly to a camcorder or

DSLR camera.A 1/4”-20 swivel shoe mount is provided for installation and features a

lock knob to set the monitor at the desired viewing angle.The supplied battery adapter

(For Sony   “L” series batteries) includes a bracket that can be mounted to the monitor 

prior to installing the swivel mount. The battery adapter can also be mounted directly

to the back of the monitor by using the supplied 1/4” mounting stud,or to a light stand

by using the built in hook-and-loop fastener on the back of the adapter.Use the

supplied 90

°

cable to make the power connection between the monitor and the

battery adapter.

Setup

Operation

Connect Li-ion battery to the battery adapter,making sure cable ends are properly

connected.If using an external power supply (no included) ,insert the power plug (5.8-

16.8V) into the DC main inlet located on the side of the light unit.

Note:The ues of any

other rated external power supply could damage your light unit and void warranty.

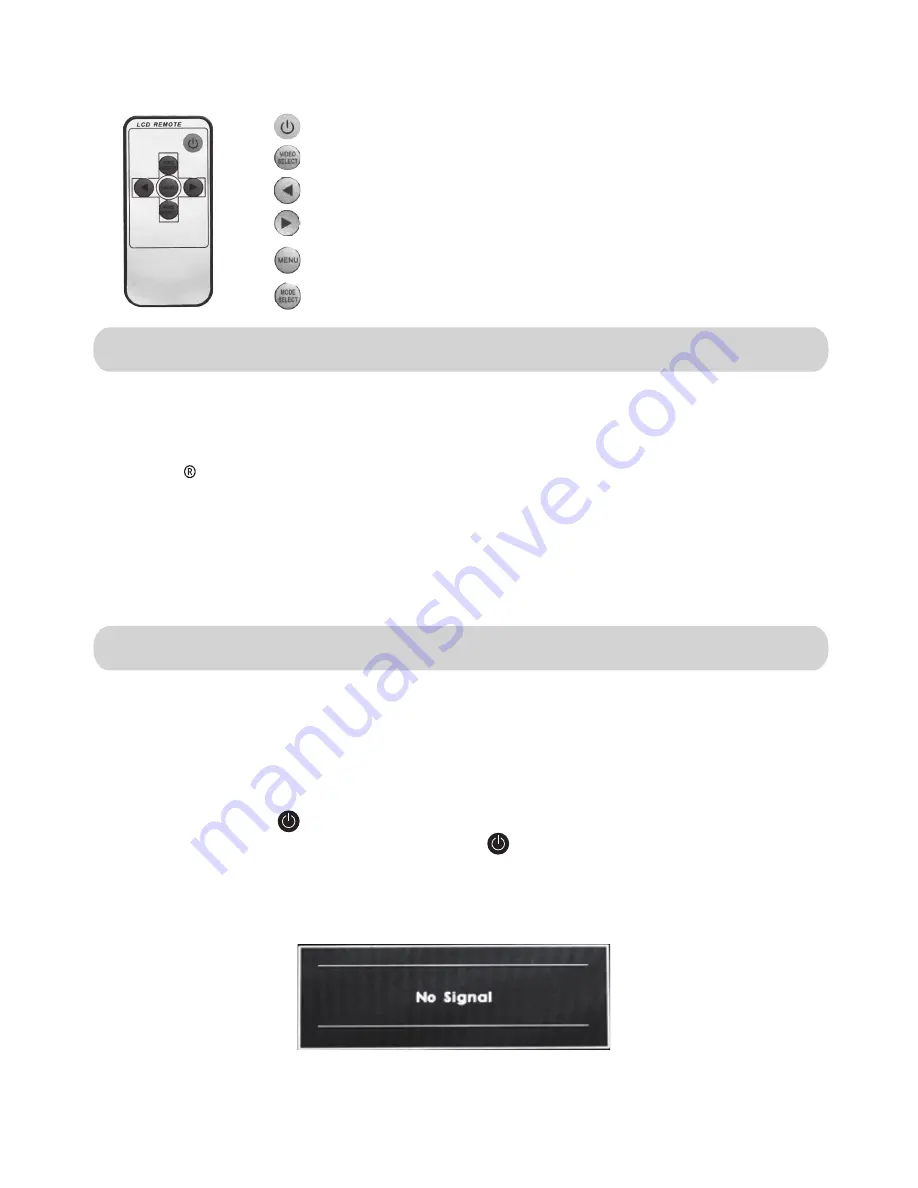
Connect the appropriate input cable to the monitor and camera.An HDMI to Mini HDMI

cable ia included.The      (Power ON/OFF) key emits a solid red color (indicating the

power is on and is in standby mode) .Press the     key and the red indicator light will turn

off,which puts the unit into working mode. If there is no signal detected the key will blink

red and a ”No Signal” message will temporarily appear on screen (as shown below) .A

blue background will also appear if the menu Function is set to “Blue Screen” .

Remote controller

Power ON/OFF

AV1

/

AV2

/

HD-SDI

/

HDMI

 or 

DVI

 input selections

Left-key

Brightness adjustment,menu list selection

Right-key

Brightness adjustment,menu list selection

Menu

Acticvates OSD menu selections

Exit

Color/B&W selectionmodes

-5-

*DVI

 input fit for 

Canon

 5D 

 only

Содержание F1

Страница 1: ...mage to your F V product or injury to yourself or to others Be sure to read the following safety precautions in their entirety before using this equipment Keep these safety instructions where all thos...

Страница 2: ...coming from the equipment please cut off and take it to service center 7 Please be noticed that it hasn t inner adjust modules Do not attempt to modify or fix this unit Contact qualified service perso...

Страница 3: ...erve this precaution could result in fire or electric shock Do not handle the plug or charger with wet hands Failuer to observe this precaution could result in electric shock Use a dry soft cloth to c...

Страница 4: ...djustment menu list selection Up key Brightness adjustment menu list selection Menu Acticvates OSD menu selections Exit Color B W selectionmodes Aspect Ratio Select 16 9 or 4 3 TFT LCD Screen Selectio...

Страница 5: ...576i p 720i p 1080i p Video Input Output Supports NTSC PAL 6 949773 390342 DC 5 8 16 8V 18 21 5 6 7 8 9 10 11 12 13 14 Audio Output 1 4 20 Female Mount 3 5mm SYNC Jack mono 5 8 16V DC Main Inlet HDMI...

Страница 6: ...xternal power supply no included insert the power plug 5 8 16 8V into the DC main inlet located on the side of the light unit Note The ues of any other rated external power supply could damage your li...

Страница 7: ...ey to access the relevant OSD on screen display menu operation Press the key again to confirm the Color selection You should now be in the Color submenu as shown below Use the keys to select one the f...

Страница 8: ...nsparent OFF 1 7 OSD Press the key to access the relevant OSD on screen display menu operation Use the keys to select the OSD icon Press the key again to confirm the OSD selection You should now be in...

Страница 9: ...ON OFF Function Press the key to access the relevant OSD on screen display menu operation Use the keys to select the Function icon Press the key again to confirm the Function selection You should now...

Страница 10: ...on screen display menu operation Use the keys to select the Sound icon Press the key again to confirm the Sound selection You should now be in the OSD submenu as shown below Use the keys to select one...

Страница 11: ...edges of the monitor the sun hood can be removed at any time to store for later use Troubleshooting 1 The unit Only displays a black and white image A Make sure that the color level settings are prope...

Страница 12: ......

Отзывы: