background image

INSTALLATION AND ASSEMBLY

CAUTION: Before installing the fan make sure you have turned OFF the electricity supply.

SELECTING A LOCATION: 
1. Choose a location for mounting the fan where the blades will have at least 2.1 metres of 
clearance from the floor. 
2. Make sure that the installation site will not allow the rotating fan blades to come into 
contact with any object and that there is enough space from the blade tip to the wall or 
ceiling. Please note that insufficient clearance distances might cause wobbling and the 
bigger this clearance is the better the airflow from your fan will be.
3. This product can be installed in a position where it is covered or enclosed al fresco areas 
and there is a minimum clearance of 1.50 m from the blade tip to all edges of the roof or 
positions where could be exposed to water, moisture or other dangerous external elements.
4. Secure the hanging bracket to the ceiling joist or suitable structure that is capable of 
carrying a load of at least 45 kg, with the two long fixing screws provided. Ensure that at 
least 30mm of the screw is threaded into the support.

The fixing screws included are designed for use when ceiling fan is secured onto timber 
joists. For all other surfaces, additional and suitable fixing screws for that surface will need 
to be purchased.

3

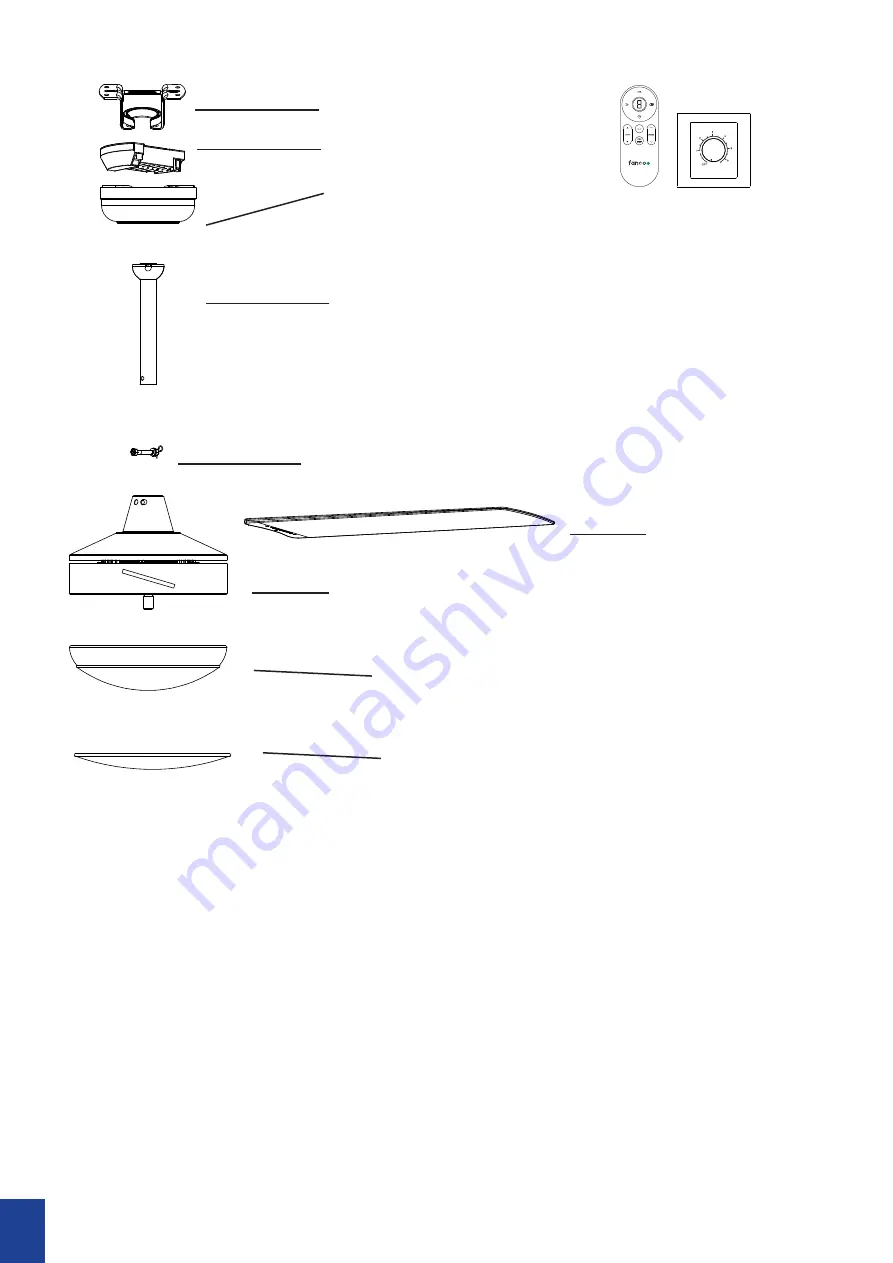
Canopy

Downrod with Ball Joint

Blade

Light Kit (with Light Models ONLY)

PARTS INCLUDED

No Light Cap

Hanging Bracket

Receiver

Cotter Pin & Cross Pin

Motor

Remote or Wall Control

Содержание Eco Silent Deluxe DC

Страница 1: ...Eco Silent Deluxe DC DC Installation Manual...

Страница 2: ...or ceiling Please note that insufficient clearance distances might cause wobbling and the bigger this clearance is the better the airflow from your fan will be 8 This product can be installed in a po...

Страница 3: ...product and keep it away from children If you think batteries might have been swallowed or placed inside any part of the body seek immediate medical attention Call the Poisons Information Centre on 13...

Страница 4: ...where it is covered or enclosed al fresco areas and there is a minimum clearance of 1 50 m from the blade tip to all edges of the roof or positions where could be exposed to water moisture or other da...

Страница 5: ...talling this fan WIRING DIAGRAM NO LIGHT NO LIGHT To Motor Wire RECEIVER Black Wire Antenna Wire To Motor Wire To Motor Wire Double pole disconnection switch or 2 pin plug Wall Switch E L N Power Supp...

Страница 6: ...5 WIRING DIAGRAM LED LIGHT ELECTRICAL CONNECTIONS FOR SMART REMOTE MODELS Ensure the power is off when installing this fan...

Страница 7: ...lling this fan WIRING DIAGRAM NO LIGHT NO LIGHT To Motor Wire RECEIVER Black Wire Antenna Wire To Motor Wire To Motor Wire Double pole disconnection switch or 2 pin plug E L N Power Supply Live Wire B...

Страница 8: ...7 INSTALLATION STEPS 1 For model with light Remove the screws that fix the light kit and put the light and screws aside...

Страница 9: ...screws and washers 3 Feed the main motor wire plug up through the inside of the downrod and then insert the downrod into the motor bush Align the holes on the downrod with the holes on the motor Gent...

Страница 10: ...ack on to the motor with the screws that were removed in step 1 Line the diffuser up with the bottom of the motor and rotate clockwise until it locks securely into place 5 For models without light Sim...

Страница 11: ...fan must be earthed Double pole disconnection switch and wall switch must be connected 8 Place the canopy over the bracket align the canopy holes with the screws and tighten 6 Place hanging ball into...

Страница 12: ...n anti clockwise direction during summer In winter this can be reversed so that the blades now move in a clockwise direction Press and hold F R button for 3 seconds to switch between Summer and Winter...

Страница 13: ...s of this troubleshooting guide Fan A uses Remote control A and Receiver A while Fan B uses Remote control B and Receiver B 1 Isolate power to one fan only when pairing the remote When installing two...

Страница 14: ...and wiring on premises Fan keeps beeping but will not start Loose wire connections or plugs to fan receiver Check wire connections and ensure plugs are positively connected Fan wobbles A Screws on dow...

Страница 15: ...Vac Max 45 W N A Wall Control CFFCESD3BLSMRABS 220 240 Vac Max 45 W N A Remote CFFCESD3LBLSMRABS 220 240 Vac Max 45 W Max 18 W Remote CFFCESD4WHWABS 220 240 Vac Max 45 W N A Wall Control CFFCESD4WHSMR...

Страница 16: ......

Отзывы: