background image


2.


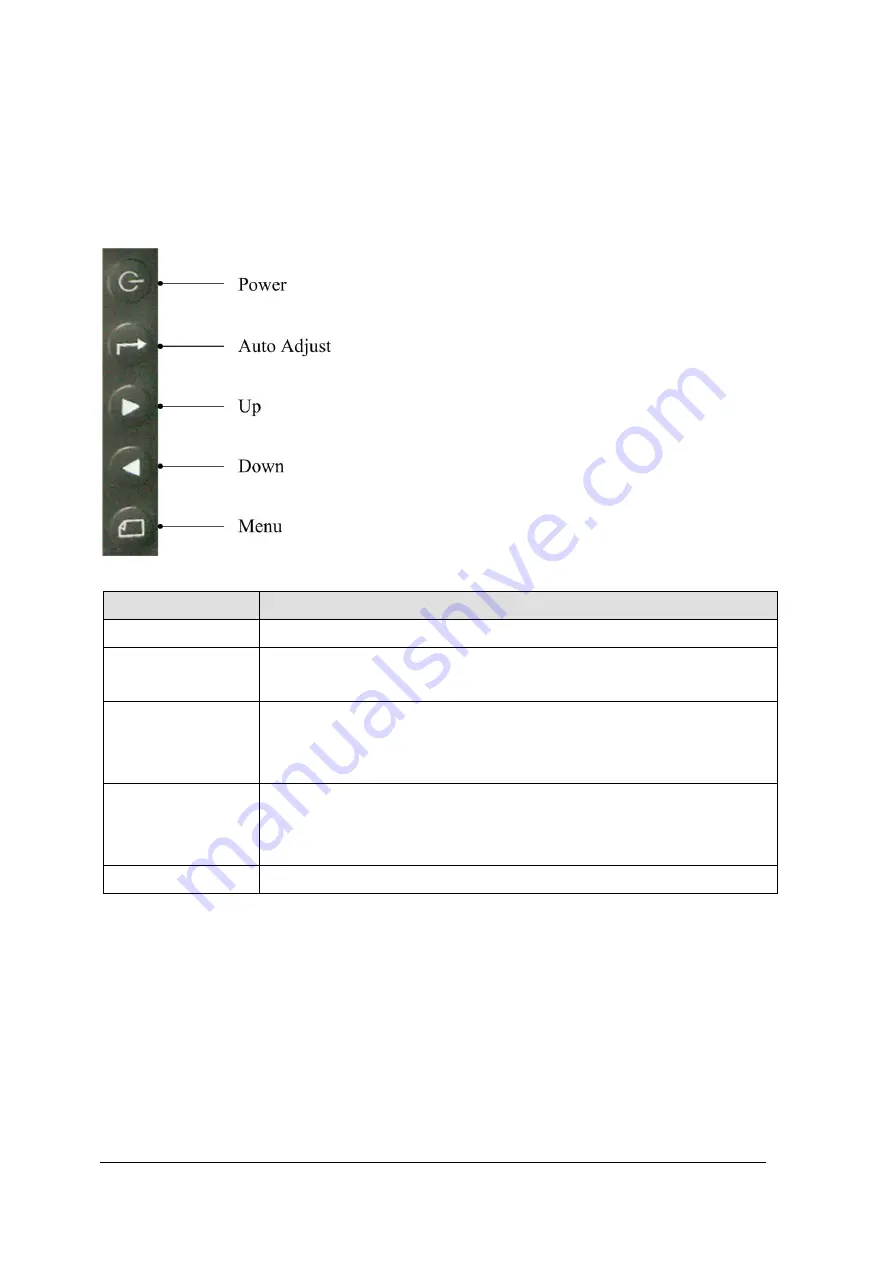
Monitor Setting 


2.1


OSD Control Panel 


Button 

Function 

Power 

Turn on/off the monitor


Auto Adjust 

a.

  Automatically optimize and adjust the screen settings. 

b.

  Exit the OSD menu. 

Up 

a.

  Increase the volume. 

b.

  Increase the value of the function selected or move to the 

previous function as the OSD menu is active. 

Down 

a.

  Decrease the volume. 

b.

  Decrease the value of the function selected or move to the next 

function. 

Menu 

Activate the OSD menu and enter/select the function.


Содержание PPD-1210

Страница 1: ...PPD 1500 Series Touch Screen LCD Monitor User Manual Version 2 1 Copyright Fametech Inc TYSSO 2017...

Страница 2: ...rgy and if not installed and used according to the instructions may cause harmful interference to radio communications However there is no guarantee that interface will not occur under particular inst...

Страница 3: ...a third grounding pin This is a safety feature If your outlet does not accommodate the three wire plug have an electrician install a correct outlet or use an adapter to ground the appliance safely Do...

Страница 4: ...king 1 1 2 Product Overview 2 1 3 I O Ports and Connectors 4 1 4 Specifications 5 2 Monitor Setting 6 2 1 OSD Control Panel 6 2 2 On Screen Display 7 3 Peripherals Installation 9 3 1 Secondary Display...

Страница 5: ...r 1 1 Unpacking The contents may vary with different options If there s any physical damage or missing parts please contact your supplier immediately Please keep all packing materials in case you need...

Страница 6: ...2 1 2 Product Overview Front View Rear View Side View...

Страница 7: ...3 Bottom View...

Страница 8: ...4 1 3 I O Ports and Connectors A PS 2 interface MSR cable B USB interface MSR cable C RS 232 interface MSR cable D USB interface touch cable E RS 232 interface touch cable F Audio cable G VGA cable...

Страница 9: ...for Touch Panel RJ 45 PS2 or USB Optioned for MSR VGA 1 x DB 15 Female Support up to XGA SXGA at 75Hz Audio In 1 x Audio Jack with Internal Speaker 2W x 2 Others Option MSR VFD 2nd Display Speaker VES...

Страница 10: ...ust the screen settings b Exit the OSD menu Up a Increase the volume b Increase the value of the function selected or move to the previous function as the OSD menu is active Down a Decrease the volume...

Страница 11: ...ase Adjust the pixel clock signal Sharpness Adjust the clarity and visibility of the edges Back Go back to menu Position H Position Adjust the horizontal position of the screen image V Position Adjust...

Страница 12: ...e Traditional Set the OSD menu language to Chinese Traditional Chinese Simple Set the OSD menu language to Chinese Simple Japanese Set the OSD menu language to Japanese MISC Signal Source D SUB analog...

Страница 13: ...y a Pass the cord through the hole Plug the cable into the VGA port on a PC Connect the extension power cord and plug the power adaptor to an AC outlet b Tighten the bundled screws specified for the s...

Страница 14: ...ugh the hole Plug the cable into a free COM port on a PC Connect the extension power cord and plug the power adaptor to an AC outlet b Press the stand of the customer display into place Note The rear...

Страница 15: ...river Please download the latest driver from TYSSO official website Extract the compressed file and double click the folder Driver Utility as below There are categorized folders of Peripherals and Tou...

Страница 16: ...sistive type and Projective Capacitive type touch screen To install the driver for Resistive type select double click the folder Resistive Touch to start installation c Select the folder D525 and J190...

Страница 17: ...according to the operating system installed for example select Win 7 Vista XP 2K ME98 32bits for the Windows XP 32 bit version f Double click the file Setup EXE to start the installation g Click Next...

Страница 18: ...ion folder and click Next to continue i COM port RS 232 driver installation If the touch screen is for RS 232 interface please click the checkbox Install RS232 driver additionally to install the drive...

Страница 19: ...15 j Click Install to start the installation k Installation completed Click Finish to exit...

Страница 20: ...16 l Restart the system Click OK to proceed m Installation completed There is an icon on the screen for quick launch...

Страница 21: ...en Calibration Resistive Type There is a Utility Touch Tool for Touch Screen Calibration a Double click the icon to access the utility b User can perform 4 point calibration by selecting the function...

Страница 22: ...bration points on the screen Tap the blinking mark to complete the first calibration point Proceed to the next mark and complete all calibration points d The calibration is completed tap the icon Save...

Страница 23: ...int Calibration There are advanced 9 point calibration and 25 point calibration for more accurate calibration demands Access Advance menu and select either 9 pts linearization or 25 pts linearization...

Отзывы: