


4
2.
INSTALLATION
It is recommended to install the filter as close as possible to the swimming pool and preferably
below the surface of the water in the swimming pool and in such a way that the base lies
completely stable upon a totally horizontal surface.
The place where the filter is installed should have enough ventilation and adequate drains so
that, in case of an accident, the water can escape through the drain system, avoiding risk of
damaging the installations.
Install the filter in a place with space enough to carry out the operation and maintenance
services.
Filtration medium should be loaded once the filter is installed into its exact location, following
the instructions in the Chapter 2.2 “FILTRATION MEDIUM LOAD”.
2.1.
ASSEMBLY
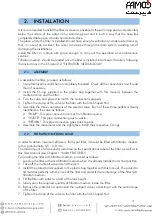
To assemble the filter, proceed as follows:
1.
Some lateral arms could be not completely threaded. Check all the connections and thread
them if necessary.
2.
Install the O-ring supplied in the plastic bag together with this manual, between the
multiport valve and the filter.
3.
Turn the valve and place it to match the connections properly.
4.
Tighten the clamp of the valve to the filter with the Star-Shaped Nut.
5.
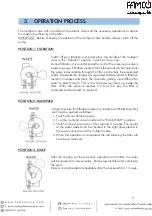
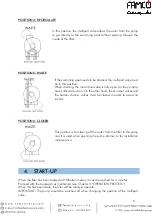
Assemble the three connections of the selector valve. Each of these three outlets is clearly
identified on the valve as follows.
“PUMP”: This pipe connection comes from filtration pump.
“WASTE”: This pipe connection goes to waste.
“RETURN”: This pipe connection goes back to pool.
6.
Assemble the manometer and the sight glass. Install their respective O-rings.
2.2.
FILTRATION MEDIUM LOAD
In order to obtain maximum efficiency from your filter, it should be filled with
filtration medium
with a granulometry 0,5 – 0,8 mm.
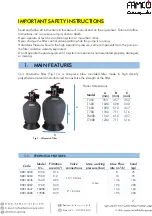
The total amount of silica sand is indicated on the specifications label of the filter, as well as in
this User Manual (see Chapter 1 “MAIN FEATURES”).
For loading the filter with filtration medium, proceed as follows:
1.
Load up the filter with silica filtration medium when it is already installed in its final position.
2.
Take off the multiport valve lid and the joint.
3.
Install the protector lid supplied in the plastic bag together with this manual. The protector
lid matches perfectly with the neck of the filter and protects the central pipe of the filter form
filtration medium.
4.
Fill the filter with water to a half of the tank height.
5.
Slowly pour the required quantity of filtration medium inside the filter.
6.
Remove the protector lid and install the multiport valve connecting it with the central pipe
of the filter.
7.
Tighten the clamp of the valve to the filter with the Star-Shaped Nut.


