


7 U109645
Australia
7
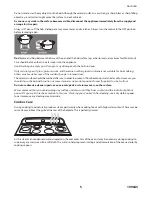
The areas marked with two concentric circles have
an inner and an outer element. Turn the control knob
clockwise to heat the whole area for larger pans - turn it
the other way to just heat the inner part for smaller pans.
When cooking on the hob, you may see the hob area
you are using switch off and on. This is caused by a
safety device that limits the temperature of the hob.
This is quite normal, especially when cooking at high
temperatures. If it happens a lot with a particular pan,
however, it may mean that the pan is not suitable
– perhaps too small or too uneven - for a ceramic hob.
8
On the left of the hob is a dual purpose area. The
inner ring marks out a 1.2kW hob area: the outer line
marks the extent of the Warmer, which is used for keeping
food warm while the final touches are put to a meal:
For best results, pre-heat a covered serving dish for 10
minutes before adding food to it.
Turn the control to the first (Warmer) position to heat the
whole area to a low temperature. Turn it further (to the
required number) to use the inner ring as a normal hob
plate.
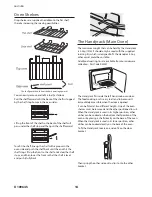
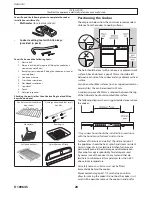
The Glide-out Grill
Open the door and pull the grill pan carriage forward
using the handle:
The grill has two elements that allow either the whole
area of the pan to be heated or just the right hand half.
Adjust the heat to suit by turning the control knob. To
heat the whole grill, turn the knob clockwise. To heat the
right hand half, turn it anticlockwise.
The neon indicator light by the grill control will come on.
For the best results, you should slide the carriage back
into the grill chamber and preheat the appropriate part(s)
of the grill for two minutes. The grill trivet can be removed
and the food placed on it while you are waiting for the
grill to preheat. Once the grill has preheated, slide the
carriage out again. With the trivet back in place with the
food on it, slide the carriage back into the grill chamber.
Ensure that it is pushed right in.
The grill pan grid can be turned over to give two grilling
positions:
Don’t leave the grill on for more than a few moments,
without the grill pan underneath it.
Never close the grill door when the grill is on.
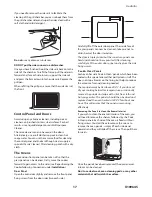
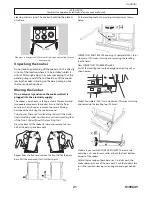
The Ovens
The clock must be set to the time of day before the
main oven (the left hand, timed oven) will work. See the
following section on ‘The Clock’ for instructions on setting
the time of day.
References to 'left hand' and 'right hand' ovens apply as
viewed from the front of the appliance.
Содержание Elan U109645 - 02
Страница 1: ...110 Ceramic with Glide out Grill User Guide for Australia Installation Service Instructions U109645 02...
Страница 28: ...U109645 28 Australia Circuit Diagram...
Страница 31: ...31 109645 Australia...
Страница 32: ......


