


9
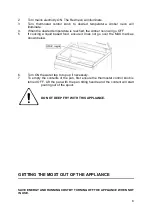
Griddling
Note that the centre of the pan is hotter than the edges when griddling.
Simmering and Stewing
Lid can be left slightly ajar if a gentle simmer is desired. As mentioned in griddling, the centre
of the pan is hotter so the content may tend to stick to the pan more around the middle.
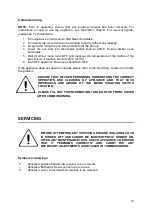
CLEANING AND MAINTENANCE
All surfaces are easier to clean if spillage is removed before it becomes burnt on and if
appliance is cleaned daily.
CAUTION:
Failure due to lack of proper cleaning is not covered by
warranty.
BEFORE ANY CLEANING IS UNDERTAKEN, ENSURE ISOLATING COCK IS TURNED
OFF AND CANNOT BE INADVERTENTLY TURNED ON.
WARNING
– DO NOT ATTEMPT TO CLEAN THIS APPLIANCE WITH A JET OF WATER
OR STEAM CLEAN.
Clean pan as soon as possible after use with hot water and detergent. Soap filled steel wool
pads may be used to remove stubborn deposits. After cleaning, empty water from pan using
the pan tilting handle to lift the pan.
Do not use proprietary cleaners, especially those with a high caustic content on appliance
surfaces. This is particularly important when appliance is hot. Such cleaners can cause
serious damage or discolouration and only a soap or detergent solution should be used.
.
SPECIFICATION
Содержание Dominator Plus
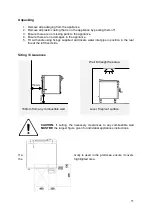
Страница 6: ...6 OPERATION...
Страница 20: ...20 Ensure Thermostat Tube is attached tightly to the Elements Wiring Diagram 400V 3N Appliance...
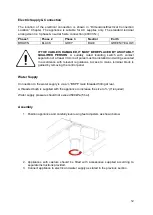
Страница 21: ...21...
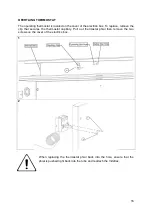
Страница 22: ...22 Wiring Diagram 440V 3N Appliance...


