


24
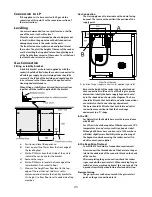
Connect the pressure gauge. Turn on and light one of the
hotplate burners.
For Natural Gas the pressure should be 20mbar.
For Propane the pressure should be 37mbar.
Electrical Connection
This appliance must be installed by a qualified
electrician to comply with the relevant regulations and
also the local electricity supply company requirements.
WARNING: THIS APPLIANCE MUST BE EARTHED
Note
The cooker must be connected to the correct electrical
supply as stated on the voltage label on the cooker,
through a suitable cooker control unit incorporating
a double pole switch having a contact separation
of at least 3mm in all poles. This cooker must not be
connected to an ordinary domestic power point.
The total electrical load of the appliance is
approximately 7.2 kW. The cable size used should
be suitable for this load and comply with all local
requirements.
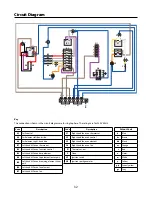
Access to the mains terminal is gained by removing the
electrical terminal cover box on the back panel.
Connect the mains cable to the correct terminals for
your electrical supply type.
Check that the links are correctly fitted and
that the terminal screws are tight.
Secure the mains cable using the cable clamp.
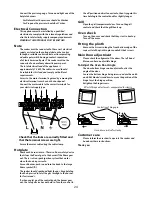
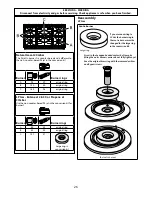
Hotplate
Check each burner in turn. There is a flame safety device
that stops the flow of gas to the burner if the flame goes
out. There is also a spark ignition system that works
when the knob is pressed in.
For each burner, push in and turn the knob to the large
flame symbol ( ).
The igniter should spark and light the gas. Keep holding
the knob pressed in to let the gas through to the burner
for few seconds.
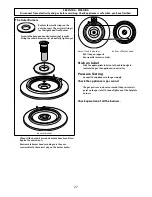
If, when you let go of the control knob, the burner goes
out, the safety device has not held in. Turn the control to
the off position and wait one minute, then try again this
time holding in the control knob for slightly longer.
Grill
Open the grill compartment door. Turn on the grill
control and check that the grill heats up.
Oven check
Turn on the ovens and check that they start to heat up.
Turn off the ovens.
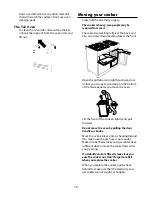
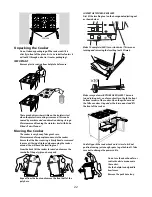
Fitting the plinth
Remove the 3 screws along the front bottom edge of the
cooker. Hold the plinth in place and refit the 3 screws.
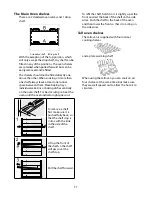
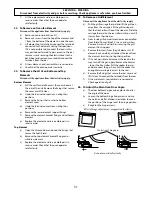
Main Door adjustment
Please check the aligment of the doors. The left hand
Main oven has an adjustible hinge.
To Adjust the Oven Door Angle
The door bottom hinge can be adjusted to alter the
angle of the door.
Loosen the bottom hinge fixing screws and use the notch
and a flat bladed screwdriver to move the position of the
hinge to set the hinge position.
Retighten the hinge screws.
Effect of hinge adjustment – exaggerated for clarity
Centre line of hinge pin
Oven door omitted for clarity
Customer care
Please inform the user how to operate the cooker and
hand over these instructions.
Thank you.


