5
EN
- button in position «ll» = intermediate
power (indicator light on);
- both buttons in position «l» «ll» =
maximum power (indicator lights on)
To turn appliance off, switch off both switches
or remove plug from wall socket.
Adjusting the thermostat
When the room has reached the desired
temperature, turn the thermostat knob slowly
in an clockwise direction until you get to the
setting – and not beyond it. The thermostat
will then adjust the set temperature
automatically and keep it constant.If your unit
is a three-output version, in intermediate
seasons or on days when temperatures are
not particularly cold, select minimum output to
optimise savings and consumption.
Anti-freeze function (only for models with
thermostat)
With the thermostat in the
*
position and a
power selected, the unit maintains the room
at a temperature of about 5°C, preventing
freezing with minimum energy outlay.
2. “EASY WHEEL” SYSTEM
Turn the radiator upside-down on a rug or a
soft surface in order to prevent damaging the
paint finish. Fully unfold the castors by turning
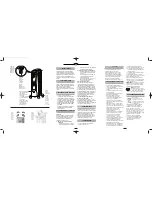
them outwards (Fig. 1).
Turn the radiator back to its upright position.
1. GENERAL INSTRUCTIONS
• Before using the appliance check that your
supply voltage is the same of that shown
on the rating label of the unit and that the
power socket and power supply line
correspond to the load specified.
• Check also that the current capacity of
your fuses. CONNECT YOUR HEATER
TO EARTH PROVIDED SOCKET ONLY.
• This appliance complies with EEC
Directive 89/336, relating to electro-
magnetic compatibility.
3. ELECTRICAL CONNECTION
Your oil filled raditor is absolutely free from
maintenance, fully reliable and will give many
years of trouble free service. Wipe radiator
with soft damp cloth; do not use detergents or
abrasives. If necessary, use a vacuum
cleaner to remove any built-up dirt (fig. 2).
5. MAINTENANCE
• Do not use your heater close to bath,
wash-basin, shower and swimming pool.
• Do not use your radiator to dry laundry.
• Do not lay the cable on the hot unit.
• The heater must always service in upright
position.
• If the supply cord is damaged, it must be
replaced by the manufacturer, its service
agent or similarly qualified persons in order
to avoid a hazard.
• In order to eliminate the radiator’s “new”
smell, set it to maximum power for at least
two hours when used for the first time.
During this operation, the room in which
the radiator is located must be ventilated.
6. IMPORTANT NOTES
Switching on
Plug into the mains socket. Turn the thermostat
to maximum. Switch the radiator on using the
switch/switches following the procedures given
in points a) - b).
a) Models with single switch
(1 power level):
- button in position «I» = Total power on
(indicator light on);
- button in position «O» = (indicator light
off)
b) Models with double switch (3 power levels)
- button in position «l» = minimum power
(indicator light on);
4. INSTRUCTIONS FOR USE
Take the radiator out of its packing box and
remove any polystyrene pieces or any other
packaging material that might be lodged
inside it.
Make sure that the radiator has not been
damaged during transit and that the mains
cable is in working order.
interior 20/5/05 10:47 Página 4


