3
3� Add the camera to EZVIZ
1. Log in to your EZVIZ app account.
2. On the Home screen, tap “+” on the upper-right corner to go to the Scan QR
Code interface.
3. Scan the QR code on the Quick Start Guide cover or on the body of the
camera.
Scan QR Code
4. Follow the EZVIZ app wizard to finish network configuration of the camera.
Camera Installation
1� Installation Location
Choose a location with a clear, unblocked field of view and with a good wireless
signal to the camera. Please keep the following tips in mind.
•
Make sure the wall is strong enough to withstand three times the weight of the
camera.
•
Recommended installation height: 10.0 ft (3m);
•
Detection distance range: 6.5-32.8 ft (2-10m).
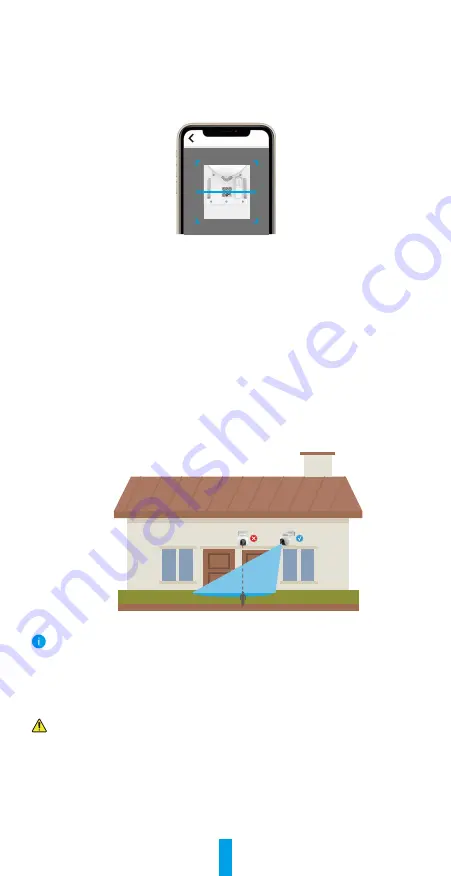
• Make sure that side-to-side traffic crosses camera’s field of view. The camera’s
motion sensor is much more sensitive to side-to-side movement across its field
of view than to movement directly toward or away from the camera.
Limited by PIR detection technology, the camera may fail to detect motion when environment
temperature is close to human body temperature or someone approaches the PIR sensor
vertically.
It is recommended to set detection sensitivity on the EZVIZ app when selecting
location. Thus you can verify if motion can be detected in the camera’s placement
and adjust the sensitivity based on the size and distance of detected object.
Important Notes on Reducing Too Much Alarms:
•
Do not install the camera under strong light conditions, including sunshine, bright lamp
lights, etc.
• Do not place the camera near any outlets, including the air conditioner vents, humidifier
outlets, the heat transfer vents of projectors, etc.
•
Do not install the camera at places with strong wind.
•
Do not install the camera in front of a mirror.
•
Keep the camera at least 1 meter away from any wireless devices, including Wi-Fi routers
and phones in order to avoid wireless interference.


