


5 - 7
MAINTENANCE
Read all of this manual to become thoroughly familiar with this vehicle. Pay particular attention to all Notices, Cautions, Warnings, and Dangers.
5
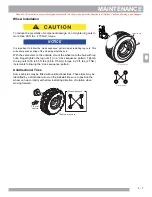
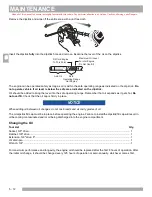
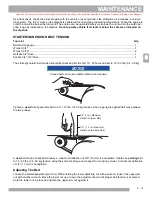
Wheel Installation
To reduce the possibility of component damage, do not tighten lug nuts to
more than 85 ft. lbs. (115 Nm) torque.
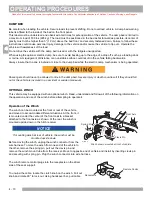
It is important to follow the ‘cross sequence’ pattern when installing lug nuts. This
will assure even seating of the wheel against the hub.
With the valve stem to the outside, mount the wheel onto the hub with lug
nuts. Finger tighten the lug nuts (1) in a ‘cross sequence’ pattern. Tighten
the lug nuts to 50 to 85 ft. lbs. (68 to 115 Nm) torque in 20 ft. lbs. (27 Nm)
increments following the ‘cross sequence’ pattern.
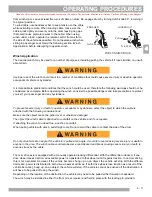
Unidirectional Tires
Some vehicles may be fitted with unidirectional tires. These tires may be
identified by a directional arrow on the sidewall. Be sure to position the
wheel on hub correctly with arrow indicating direction of rotation when
moving forward.
Valve Stem Cap
Cross Sequence
Tire style may vary
NOTICE
Tire style may vary
1
2
3
4
'Cross Sequence'
Front of
Vehicle
Rota
tio
n
Содержание 622021-GB
Страница 1: ...622021 GB Owner s Guide ISSUED JULY 2011 REVISED NOVEMBER 2011...
Страница 79: ......